

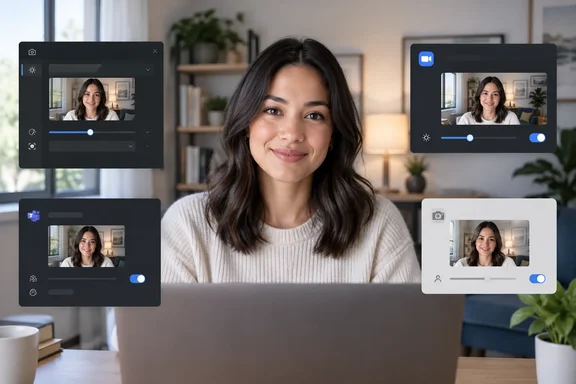
Start with the basics that work on any PC
Meredith's first tip is to test as you go. Start a meeting with nobody invited, so you can watch how each change affects your picture. It's a low-tech approach, but it works because it shows the result of each change in the app you'll actually use.
Her basic advice, which is common sense rather than documented Windows procedure:
- Wipe the lens. A microfiber cloth removes dust and fingerprints.
- Light your face from the front or side. Natural light is best. Face a window, or put a shaded lamp slightly off to one side. Never sit with the light source behind you.
- Tame harsh sun. Adjust the blinds if direct sunlight is too strong.
- Aim for 1080p. She recommends a 1080p camera and a Full HD screen for everyday calls. That is her recommendation, not a universal requirement.
HP's laptop video-call guide gives similar advice. It says lighting matters more than camera specs and that the light should face you, never sit behind you.
Windows 11: adjust the camera itself
Meredith's Windows 11 route matches Microsoft's support documentation:
- Open Settings and go to Bluetooth & devices, then Cameras.
- Under Connected cameras, select your camera.
- Windows shows a live preview with controls. Adjust the sliders and watch the image change.
Microsoft says changes apply immediately and are saved as the camera's new default. The controls you see depend on the camera and your Windows 11 version. They can include Brightness, Contrast, Saturation and Sharpness. Some systems also offer Windows Studio Effects, Rotation and Video HDR.
Meredith suggests raising brightness if your face looks dark. She suggests using contrast to change the gap between light and dark areas. She says the same steps apply to an all-in-one Windows 11 desktop.
Caveats Microsoft spells out
- Settings are per camera and per user account. They don't sync between Windows devices, so a second PC needs its own tuning.
- Apps can override your defaults. Microsoft says an app may apply different settings while it uses the camera. Not every app uses the defaults. If you tweak Windows and Zoom looks the same, check the app's own controls.
- Some cameras don't appear. Microsoft lists Windows Hello infrared cameras, DirectShow cameras (some DSLRs and action cams used as webcams) and proprietary or networked cameras as examples.
- Manufacturer apps may add controls. If your camera has one, a button under Related settings opens it.
Microsoft Teams: brightness and soft focus
Meredith describes two Teams filters. Adjust brightness helps in poor light. Soft focus smooths your appearance. She places them under Settings, then Devices, in the Teams desktop app.
Microsoft's current Teams video documentation describes the same two filters. It puts the setup on the pre-join screen: select Open device settings, then turn on the toggle for the filter you want under Video Settings.
Menu layouts can vary by Teams version and account type, so if one path doesn't match your screen, try the other. Meredith also says these two features are unavailable in a browser. I couldn't confirm that in Microsoft's documentation, so test it on your own account if you join from a browser.
Zoom: low light, portrait lighting and HD
For the Zoom desktop app, Meredith's route is Settings, then Video & effects, then the Camera tab. Guides from VideoProc and a Zoom community thread describe the same route.
- Adjust for low light brightens a dark picture. Zoom community guidance says it defaults to Auto, but you can choose Manual and adjust it yourself.
- Portrait lighting brightens your face and dims the background, per Meredith.
- HD asks Zoom to use a higher resolution when your camera and account support it. Meredith notes that you need enough bandwidth to keep it stable.
Don't read the HD checkbox as a guarantee of 1080p. HP's guide says HD needs a stable connection and cites 3.8+ Mbps upload for 1080p. It also says virtual backgrounds can cap quality. Zoom's own documentation, as summarized in my research notes, adds account and hardware conditions for sending 1080p. I couldn't retrieve that Zoom page directly, so treat the exact requirements as something to check in your Zoom account.
Zoom's low-light setting is also sometimes missing in places. One guide notes Adjust for low light isn't available in the Zoom mobile app for Android or iOS.
Mac users: Studio Light and Edge Light
Meredith devotes several paragraphs to Mac features. Apple's documentation largely supports her, with some extra limits.
- Studio Light dims the background and lights your face. You choose it from the Video menu in the menu bar during a call. Apple's page lists macOS Sonoma 14 or later on a Mac laptop with Apple silicon using the built-in camera. It also lists Continuity Camera with an iPhone 12 or later. An arrow next to the entry opens an intensity slider.
- Edge Light simulates a ring light by lighting the screen's borders. Apple says it requires a Mac with Apple silicon and macOS Tahoe 26.2 or later. You adjust brightness and color temperature from the same menu. Apple's page says it works best in low light and can be combined with other effects.
- Where Edge Light appears depends on the camera. With the built-in camera, it shows on the built-in display. With Continuity Camera or another external camera, it shows on your primary display. Apple defines that as the display you assigned the menu bar in Displays settings. That matches Meredith's advice to make the monitor your primary display if you want it to supply the light.
- Auto-on in low light is limited to Macs introduced in 2024 or later.
A sensible order of operations
- Clean the lens and fix the lighting.
- Start a solo test meeting in the app you will actually use.
- Adjust Windows camera settings and watch the preview.
- Use the app's own effects, such as Teams brightness and soft focus or Zoom low light and portrait lighting.
- Turn on HD only if your connection and account can support it.
- Only then consider a separate webcam.
Meredith's last suggestion is a webcam with 1080p, autofocus and automatic light correction. Treat that as her recommendation. Software tweaks can't fully compensate for a very dark room or a weak sensor. Her premise that you should try the free fixes first is still sound.
References
- Tech Matters: Look better on your next video call - Standard-Examiner Standard-Examiner · 2026-10-06T00:00:00+00:00
- Use video effects and mic modes during video calls on Mac - Apple Support (IE) support.apple.com
- Use Edge Light to illuminate your face during video calls - Apple Support support.apple.com