

Windows Memory Diagnostic is a built-in RAM test for Windows 11 and Windows 10. Run it when a PC repeatedly freezes, restarts, crashes applications, corrupts data, or displays unexplained blue-screen errors. Treat detected errors as a serious hardware-instability signal. However, a “no errors” result does not prove that the RAM, memory controller, motherboard, or firmware is healthy.
Windows Memory Diagnostic runs outside the normal Windows desktop and requires a restart.
Before starting:
Windows Memory Diagnostic does not erase files or modify the contents of the Windows drive. Nevertheless, unexplained crashes and memory instability can corrupt data, so back up important files before beginning hardware troubleshooting.
After the restart, Windows Memory Diagnostic opens before the Windows sign-in screen and begins testing automatically. A progress indicator and status area show whether the tool has detected a problem so far.
Allow the test to finish. The PC should restart automatically and return to Windows.
Do not force the PC off merely because the Extended test appears to be progressing slowly. Large memory configurations can take a long time to test. If the progress percentage remains unchanged for an unusually long period and the keyboard no longer responds, note the displayed stage before forcing a shutdown.
If filtering is inconvenient, select Find in the Actions pane and search for:
If the command reports that no matching events were found, the test may not have completed, the result may have been written only to the dedicated diagnostic channel, or an event-log problem may have prevented the result from being saved. Rerun the test and watch its status until the PC restarts automatically.
RAM problems can be intermittent and dependent on:
The error does not identify the exact failed component. Possible causes include:
The immediate workaround is to return the system to a known-stable memory configuration. The fix is to identify and replace or reconfigure the defective or unstable component.
Warning: Changing firmware settings can prevent Windows from starting or trigger BitLocker recovery. Before entering the BIOS or UEFI setup, locate and back up the device’s 48-digit BitLocker recovery key. Record the original firmware settings so they can be restored.
Firmware menus differ by manufacturer. Consult the PC or motherboard manual for the exact labels.
To roll back the test change, return to the firmware setup and restore the recorded profile. Do this only after establishing that the profile is stable.
Warning: Shut down the PC, disconnect AC power, and follow the manufacturer’s electrostatic-discharge precautions before touching internal components. Never remove or install RAM while the system has power.
If the memory is user-serviceable:
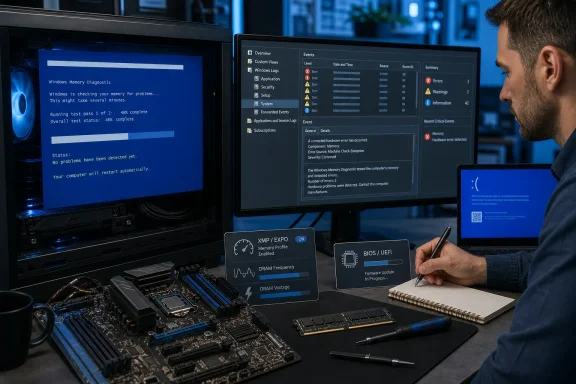 Before running the memory test
Windows Memory Diagnostic runs outside the normal Windows desktop and requires a restart.Before starting:
- Save your work and close all applications.
- Allow enough time for the PC to restart and complete the test.
- Connect a laptop to AC power.
- Disconnect unnecessary USB devices and external drives.
- Record any recent hardware, BIOS, or memory changes.
- Make sure you can sign back in after the restart.
- If the device is managed by an organization, confirm that restarting it will not interrupt scheduled work or remote access.
Windows Memory Diagnostic does not erase files or modify the contents of the Windows drive. Nevertheless, unexplained crashes and memory instability can corrupt data, so back up important files before beginning hardware troubleshooting.
Run Windows Memory Diagnostic from the Run dialog
Themdsched command is the quickest and most consistent way to start the tool on Windows 11 and Windows 10.- Save all open files.
- Press Windows key + R.
- Enter:
mdsched - Select OK.
- If User Account Control requests approval or administrator credentials, approve the prompt.
- Choose one of the following options:
- Restart now and check for problems (recommended) starts the test immediately.
- Check for problems the next time I start my computer schedules the test for the next restart.
After the restart, Windows Memory Diagnostic opens before the Windows sign-in screen and begins testing automatically. A progress indicator and status area show whether the tool has detected a problem so far.
Allow the test to finish. The PC should restart automatically and return to Windows.
Start the tool from Windows Search or Windows Tools
If the Run command is unavailable, use Windows Search.- Open Start or Search.
- Type:
Windows Memory Diagnostic - Select Windows Memory Diagnostic from the results.
- Choose whether to restart immediately or run the test during the next restart.
- Open Start.
- Search for and open Windows Tools.
- Double-click Windows Memory Diagnostic.
Run a more thorough Extended test
Windows uses the Standard test mix by default. If the Standard test finds nothing but crashes continue, run the Extended test.- Start Windows Memory Diagnostic and allow the PC to restart.
- When the blue diagnostic screen appears, press F1.
- Use the arrow keys to select Extended under Test mix.
- Leave Cache set to Default unless you are conducting a specific technical investigation.
- Set the Pass count to the number of repetitions you want.
- Press F10 to apply the settings and begin testing.
- Basic: A shorter, limited check useful only for quick triage.
- Standard: The normal default and the appropriate first test for most PCs.
- Extended: A more comprehensive test that takes substantially longer.
Do not force the PC off merely because the Extended test appears to be progressing slowly. Large memory configurations can take a long time to test. If the progress percentage remains unchanged for an unusually long period and the keyboard no longer responds, note the displayed stage before forcing a shutdown.
Find the result after Windows restarts
Windows may display a notification shortly after you sign in. The notification can take several minutes to appear and is easy to miss. Use Event Viewer when no notification appears or when you need to preserve the result.Check the System log
- Right-click Start.
- Select Event Viewer.
- Expand Windows Logs.
- Select System.
- In the Actions pane, select Filter Current Log.
- Open the Event sources list.
- Select MemoryDiagnostics-Results.
- Select OK.
- Open the newest result corresponding to the time at which you ran the test.
If filtering is inconvenient, select Find in the Actions pane and search for:
MemoryDiagnostics-ResultsCheck the dedicated diagnostic log
On current Windows installations, results may also be available under the diagnostic provider:- In Event Viewer, expand Applications and Services Logs.
- Expand Microsoft.
- Expand Windows.
- Expand MemoryDiagnostics-Results.
- Select Debug.
- Open the newest event and review its General and Details tabs.
Query the result from a command line
If Event Viewer is difficult to navigate, query the System log directly.- Right-click Start.
- Select Terminal (Admin) or Windows PowerShell (Admin).
- Approve User Account Control.
- Run:
Get-WinEvent -FilterHashtable @{LogName='System'; ProviderName='Microsoft-Windows-MemoryDiagnostics-Results'} -MaxEvents 5 | Format-List TimeCreated, Id, LevelDisplayName, Message
If the command reports that no matching events were found, the test may not have completed, the result may have been written only to the dedicated diagnostic channel, or an event-log problem may have prevented the result from being saved. Rerun the test and watch its status until the PC restarts automatically.
How much to trust a “no errors” result
A clean Windows Memory Diagnostic result means the selected tests did not detect an error during that particular run. It does not certify the entire memory subsystem.RAM problems can be intermittent and dependent on:
- Memory temperature
- CPU or motherboard temperature
- The installed combination of DIMMs
- Memory frequency, timings, and voltage
- Intel XMP or AMD EXPO profiles
- CPU memory-controller stability
- A specific motherboard DIMM slot
- BIOS or UEFI firmware behavior
- Power-supply stability
- A workload pattern not reproduced by the diagnostic
- Run the Extended test.
- Repeat it for more than one pass.
- Test with memory overclocking disabled.
- Install applicable BIOS, chipset, and device firmware updates from the PC or motherboard manufacturer.
- Use the manufacturer’s hardware diagnostics, if provided.
- Use a separate bootable memory-testing utility for confirmation.
- Continue investigating drivers, storage, overheating, and power even if additional memory tests remain clean.
MEMORY_MANAGEMENT does not by itself prove that physical RAM is defective. Drivers and other kernel-level faults can corrupt memory and produce similar symptoms.How much to trust a detected error
A reported error is much more significant than a clean result. It means data written to and read from the tested memory subsystem did not remain consistent.The error does not identify the exact failed component. Possible causes include:
- A defective RAM module
- An unstable XMP or EXPO profile
- Unsupported memory speed or timings
- Mixed or incompatible DIMMs
- A damaged or contaminated DIMM connection
- A defective motherboard memory slot
- CPU memory-controller instability
- BIOS or UEFI firmware problems
- Motherboard voltage instability
The immediate workaround is to return the system to a known-stable memory configuration. The fix is to identify and replace or reconfigure the defective or unstable component.
Disable memory overclocking before replacing RAM
Intel classifies XMP as memory overclocking, and AMD describes EXPO as an overclocked-memory technology. A memory kit’s advertised profile can therefore be unstable on a particular CPU and motherboard combination even when each component works at default settings.Warning: Changing firmware settings can prevent Windows from starting or trigger BitLocker recovery. Before entering the BIOS or UEFI setup, locate and back up the device’s 48-digit BitLocker recovery key. Record the original firmware settings so they can be restored.
Firmware menus differ by manufacturer. Consult the PC or motherboard manual for the exact labels.
- Restart the PC and enter its BIOS or UEFI setup.
- Find the memory profile setting, usually named XMP, EXPO, DOCP, A-XMP, or a similar vendor-specific name.
- Record the current selection.
- Set the profile to Disabled, Auto, or the manufacturer’s default setting.
- Save the changes and restart.
- Run Windows Memory Diagnostic again.
To roll back the test change, return to the firmware setup and restore the recorded profile. Do this only after establishing that the profile is stable.
Reseat and isolate removable memory modules
Do not open a laptop or prebuilt PC before checking its warranty and service documentation. Some systems use soldered memory, and some manufacturers require authorized service.Warning: Shut down the PC, disconnect AC power, and follow the manufacturer’s electrostatic-discharge precautions before touching internal components. Never remove or install RAM while the system has power.
If the memory is user-serviceable:
- Shut down Windows completely.
- Unplug the desktop power cable or laptop charger.
- Follow the manufacturer’s procedure for disconnecting an internal laptop battery, if applicable.
- Hold the power button briefly to discharge residual power if the service manual instructs you to do so.
- Open the case or service panel.
- Release and remove each accessible DIMM.
- Check that the contacts and slots are free from visible contamination or damage.
- Reinstall each module firmly in the manufacturer-recommended slots.
- Reassemble the PC.
- Run the memory test again at default firmware settings.
- If one module fails while another passes in the same slot, the failing module is the likely cause.
- If every module fails in one slot but passes in another, suspect the motherboard slot.
- If modules pass separately but fail together, suspect compatibility, memory-controller load, timings, or firmware configuration.
- If a module fails in more than one compatible system at default settings, replace that module.
If no diagnostic result is recorded
If the PC restarts but Event Viewer contains no result:- Confirm that you watched the diagnostic reach completion and restart automatically.
- Check both Windows Logs > System and the dedicated MemoryDiagnostics-Results channel.
- Rerun the Standard test without changing its cache or pass settings.
- Avoid pressing Esc or forcing a shutdown during testing.
- Check whether the System event log is otherwise recording new events.
- Install pending Windows updates and restart before testing again.
When to escalate the problem
Contact the PC manufacturer, motherboard vendor, or a qualified repair service when:- Windows Memory Diagnostic reports errors at default BIOS settings.
- The computer has soldered or non-user-serviceable memory.
- Multiple DIMMs fail in the same motherboard slot.
- The PC cannot complete the test reliably.
- The system remains unstable with a known-good compatible memory kit.
- Firmware updates and default settings do not restore stability.
- The device is under warranty.
References
- Primary source: Petri IT Knowledgebase
Published: 2026-07-14T13:15:43+00:00
How to use Windows Memory Diagnostic Tool
Learn how to use the Windows Memory Diagnostic Tool as a good first check when Windows starts crashing, freezing, or behaving unpredictably. petri.com
- Official source: learn.microsoft.com
I can't find memory diagnostic results in Event viewer. - Microsoft Q&A
I ran the memory diagnostic. You are supposed to be able to find them in the event viewer. Is it the case that there is simply no output if the tool finds no errors? That does not seem very good, one would want to see "no errors found" or…learn.microsoft.com - Official source: support.microsoft.com
Deprecation of Microsoft Support Diagnostic Tool (MSDT) and MSDT Troubleshooters | Microsoft Support
Learn more about the deprecation of Microsoft Support Diagnostic Tool (MSDT) and MSDT Troubleshooters.support.microsoft.com
