

Recording on a PC can mean capturing the Windows screen, an app or game, microphone audio, computer sound, webcam video, a PowerPoint presentation, or an online meeting. This guide covers Windows 11, the legacy Windows 10 paths, Microsoft 365 apps, Zoom, Google Meet, Audacity, and OBS Studio. For the quickest result, use Snipping Tool for a selected screen area, Xbox Game Bar for an app or game, Sound Recorder for a microphone, and the meeting platform’s own recording control for meetings.
If Snipping Tool does not show the Record option, install available updates from Settings > Windows Update and update Snipping Tool through Microsoft Store. This recording feature is intended for Windows 11; use Xbox Game Bar or another recorder on Windows 10.
To include more than the current game’s audio:
Sound Recorder captures microphone input; it is not the preferred tool for directly capturing sound being played by Windows.
This method can capture notifications along with the intended audio. Turn on Do not disturb, close messaging apps, and make a short test before starting the full recording.
Teams personal meeting recording requires an eligible Microsoft 365 Personal, Family, or Premium subscription used with a Teams personal account. Teams Free without a qualifying subscription does not include meeting recording. Personal recordings are placed in the meeting chat and expire after 30 days unless downloaded before expiration.
To confirm or change it, open the Zoom desktop app, select your profile picture, and go to Settings > Recording > Storage location. Zoom recommends recording to an internal local drive rather than directly to network or external storage because interruptions can damage the recording.
Hosts control recording by default. A participant needs recording permission from the host if the Record button is unavailable.
If Recording is absent, confirm that the host is eligible, recording is enabled by the Workspace administrator, and Google Drive has sufficient available storage.
Start > Settings > Privacy & security > Camera
Turn on:
Start > Settings > Privacy & security > Microphone
Turn on:
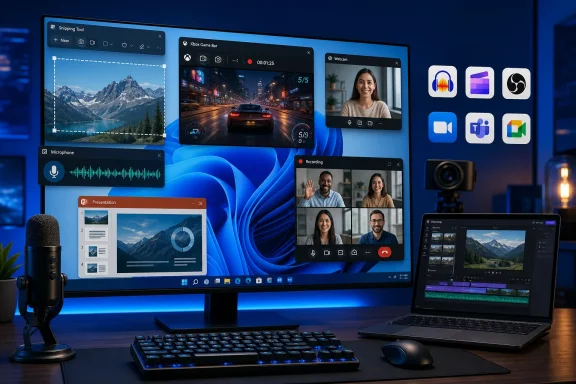 Choose the right PC recording tool
- Selected screen area: Snipping Tool on Windows 11
- App or game: Xbox Game Bar on Windows 11 or Windows 10
- Microphone only: Windows Sound Recorder
- Computer audio only: Audacity with Windows WASAPI loopback
- Webcam video: Windows Camera or Microsoft Clipchamp
- Screen, webcam, and editing: Clipchamp
- Presentation narration: Microsoft PowerPoint
- Teams, Zoom, or Meet meeting: The meeting app’s built-in recorder
- Advanced multi-source recording: OBS Studio
Record a selected screen area with Snipping Tool
Snipping Tool is the simplest built-in option for a short Windows 11 screen recording. It lets you draw a rectangle around the exact area to capture.- Arrange the windows you want to show and close anything private.
- Press Windows logo key + Shift + R.
Alternatively, open Start, search for Snipping Tool, open it, select Record, and then select New. - Drag over the screen area you want to record.
- Select Start.
- Perform the actions you want to capture.
- Select Stop when finished.
- Preview the recording and select Save, or choose Edit in Clipchamp if you need captions, audio, trimming, or other edits.
If Snipping Tool does not show the Record option, install available updates from Settings > Windows Update and update Snipping Tool through Microsoft Store. This recording feature is intended for Windows 11; use Xbox Game Bar or another recorder on Windows 10.
Record an app or game with Xbox Game Bar
Xbox Game Bar records supported games and application windows on Windows 11 and Windows 10. Recordings are saved as MP4 files in the Videos\Captures folder.- Open Settings > Gaming > Game Bar and make sure Game Bar is enabled.
- Open the app or game you want to capture.
- Press Windows logo key + Alt + R to begin recording.
- Press Windows logo key + Alt + M if you need to turn microphone recording on or off.
- Use the app or play the game.
- Press Windows logo key + Alt + R again to stop.
- Open File Explorer > Videos > Captures to find the recording.
To include more than the current game’s audio:
- Press Windows logo key + G.
- Open Settings within Game Bar.
- Select Capturing.
- Under the audio recording options, select All when you want to include game, enabled microphone, apps, and system audio.
- Record a short test and play it back.
Record your microphone with Sound Recorder
Windows 11 includes Sound Recorder for straightforward voice recordings. Microsoft supports recordings of up to three hours per file.- Connect your microphone or headset.
- Open Settings > System > Sound.
- Under Input, select the microphone you intend to use.
- Speak and confirm that the input level meter responds.
- Open Start, search for Sound Recorder, and launch it.
- Select Start recording, or press Ctrl + R.
- Select Pause when needed.
- Select Stop recording, or press Esc, to save the recording.
Sound Recorder captures microphone input; it is not the preferred tool for directly capturing sound being played by Windows.
Record computer audio with Audacity
Use Audacity when you need an audio file containing music, browser audio, application sound, or another signal being sent to your speakers or headphones. Its Windows WASAPI loopback option records playback without placing a microphone next to the speakers.- Install and open Audacity.
- Start playing the computer audio briefly so Windows initializes the output device.
- In Audacity, open Audio Setup.
- Set Host to Windows WASAPI.
- Choose the playback device you are currently using, identified as its loopback recording device.
- Select Record.
- Start the audio you want to capture.
- Select Stop when finished.
- Play the track back.
- Use File > Export Audio to create the required audio file.
This method can capture notifications along with the intended audio. Turn on Do not disturb, close messaging apps, and make a short test before starting the full recording.
Record webcam video with Camera or Clipchamp
Make a simple webcam recording with Camera
- Open Start, search for Camera, and open the app.
- Select the Video mode on the right side.
- Check the preview, lighting, and camera angle.
- Select Take video to start recording.
- Select the red Stop button when finished.
- Open the recorded clip from the Camera app or the associated Pictures camera-roll location.
Record and edit in Clipchamp
- Open Microsoft Clipchamp and create or open a video project.
- Select Record & create.
- Choose one of these options:
- Camera for webcam video
- Screen for screen capture
- Screen and camera for both
- Audio for a voice-only recording
- Select Allow when Clipchamp requests camera or microphone access.
- Choose the correct camera and microphone from the device menus.
- Select the red recording button.
- For a screen recording, choose a browser tab, window, or entire screen, and then select Share.
- Select Stop sharing or the recorder’s stop control when finished.
- Preview the result and select Save and edit.
- Edit the timeline, then select Export to save the finished MP4.
Record a PowerPoint presentation
PowerPoint can record a screen clip into one slide or capture an entire presentation with narration, timings, ink, and optional camera video.Insert a screen recording into a slide
This method is available in supported desktop editions including PowerPoint for Microsoft 365 and recent perpetual releases.- Open the slide where the recording should appear.
- Select Insert > Screen Recording.
- On the recording dock, select Select Area.
- Drag over the part of the screen to capture.
- Leave Audio and Record Pointer enabled if you want them included.
- Select Record.
- Select Stop when finished.
Record narration for a slide deck
- Open the slide where the recording should begin.
- Select Record from the top bar or ribbon.
- Confirm the microphone and camera settings.
- Select the round red Record button.
- Wait for the countdown and begin presenting.
- Advance through the slides normally.
- Select Stop, then preview the recording.
- Open the Export screen to create an MP4 when required.
Record a Teams, Zoom, or Google Meet meeting
Use the meeting platform’s recorder whenever possible. It produces the official meeting recording, notifies participants, and follows the host’s storage and access policies.Microsoft Teams
For a work or school meeting:- Start or join the meeting.
- Select More actions.
- Select Record and transcribe > Start recording.
- Confirm the action if prompted.
- To finish, select More actions > Record and transcribe > Stop recording.
Teams personal meeting recording requires an eligible Microsoft 365 Personal, Family, or Premium subscription used with a Teams personal account. Teams Free without a qualifying subscription does not include meeting recording. Personal recordings are placed in the meeting chat and expire after 30 days unless downloaded before expiration.
Zoom
Computer recording is available through the Zoom desktop app, subject to the host’s settings.- Start or join the Zoom meeting.
- Select Record in the meeting controls.
- If a choice appears, select Record to this Computer.
- Use the pause or stop control as required.
- End the meeting or stop recording and allow Zoom to convert the recording.
C:\Users\YourUserName\Documents\ZoomTo confirm or change it, open the Zoom desktop app, select your profile picture, and go to Settings > Recording > Storage location. Zoom recommends recording to an internal local drive rather than directly to network or external storage because interruptions can damage the recording.
Hosts control recording by default. A participant needs recording permission from the host if the Record button is unavailable.
Google Meet
Google Meet recording requires a supported Google Workspace edition or other eligible subscription, host permission, and any necessary administrator approval.- Start or join the meeting on a computer.
- Select Meeting tools at the bottom-right.
- Select Recording.
- Choose the caption option when offered.
- Select Start recording, followed by Start.
- Return to Meeting tools > Recording and stop the recording when finished.
If Recording is absent, confirm that the host is eligible, recording is enabled by the Workspace administrator, and Google Drive has sufficient available storage.
Build an advanced recording in OBS Studio
OBS Studio is the better choice for long recordings, multiple monitors, webcams, application audio, overlays, capture cards, or separate audio sources.- Install and open OBS Studio.
- Run Tools > Auto-Configuration Wizard and choose settings intended for recording.
- In the Sources panel, select + and add what you need:
- Display Capture for a monitor
- Window Capture for an application
- Game Capture for a Windows game
- Video Capture Device for a webcam or capture card
- Audio Input Capture for a microphone
- Watch the Audio Mixer while speaking and playing computer audio.
- If the wrong device appears, open Settings > Audio and select the correct desktop and microphone devices.
- Open Settings > Output and confirm the recording path and format.
- Select Start Recording.
- Select Stop Recording when finished.
- Open the recording folder and play the complete file.
Fix camera, microphone, or recording access
Windows 11
For camera access, open:Start > Settings > Privacy & security > Camera
Turn on:
- Camera access
- Let apps access your camera
- The individual app toggle, when listed
- Let desktop apps access your camera, when required
Start > Settings > Privacy & security > Microphone
Turn on:
- Microphone access
- Let apps access your microphone
- The individual app toggle, when listed
- Let desktop apps access your microphone
Windows 10
Use:- Settings > Privacy > Camera
- Settings > Privacy > Microphone
If recording still fails
- Close Teams, Zoom, browsers, and other apps that may already be using the camera.
- Verify the selected input under Settings > System > Sound.
- Disconnect and reconnect USB microphones, webcams, or capture devices.
- Record a short test with Sound Recorder or Camera to separate a hardware problem from an app problem.
- Check browser site permissions when using Clipchamp or Google Meet.
- Free space on the recording drive.
- On a managed work or school PC, contact the administrator if the recording control is missing or privacy settings are locked.
- Play the completed file before deleting source material or leaving the recording location.
References
- Primary source: Technobezz
Published: 2026-07-14T18:45:08.355000+00:00
How to Record on PC for Audio, Video, Screen, and Meetings | Technobezz
How to record on PC using Snipping Tool, Game Bar, Sound Recorder, Clipchamp, PowerPoint, Zoom, Meet, OBS, and Audacity.www.technobezz.com - Official source: support.microsoft.com
Use a screen reader to record your screen with Xbox Game Bar | Microsoft Support
Use the Xbox Game Bar and your screen reader to record and share your screen events.support.microsoft.com
