

Microsoft’s Windows 11 Media Creation Tool creates an official bootable USB drive or ISO for reinstalling, repairing, upgrading, or clean-installing Windows 11. These instructions cover Windows 11 version 25H2—the current release listed by Microsoft as of July 2026—and x64 PCs. The tool does not create Arm64 installation media.
You need:
If you intend to reinstall Windows, complete these checks first:
The Microsoft download page identifies the release supplied by the current tool. As of July 2026, the page lists Windows 11 2025 Update | Version 25H2. Because Microsoft updates the download independently of this guide, check the release name shown on the page before creating media for a version-specific repair.
To check the result:
You need:
An in-place reinstall is a fix for damaged Windows components. Booting from the USB and performing a clean installation is not equivalent and cannot preserve installed applications.
If Keep personal files and apps is unavailable, check that:
Warning: The following procedure removes personal files, installed applications, manufacturer customizations, and Windows settings from the selected internal disk. Back up required data and disconnect unnecessary external drives before beginning.
If the media does not appear:
If you changed the permanent UEFI boot order, restore the internal Windows drive as the first boot device after installation. Otherwise, the PC may restart into the installer again. Alternatively, remove the USB drive when Windows Setup begins booting from the internal drive.
Complete the Windows configuration screens, connect to the internet, and sign in with the Microsoft account associated with the digital license when applicable.
For an x64 PC:
Compare the returned hash with the value Microsoft lists for the same language and architecture.
Microsoft now supplies Windows 11 Arm64 ISO files separately. An Arm64 ISO can be:
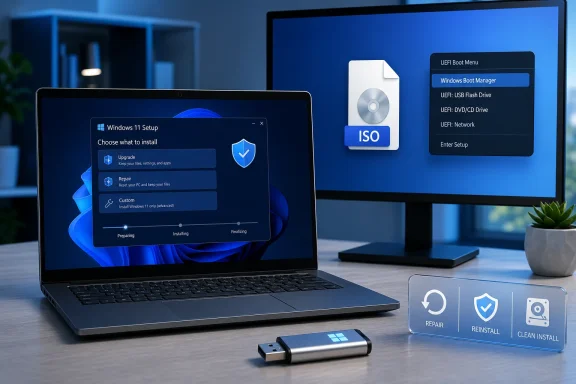 Before you create the installation media
You need:- A Windows PC and an administrator account.
- A reliable internet connection.
- A blank USB flash drive with at least 8 GB of capacity, or enough storage for an ISO file.
- A valid Windows 11 license or an eligible Windows 10 license.
- An x64 target PC that meets the Windows 11 hardware requirements.
If you intend to reinstall Windows, complete these checks first:
- Open Settings > System > About.
- Under Windows specifications, record the installed edition, such as Windows 11 Home or Windows 11 Pro. Reinstall the same edition to preserve activation.
- Open Settings > System > Activation and confirm that Windows is activated.
- Back up personal files to OneDrive, another computer, or external storage.
- If Device Encryption or BitLocker is enabled, make sure you can access the recovery key.
- Check the PC manufacturer’s support service for current firmware and storage, network, and chipset drivers.
Download the official Media Creation Tool
Microsoft’s Windows 11 download page contains three separate options. Select the one under Create Windows 11 Installation Media, not Windows 11 Installation Assistant.- Open Microsoft’s Download Windows 11 page.
- Find Create Windows 11 Installation Media.
- Select Download Now.
- Save
MediaCreationTool.exe. - Open the downloaded file.
- Select Yes if User Account Control asks for permission.
- Read the license terms and select Accept.
The Microsoft download page identifies the release supplied by the current tool. As of July 2026, the page lists Windows 11 2025 Update | Version 25H2. Because Microsoft updates the download independently of this guide, check the release name shown on the page before creating media for a version-specific repair.
Create a bootable Windows 11 USB drive
Use this option when you need media that can boot a PC into Windows Setup.- Connect the blank USB flash drive to the computer.
- In the Media Creation Tool, select Create installation media for another PC.
- Select Next.
- Choose the required language, Windows 11 edition, and 64-bit architecture.
- Select Next.
- Choose USB flash drive.
- Select Next.
- Select the correct removable drive from the list.
- Select Next.
- Allow the tool to download Windows 11 and create the bootable drive.
- When the completion message appears, select Finish.
- Use the taskbar’s removable-device control to eject the USB drive safely.
To check the result:
- Reconnect the USB drive if necessary.
- Open File Explorer > This PC.
- Open the USB drive.
- Confirm that it contains files and folders including
setup.exe,boot, andsources.
Create a Windows 11 ISO file
Choose an ISO when you want to:- Mount the installation image inside Windows.
- Keep a reusable copy on local or external storage.
- Use Windows 11 in a compatible virtual machine.
- Burn an installation DVD later.
- Run
MediaCreationTool.exe. - Select Accept.
- Choose Create installation media for another PC.
- Select Next.
- Confirm the language, edition, and 64-bit architecture.
- Select Next.
- Choose ISO file.
- Select Next.
- Choose a folder and filename for the ISO.
- Select Save.
- Wait for the download and file creation to finish.
- Select Finish, or choose Open DVD burner if you want to create a disc immediately.
Mount the ISO inside Windows
Mounting the ISO lets you run Windows Setup without creating physical media.- Open File Explorer.
- Locate the downloaded ISO.
- Right-click the file and select Mount.
- Open This PC.
- Open the new virtual DVD drive.
- Double-click
setup.exe.
- Right-click the ISO and select Properties.
- Next to Opens with, select Change.
- Choose Windows Explorer.
- Select OK, followed by Apply.
- Right-click the ISO again and select Mount.
Burn the ISO to a DVD
A DVD is useful only when the target PC has a bootable DVD drive. A USB drive is normally faster and more widely supported.You need:
- A DVD writer.
- A blank disc with enough capacity for the image.
- A higher-capacity Dual Layer DVD if Windows reports that the image is too large.
- Locate the ISO in File Explorer.
- Right-click it and select Burn disc image.
- Select the correct disc burner.
- Optionally select Verify disc after burning.
- Select Burn.
- Wait for the operation and verification to finish.
Perform a repair reinstall while keeping files and apps
Runningsetup.exe from inside an existing Windows installation performs an in-place reinstall or upgrade. This is the appropriate route when Windows still starts and you want to preserve installed applications.An in-place reinstall is a fix for damaged Windows components. Booting from the USB and performing a clean installation is not equivalent and cannot preserve installed applications.
- Sign in to Windows with an administrator account.
- Connect the installation USB, insert the DVD, or mount the ISO.
- Open File Explorer > This PC.
- Open the installation media.
- Double-click
setup.exe. - Select Yes at the User Account Control prompt.
- Follow the Windows 11 Setup prompts.
- At Ready to install, select Change what to keep if you need to alter the default.
- Keep personal files and apps: Preserves personal data, compatible applications, and Windows settings.
- Keep personal files only: Preserves personal data but removes applications and Windows settings.
- Nothing: Removes personal files, applications, and settings.
- Select Next.
- Review the Ready to install page carefully.
- Confirm that the page shows the Windows edition and retention option you intended.
- Select Install.
If Keep personal files and apps is unavailable, check that:
- Setup was launched from inside the existing Windows installation rather than by booting from the USB.
- The installation media’s language matches the installed Windows language.
- The media is not older than the installed Windows release.
- You selected the corresponding Windows edition and architecture.
Clean-install Windows 11 from USB or DVD
A clean installation is appropriate for a new drive, a seriously damaged installation, or a PC you deliberately want to erase.Warning: The following procedure removes personal files, installed applications, manufacturer customizations, and Windows settings from the selected internal disk. Back up required data and disconnect unnecessary external drives before beginning.
- Connect the Windows 11 USB drive or insert the installation DVD.
- Shut down the target PC completely.
- Turn on the PC and immediately open its boot menu.
- Select the UEFI entry for the USB or DVD.
If the media does not appear:
- Try another USB port, preferably one built into the PC.
- Recreate the media with the Media Creation Tool.
- Confirm that the PC was fully shut down.
- Check the manufacturer’s instructions for UEFI boot settings.
- Avoid disabling Secure Boot unless the manufacturer specifically requires it and provides a supported procedure.
- Choose the language and localization settings.
- Select Next.
- Choose the keyboard settings.
- Select Next.
- Select Install Windows 11.
- Select the acknowledgement that everything will be deleted, including files, apps, and settings.
- Select Next.
- If asked for a product key, enter it or select I don’t have a product key when the PC has a digital license or firmware-embedded key.
- If prompted for an edition, select the edition that matches the license previously used on the PC.
- Accept the applicable notices and license terms.
- At Select location to install Windows 11, delete each existing partition on Disk 0 until only Disk 0 Unallocated Space remains.
- Do not delete partitions on Disk 1 or another disk.
- Select Disk 0 Unallocated Space.
- Select Next.
- At Ready to install, select Install.
If you changed the permanent UEFI boot order, restore the internal Windows drive as the first boot device after installation. Otherwise, the PC may restart into the installer again. Alternatively, remove the USB drive when Windows Setup begins booting from the internal drive.
Complete the Windows configuration screens, connect to the internet, and sign in with the Microsoft account associated with the digital license when applicable.
Use the direct ISO download when the tool is unsuitable
Microsoft also supplies a multi-edition Windows 11 ISO directly from the Windows 11 download page. This is useful when the Media Creation Tool fails or when you only need an ISO.For an x64 PC:
- Open Microsoft’s Download Windows 11 page.
- Find Download Windows 11 Disk Image (ISO) for x64 devices.
- Select Download Windows 11 (multi-edition ISO for x64 devices).
- Select Download.
- Choose the product language.
- Confirm the selection.
- Download the 64-bit ISO.
Get-FileHash "C:\Path\Windows11.iso" -Algorithm SHA256Compare the returned hash with the value Microsoft lists for the same language and architecture.
Handle Windows 11 Arm64 PCs correctly
The Media Creation Tool supports x64 media only. Do not use an x64 USB or ISO on an Arm-based PC.Microsoft now supplies Windows 11 Arm64 ISO files separately. An Arm64 ISO can be:
- Mounted and run from an existing Windows on Arm installation.
- Used in a supported Arm64 virtual machine.
- Used to build bootable Arm64 media.
Troubleshoot Media Creation Tool failures
The tool does not open
- Right-click
MediaCreationTool.exeand select Run as administrator. - Download a fresh copy from Microsoft.
- Install pending updates under Settings > Windows Update and restart.
- Confirm that security software or an organization’s application-control policy is not blocking the executable.
The tool cannot see the USB drive
- Disconnect and reconnect the USB drive.
- Try another USB port.
- Open Disk Management and verify that Windows detects the device.
- Remove unrelated removable drives so that the intended target is easier to identify.
- Replace the USB drive if it disconnects or reports write errors.
Creation fails during download or verification
- Confirm that the PC has a stable internet connection.
- Free storage space on the system drive and download destination.
- Restart Windows and run a newly downloaded copy of the tool.
- Use the direct Microsoft ISO download as a workaround if the Media Creation Tool repeatedly fails.
The PC does not boot from the USB
- Open the one-time boot menu and select the USB’s UEFI entry.
- Fully shut down the PC before trying again.
- Test the USB on another compatible PC to confirm that Windows Setup starts.
- Recreate the drive if its files are incomplete.
- Consult the PC manufacturer if the USB is absent from the firmware boot menu.
Windows does not activate after reinstalling
- Connect the PC to the internet.
- Open Settings > System > Activation.
- Confirm that the installed edition matches the licensed edition.
- Select Troubleshoot if activation does not occur automatically.
- Sign in with the Microsoft account linked to the digital license.
Verify the finished installation
After Windows reaches the desktop:- Open Settings > System > Activation and confirm that Windows is activated.
- Open Settings > Windows Update.
- Select Check for updates.
- Install available Windows and driver updates.
- Restart when requested, then check again until no required updates remain.
- Open Settings > System > About and verify the edition, version, and system type.
- Open Device Manager and check that no devices display warning icons.
- Restore personal files and reinstall applications only after Windows, activation, networking, audio, graphics, and input devices are working normally.
References
- Primary source: Technobezz
Published: 2026-07-14T16:19:39.791000+00:00
How to Use the Windows 11 Media Creation Tool in 2026 | Technobezz
Use the media creation tool Windows 11 download to create a bootable USB, save an ISO, or reinstall Windows 11.www.technobezz.com
