

BitLocker Drive Encryption can be enabled on a Windows 11 Pro, Enterprise, Education, Pro Education, or SE PC in about 15–45 minutes, depending on drive size and whether you encrypt used space or the entire drive. Windows 11 Home uses the simpler Device encryption feature on compatible hardware instead. These steps protect the Windows system drive (
For a work or school PC, confirm with IT that the key has been escrowed in Microsoft Entra ID or Active Directory. Microsoft Support cannot retrieve or recreate a lost recovery key.
A completed, protected drive should show:
For a personal Microsoft account, verify the key from another device before you rely on it. For an organization-managed PC, have IT confirm that the recovery information is available for the correct device.
Windows 11 version 24H2 and later can show a hint on the BitLocker recovery screen identifying the Microsoft account associated with the key, but that hint is not a substitute for recording where the key is stored.
For firmware updates that require several restarts, use a higher reboot count or suspend protection until you manually resume it:
Warning: A reboot count of
Then inspect the protectors:
For a Microsoft Entra-joined device, an administrator can back up a specific recovery-password protector to Entra ID with:
Replace
Do not use a script that silently enables BitLocker across business PCs until recovery-key escrow, Windows Recovery Environment availability, TPM status, existing third-party encryption software, and Intune or Group Policy conflicts have been reviewed.
C:) with the PC’s TPM and create a recovery key you must keep outside the PC.
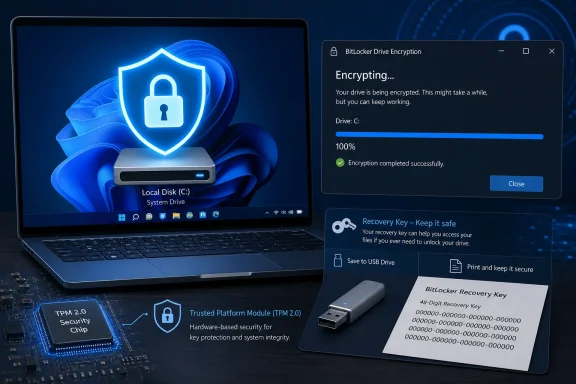 Before you start
- Sign in with an administrator account.
- Connect a laptop to AC power.
- Back up important files first. BitLocker normally runs safely in the background, but encryption changes the drive’s security state.
- Have a safe place for the 48-digit recovery key:
- Personal device: Microsoft account, printout, or USB drive stored separately.
- Work or school device: Microsoft Entra ID or your organization’s Active Directory, as directed by IT.
- Do not enable BitLocker yourself if the PC is managed by an employer or school unless its IT policy permits it.
Enable BitLocker in 11 steps
1. Confirm that you have a supported Windows edition
- Press Windows + R.
- Type
winverand press Enter. - Check the edition shown.
2. Check the TPM
- Press Windows + R.
- Type
tpm.mscand press Enter. - Confirm that the status says The TPM is ready for use.
3. Check whether BitLocker is already enabled
- Open Start.
- Search for Manage BitLocker and open it.
- Under Operating system drive, look at drive
C:.
4. Start the BitLocker wizard
- In BitLocker Drive Encryption, expand Operating system drive.
- Select Turn on BitLocker next to
C:. - If prompted, choose Let BitLocker automatically unlock my drive.
5. Save the recovery key before proceeding
Choose one or more recovery-key options presented by the wizard.- Save to your Microsoft account: Best for an unmanaged personal PC signed in with a Microsoft account.
- Save to a file: Save it to a network location or removable storage—not to
C:. - Print the recovery key: Keep the printout in a secure location away from the PC.
- Save to a USB flash drive: Keep the USB drive separate from the laptop.
For a work or school PC, confirm with IT that the key has been escrowed in Microsoft Entra ID or Active Directory. Microsoft Support cannot retrieve or recreate a lost recovery key.
6. Choose how much of the drive to encrypt
Select one of the wizard’s options:- Encrypt used disk space only: Appropriate for a new PC or a newly installed Windows drive that has never contained sensitive unencrypted data.
- Encrypt entire drive: Choose this for an existing PC or any drive that has held data before.
7. Choose the encryption mode
- Select New encryption mode for the internal Windows drive on a Windows 11 PC.
- Select Compatible mode only when the drive may be moved to an older Windows device.
C: drive that will remain in its current PC, use New encryption mode.8. Run the BitLocker system check
- Select Next.
- Select Continue.
- When prompted, select Restart now.
9. Verify that encryption is progressing
- Open Start, search for Manage BitLocker, and open it.
- Confirm that the operating system drive reports that BitLocker is on or encryption is in progress.
Get-BitLockerVolume -MountPoint C: | Format-List MountPoint,VolumeStatus,EncryptionPercentage,ProtectionStatus,EncryptionMethod,KeyProtectorA completed, protected drive should show:
VolumeStatus : FullyEncryptedEncryptionPercentage : 100ProtectionStatus : On- A TPM protector and a recovery-password protector.
manage-bde -status C:10. Back up or confirm the recovery key again
After BitLocker is enabled, return to Manage BitLocker, expandC:, and select Back up your recovery key.For a personal Microsoft account, verify the key from another device before you rely on it. For an organization-managed PC, have IT confirm that the recovery information is available for the correct device.
Windows 11 version 24H2 and later can show a hint on the BitLocker recovery screen identifying the Microsoft account associated with the key, but that hint is not a substitute for recording where the key is stored.
11. Plan for firmware updates and recovery
Before a BIOS, UEFI, or TPM firmware update, suspend protection rather than turning BitLocker off.- Open Terminal (Admin).
- Run:
Suspend-BitLocker -MountPoint "C:" -RebootCount 1- Install the firmware update and restart as instructed.
- Confirm that BitLocker protection is back on:
Get-BitLockerVolume -MountPoint C: | Format-List ProtectionStatusFor firmware updates that require several restarts, use a higher reboot count or suspend protection until you manually resume it:
Suspend-BitLocker -MountPoint "C:" -RebootCount 0Warning: A reboot count of
0 leaves protection suspended until you explicitly restore it. Run this as soon as maintenance is complete:Resume-BitLocker -MountPoint "C:"Optional: enable BitLocker from PowerShell
Use PowerShell when you need a scriptable method. Open Terminal (Admin) and run:
Code:
Enable-BitLocker C: -TpmProtector
Add-BitLockerKeyProtector -MountPoint C: -RecoveryPasswordProtector(Get-BitLockerVolume -MountPoint C:).KeyProtectorFor a Microsoft Entra-joined device, an administrator can back up a specific recovery-password protector to Entra ID with:
BackupToAAD-BitLockerKeyProtector -MountPoint C: -KeyProtectorId "{GUID}"Replace
{GUID} with the recovery-password protector ID returned by Get-BitLockerVolume. Include the braces.Do not use a script that silently enables BitLocker across business PCs until recovery-key escrow, Windows Recovery Environment availability, TPM status, existing third-party encryption software, and Intune or Group Policy conflicts have been reviewed.
If BitLocker asks for a recovery key
A recovery prompt can follow a firmware change, boot configuration change, TPM issue, repeated PIN failures, or suspected tampering.- Note the first eight characters of the Recovery Key ID shown on screen.
- From another device, locate the matching key in the Microsoft account, work or school account, Active Directory, USB drive, saved file, or printout chosen during setup.
- Enter the matching 48-digit key.
References
- Primary source: tech-insider.org
Published: 2026-07-19T15:09:55+00:00
Enable BitLocker on Windows 11: 11 Steps, 45 Min [2026]
Enable BitLocker on Windows 11: check TPM, back up recovery keys and deploy encryption fleet-wide with Intune. 2026 guide.tech-insider.org - Official source: learn.microsoft.com
Encrypt Windows devices with BitLocker using Intune - Microsoft Intune | Microsoft Learn
Use Microsoft Intune policy to manage BitLocker encryption on Windows devices, including silent encryption and Personal Data Encryption.learn.microsoft.com - Official source: support.microsoft.com
Find your BitLocker recovery key | Microsoft Support
Learn how to find your BitLocker recovery key in Windows. support.microsoft.com
