

The LastPass: Free Password Manager extension in Google Chrome can usually be restored by enabling or pinning it, restoring its website access, updating Chrome, and then repairing or reinstalling the extension if necessary. These steps apply to Chrome on Windows 10 and Windows 11 computers using a personal LastPass account or a work/school account; managed Chrome devices may require an administrator to make the final change.
An icon that has disappeared is not necessarily an uninstalled or broken extension. Chrome can keep an extension enabled while hiding its toolbar button.
If LastPass is enabled but the icon is missing:
After Chrome restarts:
If LastPass must work in a private window:
If the vault still fails to load correctly, clear LastPass local data from the same troubleshooting menu:
If LastPass works after this cleanup, stop here. Avoid using Chrome’s all-time browsing-data deletion unless the narrower cleanup did not help.
If Chrome marks the extension corrupted again after repair, treat that as a possible Chrome-profile or unwanted-software issue. Run a trusted antivirus or anti-malware scan, remove any detected unwanted software, and then repeat the repair. Google specifically notes that software changing extension files can cause repeated corruption.
Then install only the extension published as LastPass: Free Password Manager in the official Chrome Web Store:
This is a diagnostic workaround, not a reason to permanently run Chrome without security extensions.
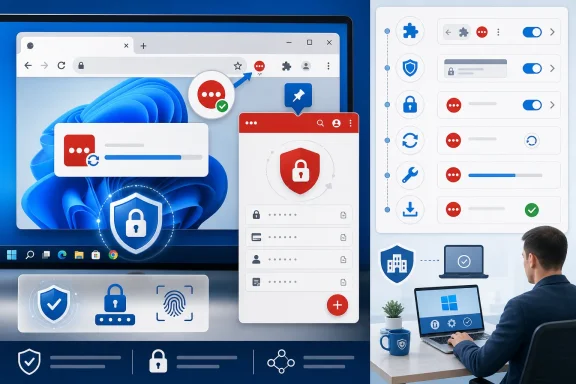 Start with the extension and toolbar checks
An icon that has disappeared is not necessarily an uninstalled or broken extension. Chrome can keep an extension enabled while hiding its toolbar button.- Open Chrome.
- Enter
chrome://extensionsin the address bar and press Enter. - Find LastPass: Free Password Manager.
- Make sure its switch is turned on.
If LastPass is enabled but the icon is missing:
- Select the Extensions puzzle-piece icon beside Chrome’s address bar.
- Find LastPass: Free Password Manager.
- Select the Pin icon.
Update Chrome before changing LastPass data
Chrome updates include extension-platform fixes and security changes. Update Chrome first, then fully relaunch it.- Select More > Help > About Google Chrome.
- Wait while Chrome checks for and downloads an update.
- Select Relaunch if the button appears.
After Chrome restarts:
- Open
chrome://extensions. - Confirm LastPass is still enabled.
- Select the LastPass toolbar icon and test whether the vault opens.
Restore LastPass access to the affected website
When LastPass works on some sites but does not show login choices or autofill on one site, Chrome’s extension site-access setting is a likely cause.- Open More > Extensions > Manage extensions.
- On the LastPass card, select Details.
- Find Allow this extension to read and change all your data on websites you visit.
- Choose the access level that matches the problem:
- On select: LastPass can access a site only after you manually activate it.
- On specific sites: Lets you approve only selected websites.
- On all sites: Lets LastPass work automatically wherever it has compatible login fields.
- Set access to On specific sites.
- Under Permissions, locate Allowed sites.
- Select Add.
- Enter the website address and select Add.
- Reload the login page.
If LastPass must work in a private window:
- Return to the LastPass Details page.
- Turn on Allow in incognito.
Refresh the LastPass vault and local cache
If the LastPass button opens but the vault appears outdated, saved items are missing, or new passwords do not appear, refresh the extension’s local vault data before reinstalling it.- Verify that the computer is online.
- Select the LastPass extension icon.
- Open Account.
- Select Fix a problem yourself.
- Select Refresh your vault.
If the vault still fails to load correctly, clear LastPass local data from the same troubleshooting menu:
- Select the LastPass icon.
- Go to Account > Fix a problem yourself.
- Select Clear local data.
- Sign in to LastPass again while connected to the internet.
Remove only LastPass site data in Chrome
Chrome’s stored site data can interfere with sign-in and vault loading. Start with LastPass-specific data rather than clearing every website’s cookies.- Select More > Settings.
- Select Privacy and security > Third-party cookies.
- Select See all site data and permissions.
- Search for
lastpass.com. - Select Delete next to each LastPass result.
- Confirm by selecting Delete.
- Close Chrome completely, reopen it, and sign in to LastPass again.
If LastPass works after this cleanup, stop here. Avoid using Chrome’s all-time browsing-data deletion unless the narrower cleanup did not help.
If a wider Chrome cleanup is necessary
- Select More > Delete browsing data.
- Set Time range to All time.
- Select Cookies and other site data and Cached images and files.
- Select Delete data.
- Restart Chrome.
Repair a corrupted LastPass extension
If Chrome labels LastPass as corrupted, use Chrome’s built-in repair control first.- Open More > Extensions > Manage extensions.
- Find the corrupted LastPass extension.
- Select Repair.
- Confirm with Repair extension.
If Chrome marks the extension corrupted again after repair, treat that as a possible Chrome-profile or unwanted-software issue. Run a trusted antivirus or anti-malware scan, remove any detected unwanted software, and then repeat the repair. Google specifically notes that software changing extension files can cause repeated corruption.
Reinstall LastPass cleanly
Reinstalling is appropriate when the extension will not open, repair fails, it remains corrupted, or its interface is persistently blank after the earlier steps.- If the LastPass icon is visible, right-click it and select Remove from Chrome.
- Select Remove to confirm.
- Open More > Extensions > Manage extensions.
- Find LastPass: Free Password Manager.
- Select Remove.
- Confirm with Remove.
Then install only the extension published as LastPass: Free Password Manager in the official Chrome Web Store:
- Open the Chrome Web Store.
- Search for LastPass: Free Password Manager.
- Confirm that the publisher is LastPass.
- Select Add to Chrome.
- Select Add extension when Chrome asks for confirmation.
- Pin the extension, sign in, and complete any multifactor-authentication prompt.
Rule out another extension conflict
A content-blocking, privacy, script-control, or security extension can sometimes prevent LastPass from loading or interacting with a login page.- Open
chrome://extensions. - Turn off every extension except LastPass.
- Reload the affected login page.
- Test LastPass.
This is a diagnostic workaround, not a reason to permanently run Chrome without security extensions.
Check whether work or school policies are blocking LastPass
On managed computers, an organization can block extensions, prevent users from enabling them, limit their website access, or control toolbar pinning.- Open Chrome.
- Select More.
- Look at the bottom of the menu for Managed by your organization.
chrome://managementto see whether Chrome is managed.chrome://policyto view applied Chrome policies.
Verify that the issue is fixed
- Restart Chrome.
- Confirm that the LastPass icon is visible and opens normally.
- Sign in to LastPass.
- Open a known saved login page in a regular Chrome window.
- Confirm that LastPass offers the expected saved credential and can fill it after you select it.
- If the vault or sign-in service still fails across multiple websites, check the LastPass Status page for a Browser Extension, Vault, or Login service incident before making further browser changes.