

Windows Update failures are often blamed on Microsoft’s servers, a bad internet connection, or a troublesome cumulative update—but a damaged local cache is frequently the real cause. When Windows 11 repeatedly retries the same download, stalls at a fixed percentage, produces a vague install error, or insists an update needs to be downloaded again, clearing the correct cache can force a clean start without removing installed updates, personal files, or applications.
The important word is correct. Windows 11 does not rely on one universal “Windows Update cache.” It uses several separate storage locations and servicing mechanisms, each with a different purpose. Clearing
Treating those stores as interchangeable is one of the most common sources of bad Windows Update advice. A component cleanup will not repair a corrupted active update download, while deleting SoftwareDistribution will not meaningfully reduce the size of the component store. The safest Windows 11 troubleshooting process starts with the built-in repair tools, then moves to the specific cleanup method that matches the problem.
Windows Update is more than the Settings page and a download progress bar. Behind the scenes, Windows maintains update services, download folders, databases, cryptographic catalogs, delivery caches, and the component store that makes servicing and rollback possible.
For ordinary troubleshooting, three locations matter most:
Clearing a cache is not a guaranteed cure for every update failure. Error codes can point to network problems, disabled services, insufficient disk space, damaged system files, driver conflicts, security software interference, or an update package that Microsoft has paused or replaced. Still, a SoftwareDistribution reset remains one of the most useful Windows 11 fixes when a download itself has gone wrong.
The troubleshooter is especially worthwhile when Windows Update still opens normally and the problem is recent. It is low-risk, fast, and can resolve simple service or configuration issues without resetting local update data.
Open Settings > System > Storage and review the available capacity on the system drive. If space is tight, use:
The folder contains Windows Update working data, including downloaded update files and local update information. Windows recreates required contents automatically after the Windows Update service starts and checks for updates again.
If Windows refuses to delete a file because it is in use, do not force it with third-party unlock utilities. Confirm that the Windows Update service has stopped, restart the PC if necessary, and use the command-line method below.
Open Command Prompt as administrator:
Here is what each command does:
In an elevated Command Prompt, use:
Restart Windows afterward and check for updates.
This method can be helpful if a service keeps files locked. It also avoids an irreversible deletion at the start of the process. Once Windows Update works normally and disk space is needed, the
Stopping BITS—the Background Intelligent Transfer Service—is not always required for a basic cache reset, but it can be useful where background transfers are still holding update-related files open.
If a command returns an access-denied message, verify that Command Prompt was opened with administrator rights. On a managed work or school device, policy restrictions can also limit what local administrators are allowed to change.
The cache can hold content associated with:
Deleting it after every update can create needless re-downloads. Use cleanup when disk space matters, when you suspect a delivery-cache issue, or when Windows identifies the category as unusually large.
More importantly, do not manually delete files from
This performs supported cleanup of superseded Windows components. It can reduce the servicing footprint after multiple updates, although the amount of recovered space varies widely between devices.
Avoid casually adding
Run:
After DISM completes, run:
These commands serve a different purpose from cache cleanup. DISM repairs the Windows component image, while System File Checker verifies and restores protected system files. They can take time, so allow them to complete without closing the terminal window.
Do Not Directly Delete
A complete Windows Update component reset may involve stopping services and renaming Catroot2 under carefully controlled circumstances. That is a broader repair action, not the standard consumer fix for a damaged update download. Do not simply delete the folder because an outdated tutorial says to do so.
The key distinction is simple: SoftwareDistribution fixes the active update-download cache, Delivery Optimization clears shared download residue, and component cleanup removes superseded servicing components. Using the right tool prevents unnecessary system changes and gives Windows Update the best chance to rebuild cleanly, download fresh files, and install normally.
The important word is correct. Windows 11 does not rely on one universal “Windows Update cache.” It uses several separate storage locations and servicing mechanisms, each with a different purpose. Clearing
C:\Windows\SoftwareDistribution addresses downloaded Windows Update packages and update metadata. Removing Delivery Optimization Files clears a separate sharing and download cache. Component-store cleanup targets obsolete system components in C:\Windows\WinSxS.Treating those stores as interchangeable is one of the most common sources of bad Windows Update advice. A component cleanup will not repair a corrupted active update download, while deleting SoftwareDistribution will not meaningfully reduce the size of the component store. The safest Windows 11 troubleshooting process starts with the built-in repair tools, then moves to the specific cleanup method that matches the problem.
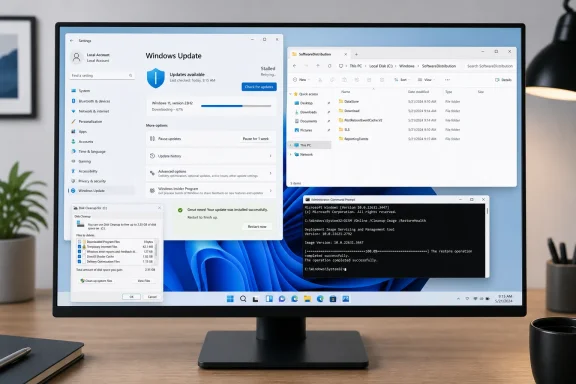 Background: What “Windows Update Cache” Actually Means
Windows Update is more than the Settings page and a download progress bar. Behind the scenes, Windows maintains update services, download folders, databases, cryptographic catalogs, delivery caches, and the component store that makes servicing and rollback possible.For ordinary troubleshooting, three locations matter most:
- SoftwareDistribution: The primary Windows Update working folder, normally located at
C:\Windows\SoftwareDistribution. - Delivery Optimization cache: A separate cache used to distribute Windows updates, Microsoft Store content, and other Microsoft downloads efficiently.
- Component store: The Windows servicing store, commonly associated with
C:\Windows\WinSxS, which retains component versions needed to service the operating system.
| Problem | Best first target |
|---|---|
| Update download loops, stalls, or repeatedly fails after downloading | SoftwareDistribution |
| Disk Cleanup reports large Delivery Optimization Files | Delivery Optimization cleanup |
| Storage is low after multiple updates | Storage Sense, Cleanup recommendations, or component cleanup |
| Windows Update reports corruption or servicing errors | Troubleshooter, DISM, and system repair steps |
| A work-managed PC has update-download restrictions | Contact IT before changing cache policies |
Start With Windows 11’s Built-In Repair Tools
Before manually deleting anything, use the Windows Update troubleshooting options built into Windows 11. They can restart services, identify common configuration problems, and apply supported repairs without requiring Command Prompt or direct folder changes.Run the Windows Update Troubleshooter
The familiar entry point is available in Settings:- Open Start and select Settings.
- Choose System.
- Select Troubleshoot.
- Open Other troubleshooters.
- Find Windows Update.
- Select Run.
- Follow the on-screen prompts.
- Restart the PC when the troubleshooting process is complete.
- Return to Settings > Windows Update and select Check for updates.
The troubleshooter is especially worthwhile when Windows Update still opens normally and the problem is recent. It is low-risk, fast, and can resolve simple service or configuration issues without resetting local update data.
Check Free Space Before Assuming the Cache Is Corrupt
A full or nearly full system drive can make Windows Update look broken. Downloads may start and fail, installation may reach a late stage before rolling back, and Windows can report generic errors that do not clearly mention storage.Open Settings > System > Storage and review the available capacity on the system drive. If space is tight, use:
- Storage Sense for automatic housekeeping of temporary files and Recycle Bin content.
- Cleanup recommendations to review temporary files, large files, unused apps, and previous Windows installation files where applicable.
- Disk Cleanup for additional classic cleanup categories.
The Main Fix: Clear the SoftwareDistribution Cache
For a Windows Update download that gets stuck, repeats endlessly, or appears to reuse a corrupted package, SoftwareDistribution is the primary cache to reset.The folder contains Windows Update working data, including downloaded update files and local update information. Windows recreates required contents automatically after the Windows Update service starts and checks for updates again.
What Clearing SoftwareDistribution Does—and Does Not Do
Clearing the folder can:- Remove incomplete or corrupted update downloads.
- Force Windows Update to obtain fresh package files.
- Eliminate stale local download state.
- Free disk space previously used by abandoned update downloads.
- Help with updates that repeatedly fail at the same download or preparation stage.
- Uninstall cumulative updates already installed on the PC.
- Delete personal documents, photos, apps, or user profiles.
- Downgrade Windows 11.
- Repair every servicing issue automatically.
- Replace component-store cleanup or system-file repair.
Method 1: Clear SoftwareDistribution Through Services and File Explorer
This is the most approachable manual method because it makes the process visible. The central requirement is to stop the Windows Update service before removing its working files.- Press Win + R.
- Type
services.msc. - Press Enter.
- Locate Windows Update in the Services list.
- Right-click Windows Update and select Stop.
- Open File Explorer.
- Navigate to:
C:\Windows\SoftwareDistribution - Select the files and folders inside SoftwareDistribution.
- Delete the contents. Approve the administrator prompt if Windows requests permission.
- Return to the Services window.
- Right-click Windows Update.
- Select Start.
- Restart the PC.
- Open Settings > Windows Update and select Check for updates.
If Windows refuses to delete a file because it is in use, do not force it with third-party unlock utilities. Confirm that the Windows Update service has stopped, restart the PC if necessary, and use the command-line method below.
Reset SoftwareDistribution From an Elevated Command Prompt
The command-line approach is useful when File Explorer cannot clear the cache or when the update folder is heavily populated. It also provides a more repeatable Windows Update reset procedure for experienced users.Open Command Prompt as administrator:
- Open Start.
- Search for
cmdor Command Prompt. - Select Run as administrator.
- Approve the User Account Control prompt.
Code:
net stop wuauserv
rd /s /q %systemroot%\SoftwareDistribution
net start wuauservnet stop wuauservstops the Windows Update service.rd /s /q %systemroot%\SoftwareDistributionremoves the SoftwareDistribution folder and all of its contents without further confirmation.net start wuauservstarts the Windows Update service again.
A More Conservative Rename Alternative
Some administrators prefer renaming a damaged cache rather than deleting it immediately. Renaming gives Windows a clean folder while retaining the old data temporarily in case it needs to be inspected or removed later.In an elevated Command Prompt, use:
Code:
net stop wuauserv
net stop bits
ren %systemroot%\SoftwareDistribution SoftwareDistribution.old
net start bits
net start wuauservThis method can be helpful if a service keeps files locked. It also avoids an irreversible deletion at the start of the process. Once Windows Update works normally and disk space is needed, the
SoftwareDistribution.old folder can be removed.Stopping BITS—the Background Intelligent Transfer Service—is not always required for a basic cache reset, but it can be useful where background transfers are still holding update-related files open.
Do Not Interrupt the Reset Halfway Through
Once the Windows Update service has been stopped and files are being removed or renamed, let the procedure finish. Do not force-shutdown the PC simply because File Explorer appears slow, particularly on systems with years of update residue or slower hard drives.If a command returns an access-denied message, verify that Command Prompt was opened with administrator rights. On a managed work or school device, policy restrictions can also limit what local administrators are allowed to change.
Clear Delivery Optimization Files Separately
Delivery Optimization is related to Windows Update, but it is not the same thing as SoftwareDistribution. It helps Windows download eligible content from Microsoft’s servers, local peers, and configured enterprise cache infrastructure where applicable.The cache can hold content associated with:
- Windows updates and feature updates.
- Microsoft Store app downloads and updates.
- Other Microsoft-delivered packages supported by Delivery Optimization.
Use Disk Cleanup for Delivery Optimization Files
The simplest consumer-facing method is Disk Cleanup:- Search for Disk Cleanup from the taskbar.
- Open the Disk Cleanup app.
- Choose the system drive if prompted.
- Select Delivery Optimization Files.
- Select OK.
- Confirm by selecting Delete Files.
Why This Cache Is Worth Keeping Most of the Time
There is no need to purge Delivery Optimization files routinely. The cache exists to reduce repeated downloads and, in some configurations, reduce network bandwidth consumption across a local network.Deleting it after every update can create needless re-downloads. Use cleanup when disk space matters, when you suspect a delivery-cache issue, or when Windows identifies the category as unusually large.
Component Store Cleanup Is a Different Maintenance Task
The Windows component store supports servicing, repairs, optional features, language components, and update replacement behavior. It is often associated with theWinSxS folder, but users should not interpret its apparent size in File Explorer as a direct measure of reclaimable storage.More importantly, do not manually delete files from
C:\Windows\WinSxS. That can damage Windows, interfere with servicing, prevent future updates, and in severe cases leave the operating system unable to boot correctly.Run the Scheduled Component Cleanup Task
Windows includes a maintenance task designed for this purpose:- Open Task Scheduler.
- Browse to:
Task Scheduler Library\Microsoft\Windows\Servicing\StartComponentCleanup - Select StartComponentCleanup.
- Under Selected Item, select Run.
Run DISM Component Cleanup From Command Prompt
For an immediate cleanup, open an elevated Command Prompt and run:Dism.exe /online /Cleanup-Image /StartComponentCleanupThis performs supported cleanup of superseded Windows components. It can reduce the servicing footprint after multiple updates, although the amount of recovered space varies widely between devices.
Avoid casually adding
/ResetBase to the command. That option is more aggressive because it removes superseded component versions in a way that prevents installed updates from being uninstalled afterward. It can make sense in tightly controlled environments, but it is not a default Windows 11 troubleshooting step.Use DISM Repair When Corruption Is Suspected
If Windows Update continues to fail after clearing SoftwareDistribution, a servicing-health check is more relevant than repeated cache deletion.Run:
DISM /Online /Cleanup-Image /RestoreHealthAfter DISM completes, run:
sfc /scannowThese commands serve a different purpose from cache cleanup. DISM repairs the Windows component image, while System File Checker verifies and restores protected system files. They can take time, so allow them to complete without closing the terminal window.
What Not to Delete on a Windows 11 PC
Many older Windows Update reset guides combine valid steps with risky, obsolete, or overly aggressive instructions. Avoid treating all system folders as disposable caches.Do Not Manually Delete WinSxS
The component store is not a normal temporary-files folder. Windows relies on it for servicing and repair. Use Disk Cleanup, the scheduled component cleanup task, or DISM—not File Explorer deletion.Do Not Directly Delete Catroot2 as a Routine Fix
C:\Windows\System32\catroot2 is associated with cryptographic catalog data used during update installation. It is not the first cache to clear for a stuck update download.A complete Windows Update component reset may involve stopping services and renaming Catroot2 under carefully controlled circumstances. That is a broader repair action, not the standard consumer fix for a damaged update download. Do not simply delete the folder because an outdated tutorial says to do so.
Skip Retired Troubleshooting Tools
Avoid instructions centered on:- Downloadable
.diagcabtroubleshooters. msdt.exe-based troubleshooting packages.- Microsoft Fix it utilities.
- Microsoft Easy Fix packages.
- Random “one-click update repair” scripts from unverified websites.
Special Considerations for Work and School PCs
On an organization-managed Windows 11 device, Delivery Optimization behavior may be controlled through Group Policy, mobile-device management, or Microsoft Intune. IT administrators can set rules for:- Maximum cache age.
- Maximum cache size as a percentage of available storage.
- Absolute cache-size limits.
- Cache-drive location.
- Peer-sharing behavior.
- Download modes and enterprise content sources.
A Practical Windows Update Cleanup Order
The most reliable approach is incremental. Start with the least invasive fix, test Windows Update, and only move to the next step when necessary.- Restart Windows and try Windows Update again.
- Run the Windows Update troubleshooter through Settings or Get Help.
- Verify free disk space under Settings > System > Storage.
- Use Cleanup recommendations or Storage Sense if capacity is low.
- Clear SoftwareDistribution if downloads are stuck, corrupted, or endlessly retrying.
- Clear Delivery Optimization Files if that cache is large or storage is constrained.
- Run DISM and SFC if servicing corruption is suspected.
- Escalate broader component resets carefully if basic repair measures fail.
- Seek administrator or vendor support for managed devices, persistent rollback loops, boot failures, or repeated error codes after repair.
The Bottom Line
Clearing the Windows Update cache on Windows 11 is safe when the cleanup target matches the problem. For broken or looping update downloads, reset SoftwareDistribution after stopping the Windows Update service. For storage recovery, clear Delivery Optimization Files through Disk Cleanup and use Windows Storage tools. For old update components that consume disk space, rely on StartComponentCleanup or the standard DISM cleanup command.The key distinction is simple: SoftwareDistribution fixes the active update-download cache, Delivery Optimization clears shared download residue, and component cleanup removes superseded servicing components. Using the right tool prevents unnecessary system changes and gives Windows Update the best chance to rebuild cleanly, download fresh files, and install normally.
References
- Primary source: Technobezz
Published: 2026-07-23T18:47:17.775000+00:00
Loading…
www.technobezz.com