Map a Network Drive with Offline Files in Windows 10/11 for Reliable Access
Difficulty: Intermediate | Time Required: 20 minutesIf you work with files stored on a home server, NAS, or office file share, a network drive can make access much more convenient. The problem is that network locations depend on your connection. If Wi-Fi drops, the VPN disconnects, or you take your laptop away from the office, those files may become unavailable.
That’s where Offline Files comes in. In supported Windows editions, you can map a network drive and cache its contents locally so your files remain available even when the network share is temporarily unreachable. When you reconnect, Windows syncs your changes back to the server.
This guide walks through the full setup in Windows 10 and Windows 11, including how to map the drive, enable offline access, and avoid common pitfalls.
Prerequisites
Before you begin, make sure you have:Quick walkthrough
- A working network share, such as
\\ServerName\SharedFolder - Permission to access the shared folder
- A Windows 10 or Windows 11 PC
- A stable first-time connection to the network share
- Sufficient local disk space for cached files
Note: Offline Files is typically available on Windows Pro, Enterprise, and Education editions. It is generally not available on Windows Home.
Important: Offline Files is intended for traditional SMB network shares. It is not the same as OneDrive offline sync.
Step 1: Confirm you can reach the shared folder
Before mapping anything, verify the network path works.- Press Windows + R to open Run.
- Type the network path, for example:
\\ServerName\SharedFolder - Press Enter.
- If prompted, enter your network username and password.
- Make sure you can open the folder and view its contents.
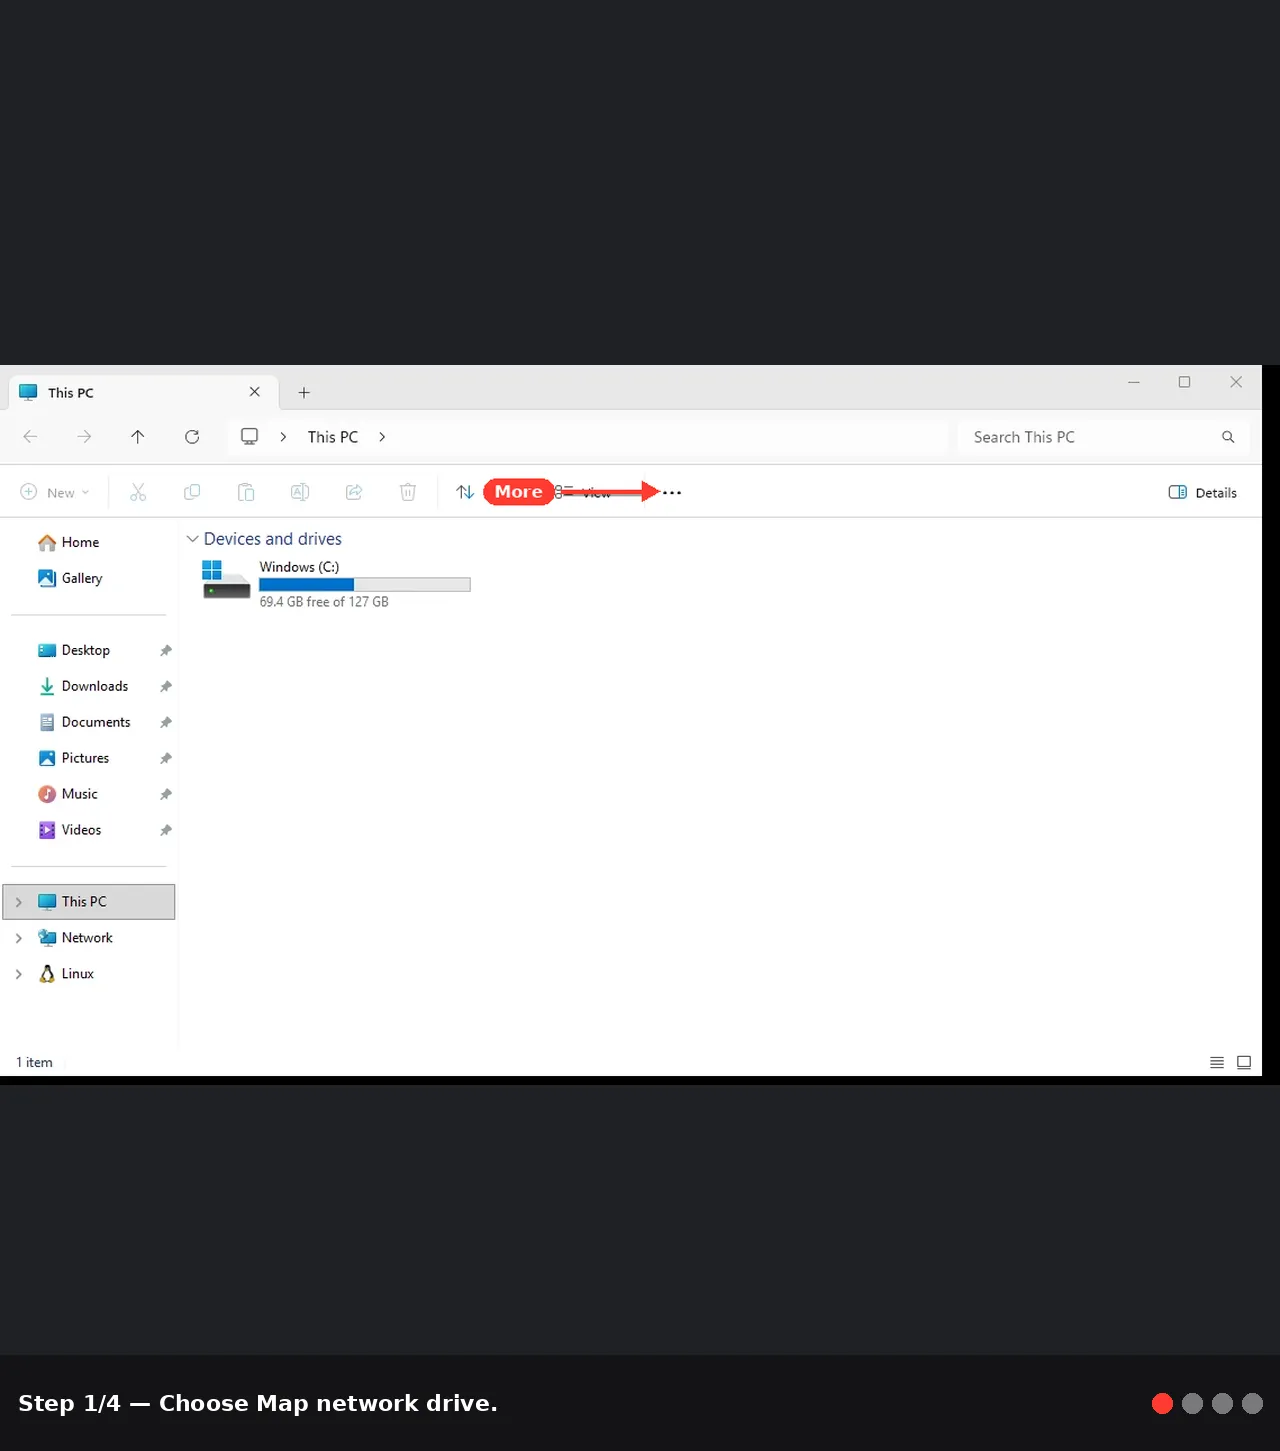
Step 2: Map the network drive
Now map the share to a drive letter for easier access.- Open File Explorer.
- In the left pane, select This PC.
- Click the three-dot menu in Windows 11 or the Computer tab in Windows 10.
- Choose Map network drive.
- Select a drive letter, such as Z:.
- In the Folder box, enter the network path, for example:
\\ServerName\SharedFolder - Check Reconnect at sign-in if you want the drive to persist after reboot.
- If you need different credentials, check Connect using different credentials.
- Click Finish.
The drive should now appear under This PC.
Tip: Use a meaningful drive letter if possible, especially in business environments where users rely on scripts or standard mappings.
Step 3: Enable Offline Files in Windows
If Offline Files is not already enabled, turn it on first.- Open Control Panel.
- Set View by to Large icons or Small icons.
- Click Sync Center.
- In the left pane, click Manage offline files.
- In the Offline Files tab, click Enable offline files.
- Click OK.
- Restart your PC if prompted.
After restart, Offline Files is active and ready to cache supported network content.
Note: In Windows 11, Sync Center is still part of the classic Control Panel even though many settings have moved to the newer Settings app.
Step 4: Make the mapped folder available offline
With the drive mapped and Offline Files enabled, you can now cache the folder locally.- Open File Explorer.
- Browse to your mapped network drive.
- Right-click the folder you want offline access to.
- Select Always available offline.
Windows will begin copying the folder contents to the local cache. This may take a few minutes depending on folder size and network speed.
You may see a sync progress notification. Wait until the initial sync is complete before disconnecting from the network.
Warning: If the folder contains a very large amount of data, the first sync can consume significant disk space and take a while. Consider starting with only the folders you truly need offline.
Step 5: Verify the folder is cached
To make sure offline access is working:- Stay connected to the network for the moment.
- Open the folder you marked as Always available offline.
- Look for sync or Offline Files indicators in File Explorer.
- Open a few documents to confirm they load normally.
- Disconnect from Wi-Fi, unplug Ethernet, or disconnect VPN.
- Reopen the mapped drive or offline folder in File Explorer.
- Try opening an already cached file.
- Edit and save a test document.
Step 6: Reconnect and let Windows sync changes
After reconnecting to your network:- Restore your normal network connection.
- Open Control Panel > Sync Center.
- Click View sync results or View sync conflicts if needed.
- Wait for Windows to synchronize offline changes with the network share.
Tip: If you use a laptop that moves between office and home, reconnect to the same network or VPN regularly so changes sync cleanly.
Step 7: Adjust Offline Files settings if needed
You can fine-tune how Offline Files behaves.- Open Control Panel > Sync Center > Manage offline files.
- Review these tabs:
- General: Enable or disable Offline Files
- Disk Usage: See cache usage and change limits
- Encryption: Protect locally cached offline files
- Network: Configure slow-link mode behavior
Security Note: If your device stores sensitive company files offline, consider enabling offline files encryption and ensuring the PC uses BitLocker as well.
Tips and Troubleshooting
1. “Always available offline” is missing
Possible causes include:- Offline Files is not enabled
- Your Windows edition does not support it
- The share is not a supported SMB file share
- Group Policy is restricting the feature
2. The mapped drive shows as unavailable
This can happen at sign-in if the network or VPN isn’t ready yet.Try:
- Waiting a minute and pressing F5 in File Explorer
- Manually reconnecting VPN before opening the drive
- Verifying Reconnect at sign-in was checked
3. Sync conflicts appear
Conflicts usually occur when both the server copy and your offline copy changed.Open Sync Center > View sync conflicts and choose which version to keep.
Warning: Review conflicts carefully before selecting a version, especially in shared team folders.
4. Performance is slow
Large folders, many small files, or unstable Wi-Fi can slow sync.To improve performance:
- Cache only the folders you need
- Avoid massive archive folders
- Sync over a faster or wired connection for initial setup
5. Changes are not syncing back
Check the following:- You are connected to the correct network or VPN
- You still have permission to write to the share
- The server is online
- Sync Center does not report errors
6. Best use case for Offline Files
Offline Files works best for:- Department shares
- Project folders on office servers
- Field laptops that occasionally lose connectivity
- Users who need continuity during short network interruptions
- Constantly changing multi-user databases
- Huge media libraries
- Cloud-only workflows better handled by OneDrive or SharePoint sync
Conclusion
Mapping a network drive with Offline Files gives you the convenience of a familiar drive letter and the reliability of local access when the network is unavailable. For mobile users, remote workers, and anyone dealing with flaky connections, it can be a very practical way to keep important files accessible without giving up centralized storage.Set it up once, test it properly, and you’ll have a much smoother experience when working away from the network.
Key Takeaways:
- Map your network share first so it appears as a standard drive in File Explorer
- Enable Offline Files through Sync Center on supported Windows editions
- Use Always available offline to cache important folders locally
- Offline changes sync back automatically when the network connection returns
- Best results come from caching only the folders you truly need
This tutorial was generated to help WindowsForum.com users get the most out of their Windows experience.
Last edited: