

A Minecraft server in 2026 can be an official Realm, a temporary LAN or friend-hosted world, or dedicated server software running on your own computer. This guide covers Minecraft: Java Edition on Windows, Minecraft: Bedrock Edition on Windows and supported Bedrock devices, and Minecraft Education. Java and Bedrock players cannot join the same official server, so choose the edition before starting.
Use this comparison before installing anything:
Invitations and member controls are available under Play > Realms > Realm Hub > Community > Members. Treat public invite links carefully: anyone who obtains a valid link may be able to request or gain access according to its settings.
Bedrock Parties can also keep a group together when moving between supported multiplayer worlds. Parties are not themselves persistent servers, and platform support may differ, particularly on mobile devices.
When startup succeeds, the console eventually reports that the server is ready. Enter
Useful properties include:
After starting the server, enter these commands in its console:
Grant operator access only to trusted administrators. Operators can run powerful commands that affect players and the world.
Look for IPv4 Address under the active Ethernet or Wi-Fi adapter.
For internet players, you will normally need to:
Router interfaces differ, so use the router manufacturer’s instructions for port forwarding. If the internet provider uses carrier-grade NAT or blocks inbound connections, ordinary port forwarding may not work; use Realms or a reputable hosted server instead.
To roll back internet exposure:
To restrict access, set:
Restart the server, then use:
Place a GamerTag containing spaces in quotation marks:
If you manually edit
For Ubuntu hosting, Mojang supports Ubuntu 22.04 LTS or later; other Linux distributions are not officially supported by the Bedrock Dedicated Server download page.
The host client must remain connected.
The administrator or authorized teacher must:
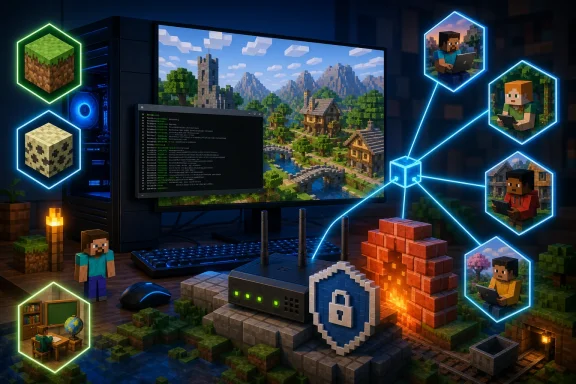 Choose the right server type
Use this comparison before installing anything:- Realm: The simplest always-online option. Mojang hosts it, but it requires a subscription.
- LAN world: Free and suitable for players on the same local network. The host must keep the world open.
- Bedrock friend-hosted world: Free online play for invited Bedrock friends. The host must remain in the world.
- Java dedicated server: A self-hosted, always-available Java Edition world with configurable files, access lists, operators, and networking.
- Bedrock Dedicated Server: A self-hosted Bedrock world for supported Windows or Ubuntu systems.
- Minecraft Education hosting: Use Join Codes for temporary peer hosting or the dedicated-server feature for a persistent institutional server.
- Everyone uses the same Minecraft edition and a compatible game version.
- Console players have the required platform multiplayer subscription.
- Microsoft account multiplayer permissions are enabled.
- The server computer has a stable network connection.
- You can administer the Windows firewall and, for internet hosting, the router.
Create a Realm for the easiest always-online server
A Realm is the best option when you do not want to maintain a computer, configure a firewall, or forward router ports. Invited players can use the world while its owner is offline.Create a Bedrock Edition Realm
- Launch Minecraft and sign in with the Microsoft account that will own the subscription.
- Select Play.
- Select Create New.
- Select Create New World, or choose an available template.
- Configure the game and multiplayer settings.
- Select Create on Realms.
- Choose the available Realm size.
- Select Subscribe Now or start an offered trial.
- Enter the Realm name.
- Accept the displayed terms.
- Complete the purchase through the platform store.
- Select Play.
- Select the pencil Edit button beside the existing world.
- Review its game and multiplayer settings.
- Select Play on Realm.
- Select the Realm that will receive the world.
Invitations and member controls are available under Play > Realms > Realm Hub > Community > Members. Treat public invite links carefully: anyone who obtains a valid link may be able to request or gain access according to its settings.
Create a Java Edition Realm
- Sign in to the Minecraft website with the Microsoft account that owns Minecraft: Java Edition.
- Open Realms.
- Select Buy Now beside the Java Realms subscription.
- Accept the Minecraft EULA.
- Complete the payment process.
- Start Minecraft: Java Edition.
- Select Minecraft Realms from the title screen.
- Configure the Realm, select or upload a world, and invite the required players.
Host a temporary Java LAN world
Use Java LAN hosting when all players are on the same local network and the host will remain in the game.- Start Minecraft: Java Edition.
- Create or load a single-player world.
- Press Esc.
- Select Open to LAN.
- Configure the game mode and command permissions.
- Select Start LAN World.
- Leave the world open while the other players connect.
- On each other Java computer, select Multiplayer and choose the discovered LAN world.
Host a Bedrock LAN world
Current Bedrock LAN controls are in the world’s Multiplayer settings. Older instructions referring to a separate Broadcast to LAN option may not match the current interface.- Connect all devices to the same local network.
- Open Minecraft: Bedrock Edition and select Play.
- Select the pencil icon beside the world, or create a new world.
- Open the Multiplayer tab.
- Enable Multiplayer Game.
- Enable Visible to LAN Players.
- Select Play to open the world.
- Open Minecraft and select Play.
- Open the Worlds tab.
- Look for a world marked LAN.
- Select the world to join.
Invite Bedrock friends without Realms
A regular Bedrock world can be shared online without buying Realms, but this is a hosted session rather than an always-on server.- Sign in to Minecraft with a Microsoft account.
- Add the other players as Minecraft or Xbox friends.
- Select Play.
- Create a world or select the pencil icon beside an existing one.
- Open Multiplayer.
- Enable Multiplayer Game and choose the appropriate player-access setting.
- Start the world.
- Pause the game and open Social.
- Select or invite the players.
Bedrock Parties can also keep a group together when moving between supported multiplayer worlds. Parties are not themselves persistent servers, and platform support may differ, particularly on mobile devices.
Install a Java Edition dedicated server on Windows
A dedicated server is appropriate when Java Edition players need persistent access and you are prepared to manage updates, backups, permissions, and network exposure.Prepare Windows and Java
- Create an empty folder such as:
C:\MinecraftServer - Download the current Java Edition server
.jarfrom Mojang’s official Minecraft server download page. - Save the file in the new server folder.
- Rename it to a simple name such as:
server.jar - Open Windows Terminal or Command Prompt.
- Verify that Java is available:
java -version
java is not recognized, install the Java version required by the current Minecraft server release and ensure its bin directory is available through the Windows PATH. The required Java release can change as Minecraft is updated, so use the requirement displayed for the current server download rather than an old third-party package.Start the server
- In File Explorer, open
C:\MinecraftServer. - Right-click an empty area and select Open in Terminal, or enter the folder with:
cd /d C:\MinecraftServer - Run the server:
java -Xms2G -Xmx4G -jar server.jar nogui
-Xms2Gsets the initial memory allocation to 2 GB, while-Xmx4Gallows up to 4 GB. Do not allocate most or all of the computer’s physical memory. - Wait for the first run to create its configuration files and stop.
- Open
eula.txtin Notepad. - Read the Minecraft EULA.
- If you agree, change:
eula=false
to:
eula=true - Save and close the file.
- Run the start command again:
java -Xms2G -Xmx4G -jar server.jar nogui
nogui if you specifically want the server’s graphical interface. The terminal method generally uses fewer resources and makes server messages easy to review.When startup succeeds, the console eventually reports that the server is ready. Enter
stop in the server console before closing the window; this gives the server an opportunity to save the world cleanly.Create a reusable start file
- Open Notepad.
- Enter:
Code:[USER=35331]@echo[/USER] off java -Xms2G -Xmx4G -jar server.jar nogui pause - Select File > Save As.
- Set Save as type to All files.
- Save the file as
start-server.batinside the server folder. - Double-click it whenever you want to start the server.
Configure Java server access
Stop the server before editingserver.properties. Change only settings you understand, preserve the exact property-name format, and restart the server afterward.Useful properties include:
max-playersto limit simultaneous users.server-portto select the listening port.white-listto restrict access to approved players.enforce-whitelistto enforce whitelist changes consistently.online-modeto require normal account authentication.
online-mode=true for a normal internet-facing server. Disabling account authentication is not a recommended fix for connection problems and makes player identity easier to impersonate.After starting the server, enter these commands in its console:
Code:
whitelist on
whitelist add PlayerName
whitelist remove PlayerName
op PlayerName
deop PlayerNameAllow external Java connections safely
Players on the server computer can test withlocalhost. Computers on the same network can use the host computer’s local IPv4 address, which you can find by running:ipconfigLook for IPv4 Address under the active Ethernet or Wi-Fi adapter.
For internet players, you will normally need to:
- Reserve a stable local IP address for the server computer in the router.
- Permit the server or Java through Windows Defender Firewall.
- Forward the configured server port from the router to the server computer.
- Give trusted players the public address and server port.
online-mode=true, update the server promptly, and forward only the required port. Do not place the computer in the router’s DMZ as a shortcut.Router interfaces differ, so use the router manufacturer’s instructions for port forwarding. If the internet provider uses carrier-grade NAT or blocks inbound connections, ordinary port forwarding may not work; use Realms or a reputable hosted server instead.
To roll back internet exposure:
- Stop the Minecraft server.
- Delete the router’s port-forwarding rule.
- Remove any unnecessary inbound Windows Firewall rule.
- Restart the router if its interface requires it.
Install a Bedrock Dedicated Server on Windows
Mojang supports the Windows Bedrock Dedicated Server on Windows 10 version 10.0.15063 or later and Windows Server 2016 or later. The listed baseline is a compatible Intel Core i3-3210, AMD A8-7600 APU, or equivalent, 4 GB RAM, broadband internet, and sufficient storage for the software and growing worlds.- Create an empty folder such as:
C:\BedrockServer - Open Mojang’s official Bedrock Dedicated Server download page.
- Choose the Windows server package and accept the displayed license and privacy terms.
- Download the ZIP archive.
- Right-click the ZIP and select Extract All.
- Extract its contents into
C:\BedrockServer. - Run
bedrock_server.exe. - If Windows Defender Firewall prompts for permission, allow it on the required trusted network profile.
- Leave the console open while the server is running.
- Enter
stopin the server console before closing it.
server.properties file while the server is stopped. The downloaded package also contains current configuration documentation, which should take precedence over instructions written for older releases.To restrict access, set:
allow-list=trueRestart the server, then use:
Code:
allowlist add GamerTag
allowlist remove GamerTagallowlist add "Gamer Tag"If you manually edit
allowlist.json, reload it from the server console with:allowlist reloadFor Ubuntu hosting, Mojang supports Ubuntu 22.04 LTS or later; other Linux distributions are not officially supported by the Bedrock Dedicated Server download page.
Set up Minecraft Education hosting
Minecraft Education offers two different hosting models.Host a temporary Join Code world
- Open Minecraft Education and select Play.
- Select a world under My Worlds.
- Select Host.
The host client must remain connected.
Create a persistent Education Dedicated Server
Minecraft Education Dedicated Servers became available in 2026 and are separate from the consumer Bedrock server package. A tenant Global Administrator must enable the feature first. Eligible faculty users can then create and manage servers through the Dedicated Server Admin Portal.The administrator or authorized teacher must:
- Confirm that Dedicated Servers and teacher management are enabled for the tenant.
- Verify the account has an eligible faculty license.
- Prepare a supported Windows, Windows Server, or Ubuntu host.
- Assign the host a stable IP address.
- Arrange any required firewall or router access with the network administrator.
- In the Admin Portal, select Add a Server.
- Enter the server IP address and port.
- Configure chat, optional chat logging, and world-generation settings.
- Download the configured Windows or Linux server package.
- Set the server name, optional passcode, enabled state, and broadcast setting.
- Extract the package.
- On Windows, run
bedrock_server.exe. - Complete authentication if prompted.
Fix players being unable to join
Work through these checks in order:- Confirm the edition. Java players need a Java server; Bedrock players need a Bedrock world, Realm, or server.
- Update every client and server. Mismatched versions commonly prevent joining.
- Check whether the host is running. LAN, friend-hosted, and dedicated sessions disappear when their host or server process stops.
- Check Microsoft account permissions. A family organizer may need to allow joining multiplayer games, cross-network play, adding friends, and online communication.
- Restart Minecraft after permission changes. Account changes can take several minutes to propagate.
- Check console subscriptions. Console multiplayer may require Xbox Game Pass Core, Nintendo Switch Online, or PlayStation Plus.
- Test locally first. Connect using
localhoston the server PC, then the local IPv4 address from another computer, and only then test the public address. - Check Windows Firewall. Ensure the correct Java executable or Bedrock server is allowed on the active network profile.
- Check router forwarding. Confirm that the rule points to the server computer’s current local IPv4 address and configured port.
- Review the server console. Authentication failures, incompatible versions, malformed configuration files, and access-list rejections are usually recorded there.
References
- Primary source: Technobezz
Published: 2026-07-13T16:53:22.867000+00:00
How to Make a Minecraft Server in 2026 | Technobezz
How to make a Minecraft server with Realms, LAN play, Java server files, or Bedrock Dedicated Server software.www.technobezz.com - Related coverage: minecraft.net
Minecraft Server Download | Minecraft
Gain access to amazing Minecraft servers using the Minecraft Server Download. Set up multi-player servers today by following the detailed instructions provided.www.minecraft.net - Related coverage: edusupport.minecraft.net
Dedicated Server FAQ – Minecraft Education
1. What is a Minecraft Education Dedicated Server?One of the most requested features for Minecraft Education has been the ability to run...edusupport.minecraft.net
