Schedule Night Light in Windows 10/11 for Eye Comfort
Difficulty: Beginner | Time Required: 10 minutesWindows Night Light is a simple, built-in way to reduce blue light and give your screen a warmer look at night. Scheduling Night Light ensures your eyes stay comfortable as daylight fades, helping reduce eye strain and improve sleep quality. This tutorial walks you through enabling and scheduling Night Light on both Windows 10 and Windows 11.
Prerequisites
Quick walkthrough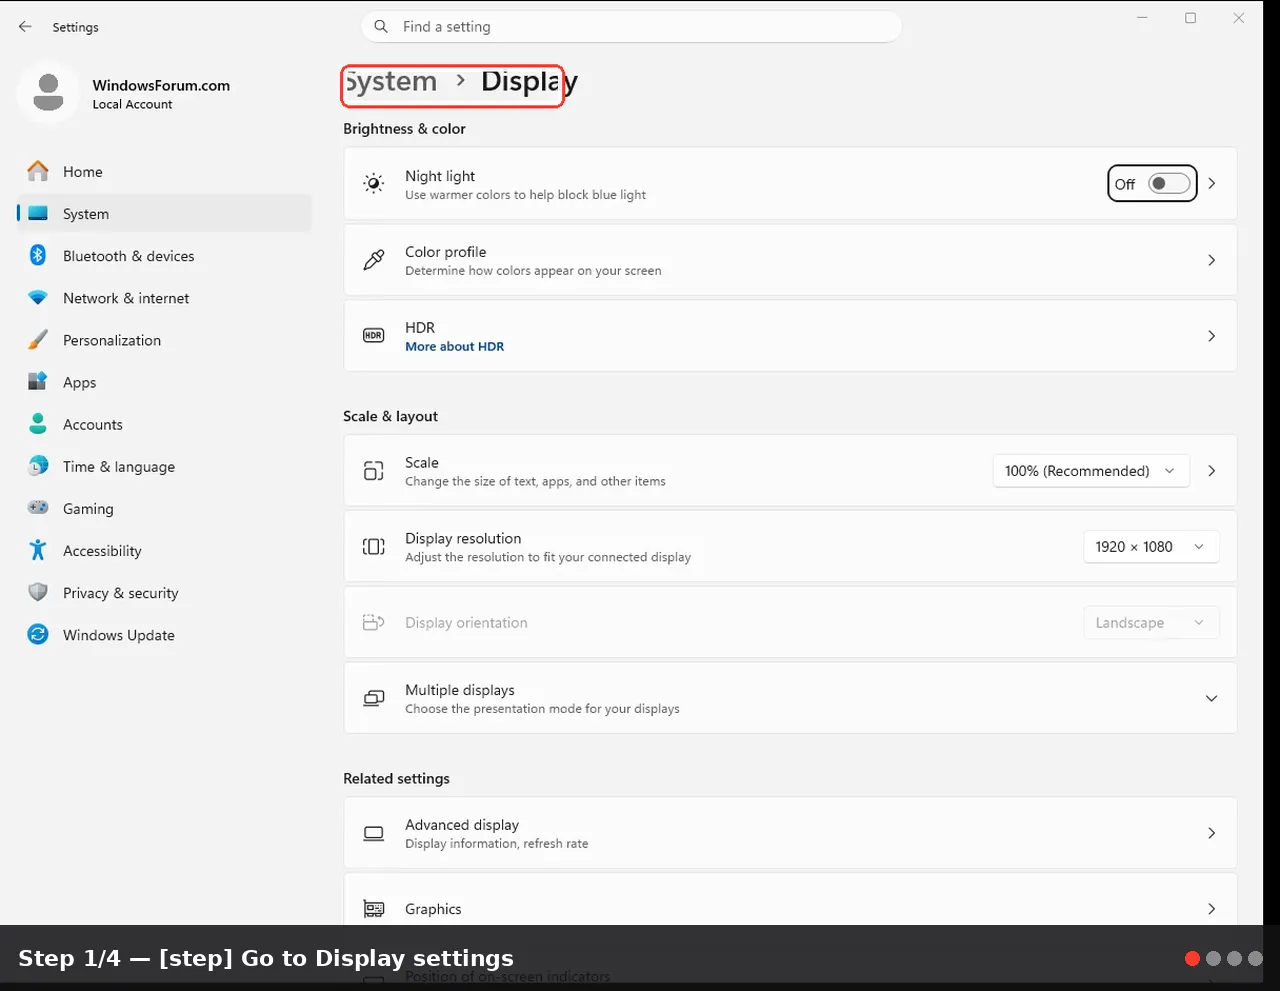
- A PC running Windows 10 or Windows 11. Night Light scheduling is available on recent builds of both OS versions.
- A display that supports color temperature adjustments (most modern LCD/LED monitors do).
- Access to Settings (no admin rights required for standard user changes, though admin rights aren’t hurt if you’re on a shared PC).
Step-by-step instructions
Note: The UI path looks very similar in Windows 10 and Windows 11, but there are small wording and layout differences. The steps below cover both, with clarifications where they differ.- Open Settings
- Press Windows logo key + I to open Settings quickly.
- If you prefer, click the Start menu and select Settings.
- Go to Display settings
- In Windows 10, choose System, then Display.
- In Windows 11, choose System, then Display (the wording is the same, the layout may feel more streamlined).
- Find Night Light settings
- Scroll to the Night light section. In Windows 10, you’ll see a toggle labeled Night light and a button labeled Night light settings. In Windows 11, Night light appears with a similar toggle and a button to configure settings.
- Click Night light settings (this opens the scheduling and color options).
4) Turn Night Light on and choose a schedule
- Turn on Night light if it isn’t already on.
- Look for the Schedule options:
- Windows 10: Choose Schedule Night light (or Set hours) and pick “Sunset to Sunrise” or “Set hours.” If you choose Set hours, you’ll enter a Start time and an End time.
- Windows 11: Choose Schedule Night light and pick “Sunset to Sunrise” or “Set hours.” Enter the Start time and End time if you select Set hours.
- Pro tip: Sunset to Sunrise uses your location to approximate local sunset and sunrise times automatically. If you’re often working late or wake up early, Set hours gives you precise times you specify.
- Adjust the color temperature
- Use the color temperature slider to set how warm Night Light should be during its active period. A warmer color (more yellow/orange) is gentler on the eyes.
- Quick tip: Start around 2700–3200K for a cozy glow and adjust to taste. You can always tweak it later if needed.
- Optional: Quick enable/disable and testing
- After saving your schedule, you can test by clicking “Turn on now” to verify how the screen looks with the chosen temperature.
- If you’re not sure about your hours, you can temporarily disable the schedule and toggle Night Light on manually, then reassess later.
- Close Settings and observe
- Exit Settings. Night Light will now automatically apply the warmer look during the scheduled times.
- If you have multiple displays, the color temperature is typically controlled at the system level and applied across displays that support Night Light.
- Windows 10: The path is Settings > System > Display > Night light settings. You’ll find a toggle for Night light and the Schedule settings there.
- Windows 11: The path is Settings > System > Display > Night light. The interface emphasizes a cleaner look but the scheduling concept is identical.
- Combine with a bedtime routine: Set Night Light to start about 1 hour before you plan to wind down to support a gradual screen color shift.
- If you use external monitors, test the color temperature on each screen. Some quirks can occur if you have very different display types.
- Consider pairing Night Light with a warm wallpaper or a darker theme at night to further reduce glare.
Tips and troubleshooting notes
- My Night Light schedule isn’t applying automatically
- Ensure Night Light is turned on and that you’ve chosen a valid schedule (Sunset to Sunrise or Set hours).
- After changing settings, give Windows a minute or two to apply the new temperature. If it seems stuck, try turning Night Light off and back on, or reboot the PC.
- Make sure Windows is up to date. Some scheduling behavior and UI tweaks come with newer updates.
- The toggle is grayed out or missing
- This usually means the feature isn’t fully available on older builds. Update Windows to a newer version, then revisit Settings > System > Display > Night light settings.
- Ensure you’re in the main user account you want to configure. Some enterprise or managed devices may have restrictions set by IT; if you’re on a company PC, check with your admin.
- Night Light seems to reset after a reboot
- Confirm you saved the schedule in Night light settings. If it resets unexpectedly, check for third-party color calibration tools that might override Windows color settings, or see if there are pending driver updates for your display.
- Custom schedules don’t align with actual sunset/sunrise
- If you selected Sunset to Sunrise, Windows uses your location to estimate times. If location services are off or if the location isn’t correct, schedules may drift. You can switch to Set hours to fix exact times.
- Display quirks or color inconsistencies
- If one monitor behaves oddly, try disconnecting secondary displays or update your GPU/display drivers. In some cases, certain graphics drivers may temporarily affect color adjustments; a driver update resolves this.
- Accessibility angle
- Night Light is just one part of eye comfort. If you’re sensitive to light, also consider enabling a dark theme, reducing screen brightness, and taking regular breaks using the 20-20-20 rule (every 20 minutes, look at something 20 feet away for 20 seconds).
Conclusion
Scheduling Night Light on Windows 10 or Windows 11 is a straightforward win for eye comfort and better sleep hygiene. By enabling a warm color temperature during evening hours, you reduce blue light exposure and create a more relaxed display environment as you wind down.Key benefits include:
- Automatic adjustment of screen color temperature to reduce eye strain in the evening.
- A simple, built-in scheduling system with flexible options (Sunset to Sunrise or custom hours).
- Quick toggles for testing and manual control, plus a straightforward slider to tailor warmth to your preference.
Key Takeaways:
- Night Light scheduling is available in both Windows 10 and Windows 11 through Settings > System > Display.
- You can choose Sunset to Sunrise or set custom hours to fit your personal routine.
- A warmer color temperature reduces blue light exposure and can help with evening wind-down.
- If scheduling doesn’t work, ensure your Windows is up to date and check for driver or third-party conflicts.
This tutorial was generated to help WindowsForum.com users get the most out of their Windows experience.
Last edited: