

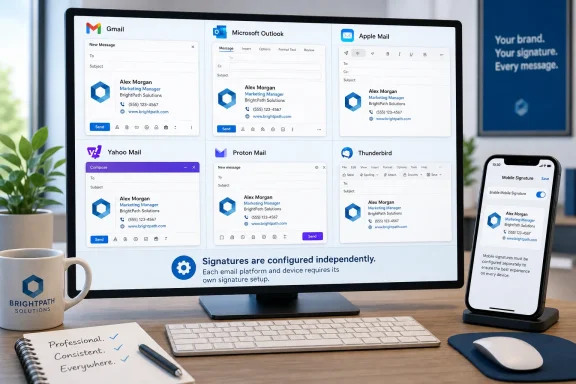
An email signature must be configured in the app or website from which you send mail. Creating one in Gmail, for example, does not necessarily configure Gmail on your phone, Outlook, or Apple Mail. The procedures below cover Gmail, new and classic Outlook for Windows, Outlook on the web and Mac, Apple Mail, iCloud Mail, Outlook and Gmail mobile, Yahoo Mail, Proton Mail, and Thunderbird.
Prepare the text and any image you intend to use. A practical signature normally includes:
If you use several email accounts or sending addresses, create or assign the signature separately for each account. Mobile mail apps may also maintain a signature that is independent of the desktop or web version.
If you use Gmail’s Send mail as feature, select the appropriate sending address from the menu above the signature editor. You can assign a different signature to each available address.
To switch signatures while composing:
To add it manually:
Microsoft notes that signatures may need to be created separately in Outlook and Outlook on the web, depending on the account and Outlook version. Send a test from each interface rather than assuming that a signature has synchronized.
You can also reach the editor through:
File > Options > Mail > Signatures
To add a logo:
Use the account’s Choose Signature menu to select a default. While composing, use the Signature pop-up menu in the message window to change or remove the selected signature.
For replies, clear Place signature above quoted text if you want the signature placed below the quoted conversation instead.
This setting controls messages sent through Apple’s Mail app. It does not configure the separate Gmail, Outlook, Yahoo, or Proton apps. Apple’s mobile Mail signature setting is intended for text; create image-heavy signatures on a desktop or web mail service instead.
If no mobile signature is configured, Gmail may use the signature created on the computer for new messages.
Outlook mobile signatures are separate from signatures created in new Outlook, classic Outlook, Outlook for Mac, or Outlook on the web.
The Yahoo Mail mobile app keeps its own signatures:
To use a signature file instead:
For Gmail formatting problems, make sure compose mode is not set to plain text. Broken images may need to be reinserted, resized, or made accessible to recipients. Gmail recommends compact signature images and may hide repeated signatures under the trimmed-content control in long conversations.
Work and school accounts may have a company disclaimer added after the message leaves your device. Microsoft 365 and Exchange administrators can apply these through mail-flow rules, so the footer may not be visible while composing or in the same position as your personal signature. If required company text is missing, duplicated, or incorrect, contact the organization’s mail administrator rather than adding another copy manually.
 Before creating the signature
Prepare the text and any image you intend to use. A practical signature normally includes:- Your name
- Job title or short sign-off
- Company or organization
- One phone number or email address
- A website link, if relevant
- A small logo, if the mail app supports images
If you use several email accounts or sending addresses, create or assign the signature separately for each account. Mobile mail apps may also maintain a signature that is independent of the desktop or web version.
Create a signature in Gmail on the web
Use this method when composing mail through Gmail in a desktop browser.- Open Gmail and sign in.
- Select the Settings gear in the upper-right corner.
- Select See all settings.
- On the General tab, scroll to the Signature section.
- Select Create new if Gmail displays that button.
- Enter a recognizable signature name, such as
WorkorPersonal. - Type the signature in the editing box.
- Use the toolbar to apply formatting, add a link, or insert an image.
- Under Signature defaults, select the signature for:
- For new emails use
- On reply/forward use
- Scroll to the bottom and select Save Changes.
If you use Gmail’s Send mail as feature, select the appropriate sending address from the menu above the signature editor. You can assign a different signature to each available address.
To switch signatures while composing:
- Open a new message.
- Select the Insert signature pen icon at the bottom of the compose window.
- Select the required signature or choose No signature.
Create a signature in new Outlook for Windows or Outlook on the web
These instructions apply to new Outlook for Windows, Outlook.com, and the current Outlook on the web interface.- Open Outlook.
- Select the Settings gear.
- Go to Accounts > Signatures.
- If Outlook contains more than one account, select the correct account.
- Select Add signature.
- Give the signature a descriptive name.
- Enter and format the signature in the editor.
- Select the options that apply the signature to:
- New messages
- Replies and forwards
- Select Save.
To add it manually:
- Select New mail or open a reply.
- Open the Message tab.
- Select Signature.
- Choose the saved signature.
Microsoft notes that signatures may need to be created separately in Outlook and Outlook on the web, depending on the account and Outlook version. Send a test from each interface rather than assuming that a signature has synchronized.
Create a signature in classic Outlook for Windows
Use these steps if Outlook has a File tab and does not use the new Outlook interface.- Select New Email.
- In the message window, open the Message tab.
- Select Signature > Signatures.
- Under Select signature to edit, select New.
- Enter a name for the signature and select OK.
- Enter and format the content under Edit signature.
- Under Choose default signature, select the applicable E-mail account.
- Choose a default for New messages.
- Choose a default for Replies/forwards, or leave it set to (none).
- Select OK.
You can also reach the editor through:
File > Options > Mail > Signatures
To add a logo:
- Open Signature > Signatures from a message.
- Select the signature.
- Place the cursor where the logo should appear.
- Select the picture button.
- Choose the image and select Insert.
- Select OK to save.
Create a signature in Outlook for Mac
The current Outlook for Mac supports text, links, pictures, and tables in signatures.- Open Outlook.
- Select Outlook > Settings.
- Under Email, select Signatures.
- Select Standard and rename it, or select the Add button.
- Enter a signature name.
- Enter and format the content in the signature editor.
- Select Save, and then close the editor.
- Return to Outlook > Settings > Signatures.
- Under Choose default signature, select the email account.
- Choose a signature for New messages.
- Choose a signature for Replies/forwards.
- Close the Signatures window.
Create a signature in Apple Mail on Mac
Apple Mail stores signatures by account and can also keep signatures in an All Signatures collection.- Open the Mail app.
- Select Mail > Settings.
- Select Signatures.
- In the left column, select the email account.
- Select the Add button below the middle column.
- Enter a name for the signature.
- Enter the signature in the right-hand preview area.
- Use the Edit and Format menus to add links or format the text.
- If required, drag a small image into the preview area.
Use the account’s Choose Signature menu to select a default. While composing, use the Signature pop-up menu in the message window to change or remove the selected signature.
For replies, clear Place signature above quoted text if you want the signature placed below the quoted conversation instead.
Create a signature in iCloud Mail on the web
iCloud Mail on the web supports an automatic plain-text signature.- Sign in to Mail on iCloud.com.
- Select the Settings button above the Mailboxes list.
- Select Settings.
- Select Composing in the sidebar.
- Scroll down and select Add a signature.
- Enter the signature text.
Set a signature in Apple Mail on iPhone or iPad
On current iPhone and iPad software:- Open Settings.
- Go to Apps > Mail.
- Tap Signature.
- Delete the default text and enter your signature.
- If several mail accounts are configured, select Per Account to enter a different signature for each account.
This setting controls messages sent through Apple’s Mail app. It does not configure the separate Gmail, Outlook, Yahoo, or Proton apps. Apple’s mobile Mail signature setting is intended for text; create image-heavy signatures on a desktop or web mail service instead.
Set a signature in the Gmail mobile app
Gmail for Android
- Open the Gmail app.
- Tap Menu.
- Scroll down and tap Settings.
- Select the Google Account.
- Tap Mobile signature.
- Enter the signature.
- Tap OK.
If no mobile signature is configured, Gmail may use the signature created on the computer for new messages.
Gmail for iPhone and iPad
- Open Gmail.
- Tap Menu > Settings.
- Under Compose and Reply, tap Signature settings.
- Turn on Mobile Signature.
- Enter or edit the signature.
- Tap Back to save.
Set a signature in Outlook for Android or iPhone
- Open the Outlook app.
- Open Settings.
- Under Mail, tap Signature.
- Enter the signature you want to use.
Outlook mobile signatures are separate from signatures created in new Outlook, classic Outlook, Outlook for Mac, or Outlook on the web.
Create a signature in Yahoo Mail
In the current Yahoo Mail web interface:- Open Yahoo Mail.
- Select More options.
- Select Settings.
- Open Writing email.
- Turn on the signature toggle for the required email address.
- Enter or edit the signature in the text box.
The Yahoo Mail mobile app keeps its own signatures:
- Tap the profile icon.
- Tap Settings.
- Tap Signatures.
- Enable signatures.
- Enter the signature text.
Create a signature in Proton Mail
Proton Mail on the web
- Sign in to your Proton Account.
- Open Settings > All settings.
- Select Identity and addresses.
- Scroll to Display name and signature.
- If you have multiple addresses, select the required Email address.
- Enter and format the signature.
- Select Update.
Proton Mail mobile
- Open the Proton Mail app.
- Go to Menu > Settings > Signature > Mobile signature.
- Edit the text.
- Use the toggle to enable or disable it.
Create a signature in Thunderbird
Thunderbird stores signatures for each account or identity.- Open Thunderbird.
- Open the application menu and select Account Settings. You can also use Tools > Account Settings when the menu bar is visible.
- Select the email account in the left pane.
- Enter the signature in Signature text.
To use a signature file instead:
- Select Attach the signature from a file instead.
- Select Choose.
- Choose a plain-text or HTML file containing the signature.
Verify that the signature works
Test from every app you regularly use.- Compose a new message to another address you can access.
- Confirm that the correct account is shown in the From field.
- Verify that the signature appears once.
- Send the message.
- Check it in both a desktop and mobile mail client.
- Reply to the message and verify the reply signature.
- Repeat the test from your phone if you also send mobile mail.
For Gmail formatting problems, make sure compose mode is not set to plain text. Broken images may need to be reinserted, resized, or made accessible to recipients. Gmail recommends compact signature images and may hide repeated signatures under the trimmed-content control in long conversations.
Work and school accounts may have a company disclaimer added after the message leaves your device. Microsoft 365 and Exchange administrators can apply these through mail-flow rules, so the footer may not be visible while composing or in the same position as your personal signature. If required company text is missing, duplicated, or incorrect, contact the organization’s mail administrator rather than adding another copy manually.
References
- Primary source: Technobezz
Published: 2026-07-13T16:19:09.562000+00:00
How to Create an Email Signature in Gmail Outlook Apple Mail and More | Technobezz
How to create an email signature in Gmail, Outlook, Apple Mail, Yahoo, Proton Mail, Thunderbird, and mobile email apps.www.technobezz.com - Related coverage: help.yahoo.com
Add, edit, or disable your signature in Yahoo Mail | New Yahoo Mail Help | Yahoo Help
Automatically add your contact info or a favorite quote to each outgoing email. Learn how to create, change, or turn off your signature to express how you feel today.help.yahoo.com - Official source: support.microsoft.com
How to add and change an email signature in Outlook | Microsoft Support
How to create or edit your Outlook signature for email messages. Include your signature, text, images, electronic business card, and logo.support.microsoft.com - Official source: support.google.com

Create a Gmail signature - Android - Gmail Help
An email signature is text, like your contact information or a favourite quote, that's automatically adde
support.google.com
- Official source: support.apple.com
Fill out forms, sign documents, and create signatures iPhone – Apple Support (UK)
Use your iPhone to fill out forms, add your signature, and then send the forms to others. You can also create multiple signatures to use in different images and documents.support.apple.com
- Related coverage: proton.me
Set a sender name and signature for your emails | Proton
You can customize your Proton Mail display name and email signature. This adds a personal touch to your messages and helps recipients identify you.proton.me
