Set Up and Manage Windows 10/11 Wireless Display Projection to a TV or Second PC
Difficulty: Beginner | Time Required: 15 minutesWant to show your laptop screen on a TV without an HDMI cable, or use another Windows PC as a wireless second display? Windows 10 and Windows 11 both support wireless display projection using Miracast and the built-in Project feature. It’s a handy way to share presentations, stream photos, watch videos on a bigger screen, or extend your desktop to a second PC.
This guide walks you through how to connect, choose the right projection mode, and fix the most common problems if it doesn’t work the first time.
Introduction
Wireless projection solves a simple but common problem: you want a bigger screen or an extra display, but you don’t want to deal with cables. With the right hardware and settings, Windows can project to:Quick walkthrough
- A Miracast-compatible TV
- A wireless display adapter
- Another Windows 10/11 PC set up to receive projections
Prerequisites
Before you begin, make sure you have the following:- A PC running Windows 10 or Windows 11
- A TV, monitor, wireless adapter, or second PC that supports wireless display/Miracast
- Wi-Fi enabled on both devices
- Both devices reasonably close together for the initial connection
Version notes
- Windows 10: Wireless projection features are available in most modern editions, but menus may look slightly different depending on your build.
- Windows 11: The steps are very similar, but Settings pages are more streamlined.
- On some systems, the Wireless Display feature may need to be installed first.
Note: Not every PC supports Miracast. Older hardware, outdated Wi-Fi drivers, or unsupported graphics adapters can prevent wireless projection from working.
Step 1: Check whether your PC supports wireless projection
Before troubleshooting anything else, confirm your PC can actually project wirelessly.- Press Windows + K on your keyboard.
- If the Cast or Connect panel opens and starts searching for displays, that’s a good sign.
- If nothing useful appears, you may still need to install or enable Wireless Display.
- Press Windows + R, type
dxdiag, and press Enter. - Let DirectX Diagnostic Tool finish loading.
- Click Save All Information if you want a report, or check your display/network hardware details manually.
Tip: If Windows + K opens normally, don’t overthink the advanced checks unless you’re having trouble connecting.
Step 2: Install the Wireless Display feature if needed
Some PCs, especially clean installs or managed systems, may not have the feature installed.On Windows 11
- Open Settings.
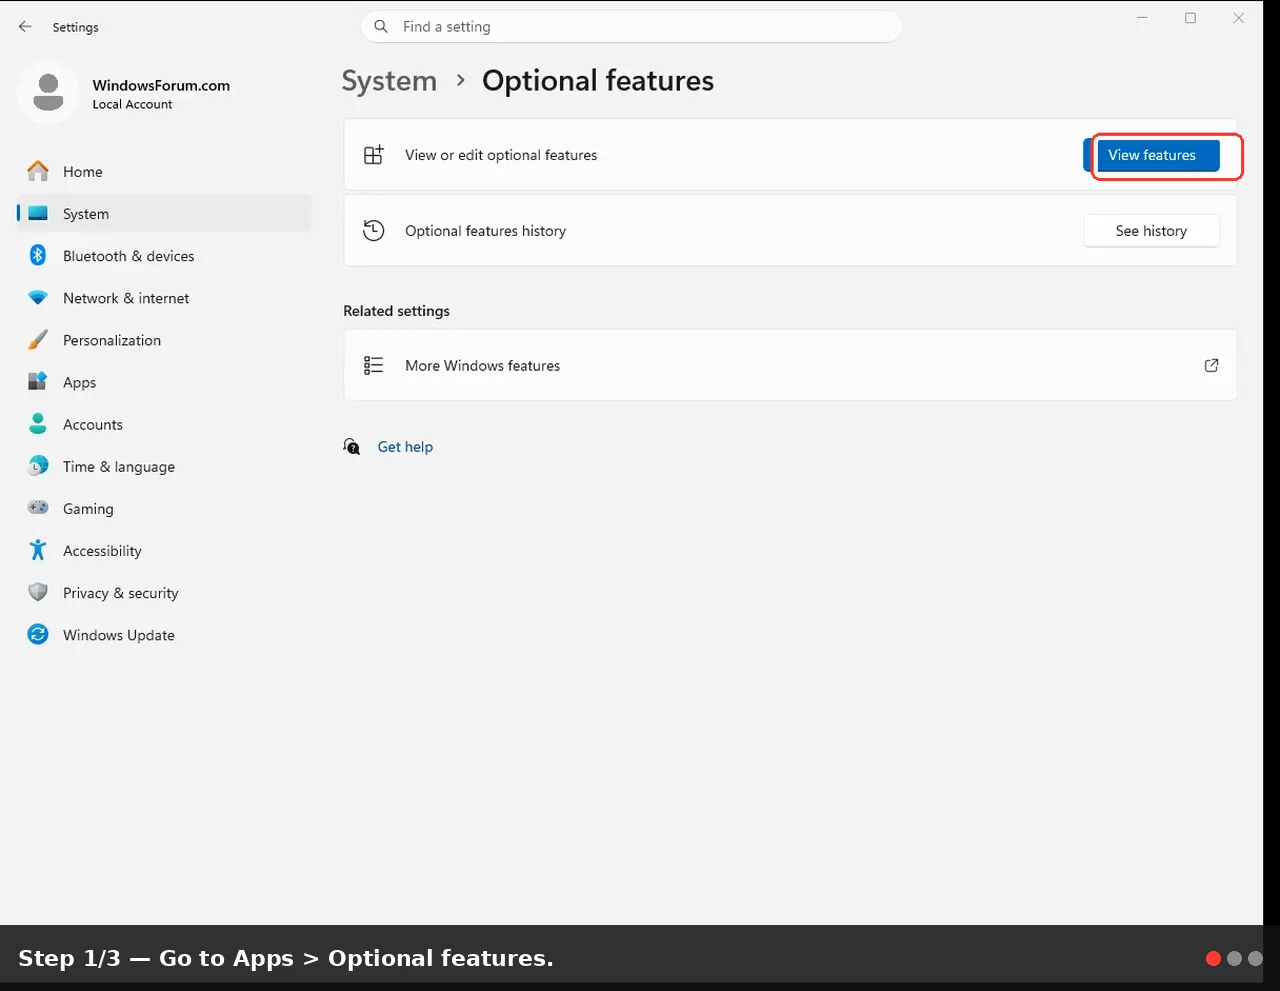
- Go to Apps > Optional features.
- Click View features next to Add an optional feature.
- Search for Wireless Display.
- Check it and click Next, then Install.
On Windows 10
- Open Settings.
- Go to Apps.
- Click Optional features.
- Select Add a feature.
- Search for Wireless Display.
- Select it and install it.
Warning: If your PC is managed by work or school, optional features may be blocked by policy.
Step 3: Set up a second Windows PC to receive projection
If you want to use another computer as the display, that receiving PC must be configured first.On Windows 11 or Windows 10 receiving PC
- Open Settings.
- Go to System.
- Select Projecting to this PC.
- Choose your preferred options, such as:
- Available everywhere
- Available everywhere on secure networks
- Ask to project to this PC every time
- Require PIN for pairing
- Leave the receiving PC powered on and connected to Wi-Fi.
Once enabled, that PC should be discoverable from the sending device.
Tip: If you only want trusted devices to connect, enable the PIN requirement for extra security.
Note: On some newer Windows 11 systems, Projecting to this PC may depend on the Wireless Display optional feature being installed first.
Step 4: Connect to a TV, wireless display, or second PC
Now it’s time to start the connection from the PC you want to project from.- Press Windows + K.
- A list of available wireless displays should appear.
- Click your TV, adapter, or second PC from the list.
- Accept the connection on the receiving device if prompted.
- Wait a few moments while Windows establishes the connection.
- The TV supports screen mirroring or Miracast
- It is on the correct input/source
- Wireless display mode is enabled if required by the manufacturer
Warning: Many smart TVs support casting for apps but not full Windows Miracast projection. If your TV never appears, check the TV’s manual or specs.
Step 5: Choose your projection mode
Once connected, decide how you want Windows to use the second screen.Press Windows + P to open projection options:
- PC screen only
Uses only your main screen. - Duplicate
Shows the same content on both screens.
Best for: - Presentations
- Watching videos on a TV
- Demonstrations
- Extend
Turns the wireless display into a second monitor.
Best for: - Multitasking
- Moving apps between screens
- More desktop space
- Second screen only
Uses only the wireless display.
Best for: - Streaming to a TV
- Closing the laptop lid while using an external display setup
Tip: Most users projecting to a TV will want Duplicate, while users projecting to a second PC for work will usually prefer Extend.
Step 6: Adjust display layout and resolution
If the screens don’t look right, fine-tune the display settings.- Open Settings.
- Go to System > Display.
- You should see both displays represented as numbered boxes.
- Click Identify if needed.
- Drag the displays to match their physical positions.
- Scroll down to adjust:
- Display resolution
- Scale
- Multiple displays behavior
If you’re using Extend, arranging the displays properly makes moving the mouse between screens much easier.
Note: Wireless displays may have slightly higher latency than HDMI-connected monitors, so they’re best for general use, office work, media, and presentations rather than fast-paced gaming.
Step 7: Disconnect or reconnect later
When you’re done projecting:- Press Windows + K.
- Select the connected display.
- Click Disconnect.
Windows may remember previously connected wireless displays, making future connections faster.
Tips and Troubleshooting
Here are the most common fixes if wireless projection doesn’t work.If the TV or PC doesn’t appear
- Make sure Wi-Fi is turned on for both devices.
- Bring the devices closer together.
- Confirm the receiving device supports Miracast.
- Restart both devices and try again.
If connection fails partway through
- Update your graphics drivers and wireless network drivers.
- Remove the device and reconnect:
- Open Settings > Bluetooth & devices or Devices
- Remove the wireless display if listed
- Try pairing again
If “Projecting to this PC” is missing
- Install the Wireless Display optional feature.
- Check whether your Windows edition or device policy limits the feature.
If the picture lags or stutters
- Move closer to the router or reduce interference.
- Disconnect unused Wi-Fi devices if your network is crowded.
- Lower the display resolution if needed.
If audio stays on the laptop
- Check the volume/output icon in the taskbar.
- Select the TV or wireless display as the audio output device if Windows doesn’t switch automatically.
Helpful tip: For best results, keep Windows fully updated. Wireless display reliability often improves with newer graphics and Wi-Fi drivers.
Conclusion
Wireless projection in Windows 10 and 11 is a simple way to share your screen, enjoy media on a TV, or add a second display without running cables across the room. Once you know how to enable the feature, connect with Windows + K, and choose the right mode with Windows + P, it becomes a very useful tool for both home and office use.If you run into issues, they’re usually caused by unsupported hardware, missing optional features, or outdated drivers—problems that are often easy to fix.
Key Takeaways:
- Wireless projection lets you connect a Windows PC to a TV or second PC without HDMI
- Windows + K is the fastest way to find and connect to wireless displays
- Windows + P lets you switch between Duplicate, Extend, and other display modes
- A second PC must be set up under Projecting to this PC before it can receive a connection
- Most connection problems are caused by missing Miracast support, disabled Wi-Fi, or outdated drivers
This tutorial was generated to help WindowsForum.com users get the most out of their Windows experience.
Last edited: