

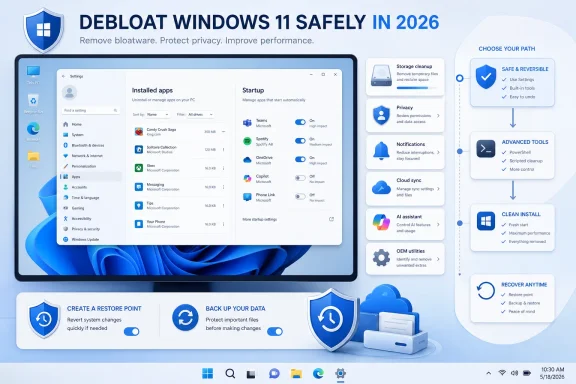
The safest way to debloat Windows 11 in 2026 is to uninstall recognizable applications through Settings, disable unnecessary startup items, hide promotional surfaces, and clean temporary files before considering PowerShell or a clean installation. These instructions cover current Windows 11 Home and Pro PCs, including Copilot+ PCs. On organization-managed Enterprise or Education devices, use only changes approved by your IT administrator.
Debloating should reduce unwanted software without damaging Windows Update, security, device drivers, recovery tools, or features you actually use.
Before starting:
Some entries provide Modify or Advanced options instead of an immediate uninstall. Use Repair when you want to fix an application rather than remove it. Reset deletes the app’s local data and restores its defaults, so it is not a debloating step.
You can also remove an application from Start:
To remove the synchronization client:
Keep security software, accessibility tools, cloud synchronization services you use, password managers, and hardware-control utilities enabled.
Do not use a clean boot as a permanent debloating configuration. Clean boot disables non-Microsoft services for troubleshooting and should be reversed after identifying the conflicting software.
For a one-time cleanup, open Settings > System > Storage > Temporary files, review the categories, and select Remove files.
If you want to retain the feature but erase its data instead, open Settings > Privacy & security > Recall & snapshots > Advanced settings and use the available reset or deletion controls. Windows Hello confirmation may be required.
Instead, change the default browser and remove Edge add-ons you do not use.
Alternatively, use its exact name:
Read the displayed package information before confirming. Wildcards are not supported for WinGet uninstall queries, and ambiguous names may match the wrong entry unless you use an exact ID.
WinGet invokes the application’s registered uninstaller; it does not make an otherwise essential Windows component safe to remove.
These commands are administration tools, not a general cleanup shortcut. Broad commands that pipe every package into removal can affect Microsoft Store, App Installer, Start dependencies, codecs, security interfaces, and recovery functionality.
Third-party debloaters also commonly combine several unrelated actions:
To reverse a bad script, first use its documented undo option. If none exists, run System Restore:
If the reset workflow offers Restore preinstalled apps, enabling it reapplies manufacturer applications and customizations. Disable that option when your objective is to avoid restoring OEM software, but be prepared to reinstall necessary manufacturer utilities afterward.
Create official Windows 11 installation media on a working PC, boot the target computer from it, and select Install Windows 11. When Setup displays the confirmation that files, apps, and settings will be deleted, proceed only after verifying the backup. Install the same Windows edition—Home or Pro—that matches the device’s license.
After installation:
 Before removing anything
Debloating should reduce unwanted software without damaging Windows Update, security, device drivers, recovery tools, or features you actually use.Before starting:
- Install pending updates from Settings > Windows Update, then restart.
- Back up important files.
- Sign in with an administrator account if an uninstall requires elevation.
- Confirm that OneDrive or another backup service has finished syncing.
- Note which OEM applications support hardware-specific functions such as battery limits, fan modes, function keys, firmware updates, pen controls, or audio effects.
- Microsoft Visual C++ Redistributables
- Microsoft .NET components and runtimes
- Windows Security and Microsoft Defender components
- Hardware drivers from Intel, AMD, NVIDIA, Realtek, Qualcomm, or your PC manufacturer
- Microsoft Store, App Installer, Windows Terminal, WebView2 Runtime, and Windows Update components
- OEM firmware, hotkey, thermal-management, docking, or battery-management services
- Press Windows key + R.
- Enter
systempropertiesprotection.exeand select OK. - Select the Windows system drive.
- If protection is disabled, select Configure, choose Turn on system protection, and select OK.
- Select Create.
- Enter a description such as
Before debloating, then select Create.
Remove recognizable apps through Settings
Settings is the primary and safest removal method because it uses each app’s registered uninstaller.- Open Start > Settings > Apps > Installed apps.
- Use the search box or sorting controls to locate an application.
- Select the More options three-dot button beside it.
- Select Uninstall.
- Confirm the removal and complete any separate uninstall wizard.
- Restart if the uninstaller requests it.
Some entries provide Modify or Advanced options instead of an immediate uninstall. Use Repair when you want to fix an application rather than remove it. Reset deletes the app’s local data and restores its defaults, so it is not a debloating step.
You can also remove an application from Start:
- Open Start > All.
- Right-click the application.
- Select Uninstall.
- Search for and open Control Panel.
- Select Programs > Programs and Features.
- Select the program.
- Choose Uninstall or Uninstall/Change.
Handle Copilot, OneDrive, and OEM utilities carefully
Remove the Copilot app
When Microsoft Copilot is installed as a removable application:- Open Settings > Apps > Installed apps.
- Search for
Copilot. - Select its More options button.
- Select Uninstall.
Unlink or uninstall OneDrive
Unlinking OneDrive is preferable when you want to stop synchronization but retain easy access to the client.- Select the OneDrive cloud icon in the notification area.
- Select Help & Settings, then Settings.
- Open the Account tab.
- Select Unlink this PC.
- Select Unlink account.
To remove the synchronization client:
- Unlink the PC first.
- Open Settings > Apps > Installed apps.
- Find Microsoft OneDrive.
- Select More options > Uninstall.
Review OEM applications
Before removing a manufacturer utility, open it and determine what it controls. Keep software responsible for:- BIOS and firmware updates
- Battery charging thresholds
- Thermal or fan profiles
- Keyboard backlighting and function keys
- Touchpad, pen, camera, or docking features
- Device-specific diagnostics
Disable unnecessary startup applications
Disabling startup entries is a reversible way to reduce sign-in time and background activity while keeping applications installed.Use Settings
- Open Settings > Apps > Startup.
- Review the listed applications.
- Turn an application Off to stop it from starting automatically at sign-in.
- Restart or sign out and back in to test the result.
Keep security software, accessibility tools, cloud synchronization services you use, password managers, and hardware-control utilities enabled.
Use Task Manager
Task Manager displays additional startup-impact information:- Right-click Start and select Task Manager.
- Select Startup apps.
- Select an unwanted startup entry.
- Select Disable.
Do not use a clean boot as a permanent debloating configuration. Clean boot disables non-Microsoft services for troubleshooting and should be reversed after identifying the conflicting software.
Reduce taskbar, Start, privacy, and notification clutter
Many irritating Windows surfaces are settings rather than installed applications. Turning them off is safer than deleting their supporting packages.Hide Widgets and other taskbar buttons
- Right-click an empty area of the taskbar.
- Select Taskbar settings.
- Under Taskbar items, turn Widgets off.
- Turn off any other taskbar item you do not use.
Clean up Start
- Open Start.
- Right-click an unwanted pinned item.
- Select Unpin from Start.
- Open Settings > Personalization > Start.
- Turn off the recommendation, recently added app, or recently opened item options you do not want.
Reduce suggestions and tracking preferences
Open Settings > Privacy & security > General and review the available switches. You can disable options associated with:- Advertising ID use
- Website access to the language list
- Windows tracking app launches to improve Start and search
- Suggested content in Settings
Quiet notifications
- Open Settings > System > Notifications.
- Leave the main notification switch enabled if you still need alerts.
- Scroll to the application list.
- Turn off notifications for noisy applications, or select an app to adjust banners, sounds, and notification priority.
- Expand any additional settings near the bottom and disable optional Windows tips or setup suggestions you do not want.
Recover storage without deleting system components
Storage cleanup can produce more useful free space than removing small built-in applications.Run Cleanup recommendations
- Open Settings > System > Storage > Cleanup recommendations.
- Review each category:
- Temporary files
- Large or unused files
- Files synced to the cloud
- Unused apps
- Select only items you understand.
- Select Clean up for each reviewed section.
Configure Storage Sense
- Open Settings > System > Storage.
- Turn Storage Sense on.
- Select Storage Sense to open its schedule and cleanup options.
- Review how frequently it runs and how it treats the Recycle Bin, Downloads folder, and cloud content.
For a one-time cleanup, open Settings > System > Storage > Temporary files, review the categories, and select Remove files.
Remove optional Windows features only when identified
Optional features can include legacy compatibility components, administration tools, fonts, media support, and specialized networking functions.- Open Settings > System > Optional features.
- Under installed features, locate the feature you recognize.
- Expand or select it.
- Choose Remove if that option is available.
- Restart if Windows requests it.
- Search for Turn Windows features on or off.
- Open the matching Control Panel result.
- Clear the checkbox beside the feature.
- Select OK.
- Restart when prompted.
Remove Recall from a Copilot+ PC
Recall is an optional feature on supported Copilot+ PCs. Saving snapshots requires user opt-in, but you can remove the feature entirely:- Search for Turn Windows features on or off.
- Clear the Recall checkbox.
- Select OK.
- Restart the PC.
If you want to retain the feature but erase its data instead, open Settings > Privacy & security > Recall & snapshots > Advanced settings and use the available reset or deletion controls. Windows Hello confirmation may be required.
Clean up Microsoft Edge without forcing its removal
Microsoft identifies Edge as an essential Windows component used by features such as web apps and Widgets. Unsupported Edge-removal commands may break dependent applications and can be undone by servicing updates.Instead, change the default browser and remove Edge add-ons you do not use.
Change the default browser
- Install the browser you want.
- Open Settings > Apps > Default apps.
- Select or search for that browser.
- Select Set default if available.
- Review individual file and link associations if a required type still opens in another application.
Remove Edge web apps
- Open Microsoft Edge.
- Enter
edge://appsin the address bar. - Select Details on an unwanted app card.
- Select Uninstall.
- Choose whether to delete its app history and data.
- Select Uninstall again.
Remove Edge extensions
- Select the Extensions puzzle-piece button.
- Select More actions beside an extension.
- Choose Remove from Microsoft Edge.
- Select Remove to confirm.
Use WinGet only for packages you can identify
Windows Package Manager is useful when Settings cannot locate a conventional application or when you need an exact inventory.- Open Windows Terminal.
- Run:
winget list- Locate the exact application name and package ID.
- Remove it by exact ID:
winget uninstall --id Package.ID --exactAlternatively, use its exact name:
winget uninstall --name "Application Name" --exactRead the displayed package information before confirming. Wildcards are not supported for WinGet uninstall queries, and ambiguous names may match the wrong entry unless you use an exact ID.
WinGet invokes the application’s registered uninstaller; it does not make an otherwise essential Windows component safe to remove.
Avoid broad Appx and debloater scripts
Remove-AppxPackage removes a selected packaged app for a user. Remove-AppxProvisionedPackage changes provisioning so a package is not installed automatically for new user profiles. Provisioning removal does not necessarily remove the app from existing accounts.These commands are administration tools, not a general cleanup shortcut. Broad commands that pipe every package into removal can affect Microsoft Store, App Installer, Start dependencies, codecs, security interfaces, and recovery functionality.
Third-party debloaters also commonly combine several unrelated actions:
- App removal
- Service disabling
- Scheduled-task changes
- Registry policy changes
- Privacy configuration
- Edge or Store modification
To reverse a bad script, first use its documented undo option. If none exists, run System Restore:
- Press Windows key + R.
- Enter
rstrui.exe. - Select Next.
- Choose the restore point created before debloating.
- Select Next > Finish.
Reset or clean-install Windows only as a last step
Reset and clean installation are recovery procedures, not routine cleanup.Reset Windows 11
- Back up personal files and recovery keys.
- Open Settings > System > Recovery.
- Under Recovery options, select Reset PC.
- Choose Keep my files or Remove everything.
- Choose Cloud download or Local reinstall.
- Review Change settings before continuing.
- Follow the prompts and allow the PC to restart.
If the reset workflow offers Restore preinstalled apps, enabling it reapplies manufacturer applications and customizations. Disable that option when your objective is to avoid restoring OEM software, but be prepared to reinstall necessary manufacturer utilities afterward.
Perform a clean installation
Warning: A clean installation deletes personal files, applications, manufacturer customizations, and Settings changes from the Windows installation. Back up data, BitLocker recovery keys, browser information, licenses, and application installers first.Create official Windows 11 installation media on a working PC, boot the target computer from it, and select Install Windows 11. When Setup displays the confirmation that files, apps, and settings will be deleted, proceed only after verifying the backup. Install the same Windows edition—Home or Pro—that matches the device’s license.
After installation:
- Connect to the internet and allow activation to complete.
- Run Settings > Windows Update > Check for updates repeatedly.
- Install required drivers from Windows Update or the PC manufacturer.
- Verify audio, Wi-Fi, Bluetooth, graphics, camera, function keys, and sleep.
- Reinstall applications individually instead of restoring an unreviewed software bundle.
References
- Primary source: Technobezz
Published: 2026-07-13T18:45:03.047000+00:00
How to Debloat Windows 11 Safely in 2026 | Technobezz
Debloat Windows 11 safely with built-in uninstall, startup, privacy, cleanup, and reset tools.www.technobezz.com
