

UpperFilters and LowerFilters values from the CD/DVD device-class registry key. These steps apply to built-in SATA optical drives and many external USB optical drives. Windows 10 reached end of free Microsoft support on October 14, 2025, but the troubleshooting procedure remains applicable to both Windows 10 and Windows 11.
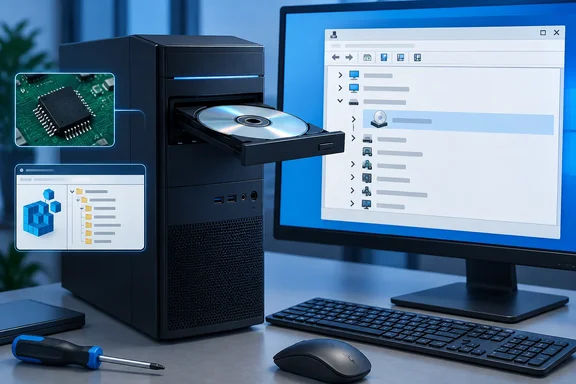 Identify whether Windows or the hardware has lost the drive
Before changing drivers or the registry, determine where the drive disappears. This avoids treating a cable, power, USB-port, or firmware issue as a Windows configuration problem.
- Shut down Windows completely, then start the PC again.
- If the drive is external:
- Disconnect it and connect it directly to another USB port on the PC. Do not use a hub or docking station while testing.
- If the drive has an external power supply, confirm that it is connected and powered.
- Test with another known-good USB cable if the enclosure uses a removable cable.
- If possible, test the drive on another computer.
- Insert a known-good data CD or DVD. Listen for the drive spinning up and check whether its activity light responds, if it has one.
- Open Device Manager:
- Press the Windows key.
- Type Device Manager.
- Press Enter.
- Expand DVD/CD-ROM drives.
- If the drive appears here, Windows can at least detect it. Continue with the driver checks below.
- If it appears with a yellow warning icon, open its status details:
- Right-click the drive and select Properties.
- Stay on the General tab.
- Read the Device status message.
Common messages include Code 19, Code 31, Code 32, Code 39, and Code 41. These codes point to a driver or configuration issue and make the registry-filter repair especially relevant.
- If the DVD/CD-ROM drives category is absent:
- In Device Manager, select View.
- Select Show hidden devices.
- Check again for DVD/CD-ROM drives and for a faded optical-drive entry.
A faded entry can indicate that Windows remembers a previously connected or detected device but cannot currently communicate with it. For an external drive, reconnect it directly to the PC and repeat the check. For an internal drive that is absent even as a hidden device, check firmware detection before making registry changes.
Confirm the drive is enabled in BIOS or UEFI firmware
Firmware is the layer that detects internal hardware before Windows starts. If an internal optical drive is disabled or missing there, Windows cannot restore it by reinstalling a driver or editing the registry.
- Restart the computer.
- Open the PC’s firmware setup screen during startup. The required key varies by manufacturer; it is commonly shown briefly on the startup screen.
- Look for a section such as Storage, Drives, SATA Configuration, Integrated Devices, or Boot.
- Confirm that the optical drive is listed and enabled.
- If the drive is listed as disabled, enable it, save the firmware configuration, and restart Windows.
- If the drive is not listed in firmware:
- Shut the PC down.
- For a desktop with an internal SATA optical drive, check that the drive has both power and data connections only if you are comfortable servicing the hardware and the manufacturer permits access.
- For a laptop or all-in-one PC, do not force open the chassis. Use the PC manufacturer’s service guidance or arrange hardware service.
- For an external USB drive, return to the direct USB-port and cable test.
Do not reset all firmware settings simply because the optical drive is missing. A complete firmware reset can change boot, storage, security, and virtualization settings without addressing a failed or disconnected drive.
Reinstall the optical-drive device in Device Manager
If the drive appears in Device Manager, reinstalling its device entry makes Windows detect the hardware again and reinstall the driver on restart.
Warning: Save open work before proceeding. Windows must restart after this procedure. Do not select options to remove a driver package unless you have a specific reason and a replacement driver from the PC or drive manufacturer.
- Open Device Manager.
- Select View > Show hidden devices.
- Expand DVD/CD-ROM drives.
- Right-click the affected CD/DVD drive and select Uninstall device.
- When asked to confirm, select Uninstall.
- Restart the computer.
After the restart, Windows should rediscover the drive and reinstall its device driver automatically. Open Device Manager again and check DVD/CD-ROM drives.
If the drive is present without a warning icon, open File Explorer and select This PC. The optical drive should appear when Windows assigns it a drive letter. Insert a known-good disc to confirm that it can read media.
Update the manufacturer’s chipset or device software
If uninstalling the device does not help, obtain current chipset drivers from the PC manufacturer’s support site. For a separately purchased optical drive, use the drive manufacturer’s support site.
This is particularly important after a Windows upgrade, motherboard replacement, or storage-controller update. Install only a driver package that matches the exact PC model and installed Windows version, then restart when the installer requests it.
If the drive stopped working immediately after a driver update and the Roll Back Driver button is available:
- In Device Manager, right-click the optical drive and select Properties.
- Select the Driver tab.
- Select Roll Back Driver.
- Follow the prompts and restart Windows.
The rollback option is unavailable when Windows has no previous driver version to restore.
Reinstall IDE/ATAPI controller entries when they are present
Microsoft also documents reinstalling IDE/ATAPI controller entries for certain optical-drive detection failures. This is not applicable on every modern PC. Only use it if Device Manager contains the IDE ATA/ATAPI controllers category and the listed controller entries match those described below.
Warning: These entries can be connected to the system’s storage controller. Follow the list carefully, remove only the indicated controller entries, and restart immediately afterward. Do not use this method if you are unsure which storage controller Windows uses.
- Open Device Manager.
- Select View > Show hidden devices.
- Expand IDE ATA/ATAPI controllers.
- Right-click ATA Channel 0 and select Uninstall device.
- Right-click ATA Channel 1 and select Uninstall device.
- Right-click Standard Dual Channel PCI IDE Controller and select Uninstall device.
- If additional entries are present in this same category, uninstall them one at a time only when they are part of the IDE/ATAPI controller group.
- Restart the PC.
Windows reinstalls the applicable controller drivers after startup. Check Device Manager and File Explorer again.
Remove corrupted UpperFilters and LowerFilters values
The UpperFilters and LowerFilters values allow software to insert filter drivers into the CD/DVD device stack. Disc-burning, disc-authoring, virtual-drive, and media-related software can use these entries. If an entry is corrupted or incompatible, Windows may show Code 19, 31, 32, 39, or 41 and the drive may disappear from File Explorer.
Warning: Registry changes can prevent Windows or applications from working correctly if you change the wrong key or value. Sign in with an administrator account. Create a restore point before continuing, and delete only the two values named below—never the entire registry key.
Create a restore point first
- Press the Windows key and type Create a restore point.
- Select Create a restore point from the search results.
- In the System Protection tab, select the system drive.
- If protection is off, select Configure, choose Turn on system protection, select Apply, then return to the System Protection tab.
- Select Create.
- Enter a description such as
Before DVD filter repair, then select Create. - Wait for Windows to confirm that the restore point was created.
Delete only the two filter values
- Press Windows key + R to open Run.
- Type
regeditand press Enter. - When User Account Control asks for permission, select Yes.
- In the left pane, browse to this key:
HKEY_LOCAL_MACHINE\SYSTEM\CurrentControlSet\Control\Class\{4D36E965-E325-11CE-BFC1-08002BE10318} - Confirm that you selected the key ending in:
{4D36E965-E325-11CE-BFC1-08002BE10318}
This is the CD/DVD device-class key. Do not delete similarly named values from another key. - In the right pane, look for UpperFilters.
- If it exists, right-click UpperFilters and select Delete.
- Select Yes to confirm.
- If you see UpperFilters.bak, leave it alone.
- Look for LowerFilters.
- If it exists, right-click LowerFilters and select Delete.
- Select Yes to confirm.
- Close Registry Editor.
- Restart the computer.
After the restart, open Device Manager. The drive should reappear under DVD/CD-ROM drives if the filter entries were the cause. Check File Explorer > This PC, then test with a known-good disc.
Removing these values can affect CD/DVD recording or disc-authoring applications that installed the filters. If the drive returns but recording software stops working, reinstall that application using its current installer rather than restoring the deleted filter values manually.
Verify that the repair worked
Use all three checks; seeing a drive letter alone does not confirm that the drive can read media.
- In Device Manager, expand DVD/CD-ROM drives.
- The drive should be listed.
- It should not have a yellow warning icon.
- In Properties > General, Device status should report that the device is working properly.
- In File Explorer, select This PC.
- The optical drive should be visible, normally with an assigned drive letter.
- Insert a known-good data disc.
- Windows should recognize the disc.
- Opening the drive in File Explorer should display its contents.
If File Explorer sees the drive but cannot read any discs, test more than one disc type. A drive that is visible in firmware and Device Manager but cannot read known-good media may have a failing laser, unsupported media, or a hardware fault.
Troubleshoot failures and recover from a bad change
The drive is missing from Device Manager and firmware
This is not a Windows registry or driver problem. For an internal drive, the likely fault is with the drive itself, its SATA data connection, power connection, or the motherboard port. For an external drive, test another USB port, cable, and computer. If it remains undetected outside Windows, contact the PC or drive manufacturer for hardware service.
The drive appears in Device Manager with Code 19, 31, 32, 39, or 41
Start with the Device Manager uninstall-and-restart procedure. If the code persists, use the registry-filter procedure and restart. These are the Windows device-status errors most closely associated with corrupted configuration or unavailable optical-drive drivers.
The drive returned, but disc-burning software stopped working
Removing UpperFilters or LowerFilters can affect applications that provide CD/DVD recording features. Uninstall and reinstall the affected application, preferably using a version supported by your Windows release. Do not recreate registry values from memory or copy them from another computer.
The drive disappeared after a Windows or driver update
If the timing is clear and Roll Back Driver is available in the drive’s Device Manager properties, roll back the driver and restart. Then install current chipset drivers from the PC manufacturer.
Also check for Windows updates:
- Windows 11: Select Start > Settings > Windows Update > Check for updates.
- Windows 10: Select Start > Settings > Update & Security > Windows Update > Check for updates.
Restart after applicable updates install.
Windows becomes unstable after the registry repair
Use the restore point created before the change:
- Press Windows key + R.
- Type
rstrui.exeand press Enter. - Select Next.
- Choose the restore point created before the DVD filter repair.
- Optionally select Scan for affected programs.
- Select Next > Finish.
Windows restarts and restores its system files, installed programs, system settings, and registry configuration to the selected restore point.