

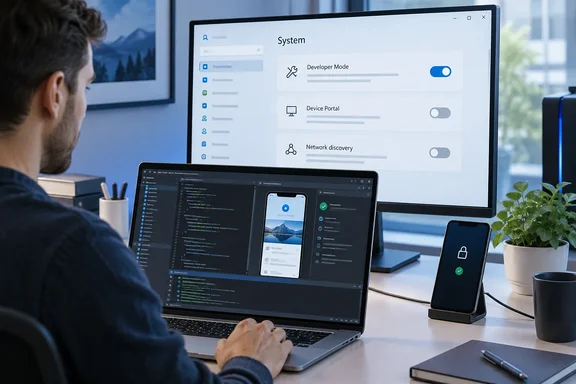
Microsoft’s current documentation also makes an important distinction: Developer Mode enables development-oriented capabilities, while network-facing tools such as Device Portal and Device Discovery require their own opt-in. In other words, turning on Developer Mode does not fling open every door in the lab.
 Before you begin
You will need:
- A Windows administrator account, or access to someone who can approve the change.
- An internet connection if Windows needs to download the optional Developer Mode package.
- A clear reason to enable it—such as testing a Visual Studio build, registering an unpackaged app layout, using a local development certificate, or deploying to another Windows device.
On a work-managed PC, the control may be unavailable or greyed out. That is usually policy rather than a broken Settings app; an organization can block sideloading and Developer Mode through Group Policy or device management.
Enable Developer Mode in Windows 11
The exact location depends on the Windows 11 release installed on your PC.
Windows 11 version 25H2 and later
- Open Settings.
- Select System.
- Open Advanced.
- Scroll to For developers.
- Turn on Developer Mode.
- Read the confirmation prompt and select Yes.
Earlier Windows 11 releases
- Open Settings.
- Go to System > For developers.
- Turn on Developer Mode.
- Confirm the warning by selecting Yes.
If the menu path looks different from the instructions, use the search field at the top of Settings and search for Developer Mode. Microsoft moved the former For developers page into System > Advanced beginning with Windows 11 version 25H2, so old screenshots can send you on a brief Settings scavenger hunt.
Enable Developer Mode in Windows 10
- Open Settings.
- Select Update & Security.
- Choose For developers from the left pane.
- Select Developer mode and approve the confirmation prompt.
Depending on the Windows 10 build and the task, you may also see an option related to Sideload apps. Sideloading allows trusted app packages from outside the Microsoft Store, but Developer Mode is the broader setting for app building, debugging, and IDE deployment. If you are developing locally, select Developer Mode rather than enabling more features by hand and hoping they all agree with one another.
What Developer Mode actually unlocks
Developer Mode is not a compiler, SDK, or magic “make my code work” button. You still need your actual tools—Visual Studio, the.NET SDK, Windows App SDK, Node.js, Python, or whatever your project uses. What it changes is Windows’ posture toward development and test deployments.
1. App sideloading and local package testing
A sideloaded app is installed outside the Microsoft Store. This is common when testing an MSIX/AppX package, deploying an internal line-of-business app, or validating a build before distribution.
That added flexibility comes with a security boundary: Windows expects the package to be signed with a certificate the device trusts. Developer Mode helps with development workflows, but it is not a permission slip to install random packages scraped from the web like mystery leftovers from the back of the refrigerator.
A typical safe workflow looks like this:
- Build your app package from your trusted project source.
- Use the development certificate created or specified by your build tools.
- Trust that certificate only on the test device that needs it.
- Install and test the package.
- Remove test certificates and disable Developer Mode when the work is complete.
2. Deployment and debugging from an IDE
Developer Mode replaces the old developer-license requirement for Windows app development. Visual Studio can use it when deploying and debugging a project directly on the local PC or to an appropriately configured test device.
Microsoft notes that the Developer Mode package is required for remote deployment to that PC, but not for ordinary local development. So if Visual Studio can build and run locally but Device Portal or remote deployment fails, the problem may be the optional package or corporate update policy—not your code.
3. Symbolic-link workflows
Symbolic links let one file-system location point to another. They are especially useful for source trees, package managers, monorepos, build output folders, and projects that expect Unix-style linking behavior.
Windows has long supported symbolic links, but creating them traditionally often required elevation or a specific user right. The Windows API includes an option for allowing non-elevated symbolic-link creation; Microsoft documents that Developer Mode is required for that option in UWP scenarios, while MSIX has different requirements.
The practical takeaway is simple:
- If a development tool complains that it cannot create a symlink, Developer Mode may be one part of the fix.
- It is not a universal cure. Folder permissions, antivirus controls, repository settings, and organization-assigned user rights can still block the operation.
- Do not hand out symbolic-link privileges broadly on shared systems. Microsoft warns that symbolic links can expose weaknesses in software that does not handle them safely.
4. The option to enable Windows Device Portal
Windows Device Portal is a web-based management and diagnostics service for a Windows device. When explicitly enabled, it can expose information and tools for inspecting performance, viewing diagnostics, managing apps, and deploying test packages.
Developer Mode is a prerequisite, but Device Portal remains off by default. To turn it on:
- Enable Developer Mode first.
- Return to the For developers area in Settings.
- Turn on Device Portal.
- Review the Windows prompt and any authentication options.
- Use the address shown by Windows to connect from a browser on the approved local network or from the local device.
On desktop Windows, Device Portal can use dynamically selected high-numbered ports rather than a single permanent port number. Use the URL displayed in Settings instead of guessing.
A security note on Device Portal and Device Discovery
Only enable Device Portal when you actually need it, and do not casually enable Device Discovery on every PC in sight. Device Discovery makes a machine visible through mDNS and can enable the SSH service used for remote deployment. That makes sense for a test tablet or a second development target; it makes far less sense for the laptop that carries your entire working life into coffee shops and airport lounges.
If Developer Mode will not enable
Start with the boring checks. Boring is good; boring fixes things.
- Confirm you have administrator rights. Developer Mode requires elevation.
- Install pending Windows updates and restart.
- Check your network connection. Windows may need to download the Developer Mode feature package.
- Look for company management restrictions. On a managed device, contact the IT administrator rather than editing registry values in a heroic but unapproved act of keyboard archaeology.
- Check Optional features if Windows reports that the Developer Mode package cannot be found or installed.
Microsoft identifies the Developer Mode package as a Feature on Demand. On WSUS-managed or tightly controlled enterprise devices, those feature downloads can be blocked by policy, which prevents remote deployment features such as Device Portal and Device Discovery from being installed.
For automated labs and enterprise deployment, administrators can use Group Policy, MDM, or registry-based configuration. Those methods are legitimate for managed scenarios, but Settings is the safer and clearer route for an individual developer machine because it applies the full user-facing configuration rather than merely flipping a low-level value.
Turn Developer Mode off when the project is finished
When you no longer need local deployment, loose app registration, or remote testing features, disable it from the same Settings page:
- Windows 11 25H2 or later: Settings > System > Advanced > For developers > turn Developer Mode off.
- Earlier Windows 11: Settings > System > For developers > turn Developer Mode off.
- Windows 10: Settings > Update & Security > For developers > turn Developer mode off.
Also turn off Device Portal and Device Discovery separately if you enabled them for a test. Disabling Developer Mode stops the SSH service associated with this development deployment path.
One final cleanup detail matters: switching Developer Mode off does not remove app packages already installed or certificates you previously trusted for development. If this was a temporary test setup, review and remove unneeded test packages and development certificates as well. Microsoft’s current Windows app tooling documentation explicitly calls out that distinction.
The sensible default
Enable Developer Mode on a machine that genuinely builds, tests, or deploys Windows apps. Keep Device Portal and Device Discovery off unless remote testing calls for them. Use trusted packages and certificates. Then switch the features back off when the experiment is over.
That is not paranoia; it is good engineering. The best development workstation is flexible when you need it and boringly locked down when you do not.