

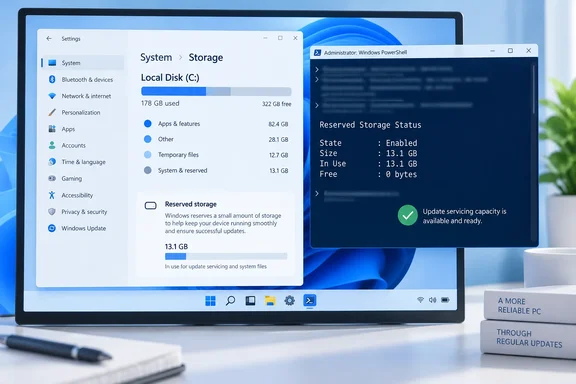
 Understand what Reserved Storage does
Reserved Storage is part of the System & reserved storage category on the Windows system drive, normally C:. It gives Windows working room for update downloads, installation files, temporary data, and system caches. The reserve is not a separate drive or a folder you should try to delete manually.
Its purpose is reliability: Windows Update is less likely to fail simply because personal files, installed apps, or temporary data consumed nearly all free disk space. When the device is low on space, Windows can use reserved capacity for critical operations such as an update.
Disabling the feature does not uninstall updates, remove Windows components, or clean general junk files. It changes whether Windows keeps capacity available for future servicing. That capacity becomes available for normal use after Windows releases it, but the amount visible in Settings can vary because the System & reserved category includes more than Reserved Storage.
Reserved Storage is usually the wrong target if:
Quick walkthrough
- You have plenty of free capacity on
C:. - Windows Update has recently failed because the disk is full; first remove temporary files or move personal data.
- This is a low-maintenance PC, shared computer, or device that may go a long time between manual cleanups.
- Your PC is managed by an employer or school. Update policies or management tools may determine how servicing capacity is handled.
It can be useful to disable it temporarily on a small system drive when you need space immediately and understand that you may need to free space manually before a later update.
Check your Windows version and current storage use
Before changing the setting, confirm that the PC has a supported Windows release and determine whether Reserved Storage is actually the issue.

- Press Windows + R, type the following command, and select OK:
winver - Check the displayed version.
- The DISM Reserved Storage controls are available starting with Windows 10, version 2004.
- Windows 11 includes the DISM Reserved Storage command-line support.
- If the PC is running an earlier Windows 10 release, do not use registry workarounds from older tutorials. Update the operating system instead, if appropriate for the device.
- Open Settings.
- Select System > Storage.
- Review the capacity bar for the system drive. If the storage categories are condensed, select Show more categories.
- Select System & reserved to review its breakdown when Windows presents one.
The number shown for System & reserved is not necessarily the exact Reserved Storage allocation. It can also include system files, virtual-memory files, hibernation data, and other Windows-managed storage. Use the DISM query in the next section to determine the actual Reserved Storage state.
Open an elevated PowerShell window
The state-changing command requires administrator rights.
- Select Start.
- Type PowerShell.
- Right-click Windows PowerShell and select Run as administrator.
On some Windows 11 systems, you may instead see Terminal (Admin). That is also suitable if its active profile is PowerShell. - If User Account Control asks for permission, select Yes.
- Confirm that the title bar identifies the session as Administrator before continuing.
You do not need to download DISM, install a PowerShell module, or boot into recovery. These commands act on the currently running Windows installation only.
Check whether Reserved Storage is enabled
In the elevated PowerShell window, run:
Get-WindowsReservedStorageState
Windows returns an object that reports whether the state is Enabled or Disabled.
- Enabled means Windows is maintaining reserved capacity for servicing-related work.
- Disabled means Windows is not maintaining that reserve.
This query does not make any changes. It is the safest first step when you are investigating unexpectedly low free space.
If you prefer the traditional DISM executable syntax, the equivalent status check is:
DISM.exe /Online /Get-ReservedStorageState
/Online is important: Reserved Storage controls are supported only against the online Windows image—the operating system currently running on the PC. Do not add image paths or attempt to use these commands against an offline Windows installation image.
Disable Reserved Storage safely
Warning: Disabling Reserved Storage removes Windows’ dedicated servicing buffer. On a drive that is routinely close to full, this can make future quality updates or feature updates more likely to request manual cleanup or external storage. Do not disable it merely because System & reserved looks large. First confirm its state and make sure the capacity you need cannot be recovered more safely through Storage settings.
Before proceeding:
- Save open work.
- Make sure Windows Update is not downloading, installing, or waiting to restart.
- If Settings shows an update awaiting a restart, restart first and wait for Windows to finish servicing.
- On an organization-managed PC, consult the IT administrator before changing the setting.
To disable Reserved Storage, run this command in the elevated PowerShell session:
Set-WindowsReservedStorageState -State Disabled
The command changes the policy state for the live Windows installation. A separate restart is not required solely to submit the setting change, although Windows may still be finishing work from a prior update and storage totals in Settings may not refresh instantly.
Run the query again to verify the requested state:
Get-WindowsReservedStorageState
The result should now report Disabled.
When will the reclaimed space appear?
When the disable command succeeds, Windows is instructed to stop keeping the Reserved Storage allocation. The capacity is returned to general disk use as Windows releases the reserved allocation.
There is no fixed number of gigabytes or guaranteed display-refresh time. The amount depends on the device and its installed optional features, language resources, drivers, and servicing requirements. Also, the System & reserved total in Settings is broader than Reserved Storage, so it may not decrease by the amount you expected.
To check practical free space:
- Open File Explorer.
- Select This PC.
- Look at the free-space figure below Local Disk (C🙂.
- Return to Settings > System > Storage after a few minutes or after a normal restart to see the refreshed category breakdown.
Do not attempt to force the release by deleting files from C:\Windows, modifying the registry, or clearing component-store folders manually. Those actions can damage update servicing and are not required for the supported DISM method.
Re-enable Reserved Storage
If you disabled Reserved Storage to handle a temporary disk-space shortage, turn it back on once you have expanded storage, moved files, or completed the immediate task.
Open PowerShell as Administrator and run:
Set-WindowsReservedStorageState -State Enabled
Then confirm the result:
Get-WindowsReservedStorageState
The result should report Enabled.
Re-enabling is the appropriate rollback. It restores Windows’ ability to maintain servicing capacity proactively. It does not erase personal files or undo an update. It simply instructs Windows to reserve capacity again for update-related and temporary system activity.
Use safer cleanup options before disabling the reserve
If the real problem is a nearly full C: drive, address disposable data before reducing Windows’ servicing headroom.
- Go to Settings > System > Storage.
- Select Cleanup recommendations.
- Review each group before selecting cleanup:
- Temporary files
- Large or unused files
- Files synchronized to cloud storage
- Unused apps
- Remove only items you recognize and no longer need.
- Under Storage, turn on Storage Sense if you want Windows to remove unnecessary temporary files automatically when space is low.
- If a major Windows update specifically asks for more space, connect an external drive when prompted. Windows can use external storage temporarily during the update process.
Be especially cautious with Previous Windows installation(s). Removing that option deletes the files that allow a rollback to the previous Windows version, if that rollback is still available.
Troubleshoot Reserved Storage commands
The command says it is not recognized
First, make sure you are using PowerShell, not Command Prompt, for the PowerShell cmdlets.
Use the command-line DISM form as an alternative:
DISM.exe /Online /Get-ReservedStorageState
or:
DISM.exe /Online /Set-ReservedStorageState /State:Disabled
If both forms are unavailable, check winver. The computer may be running a Windows release older than version 2004, or its Windows servicing components may be damaged. Do not substitute an undocumented registry edit.
Access is denied or the command cannot make changes
Close the window and reopen Windows PowerShell or Terminal using Run as administrator. Standard-user PowerShell sessions can query some system information but cannot reliably change system servicing state.
On a work or school PC, device management may prevent local configuration changes. Contact the organization’s IT administrator rather than trying to bypass policy.
DISM says Reserved Storage is in use
This normally means Windows is actively servicing updates or another servicing operation has not completed. The supported response is to wait.
- Open Settings > Windows Update.
- Let any displayed update complete.
- Restart if Windows requests it.
- After restart, wait until the system finishes post-update work.
- Open an elevated PowerShell session and run the state-change command again.
Do not force-stop Windows Update services, delete update folders, or edit the registry just to make the command run.
Reserved Storage is disabled, but free space did not increase much
Check File Explorer’s free space on C: rather than relying only on the System & reserved category. If free space remains low, the disk may be occupied by other categories such as installed applications, user files, previous Windows installations, restore data, or temporary files.
Use Settings > System > Storage > Cleanup recommendations, then review installed apps and large personal files. If Windows Update still needs room, use external storage when Windows offers that option rather than repeatedly disabling and enabling Reserved Storage.


