

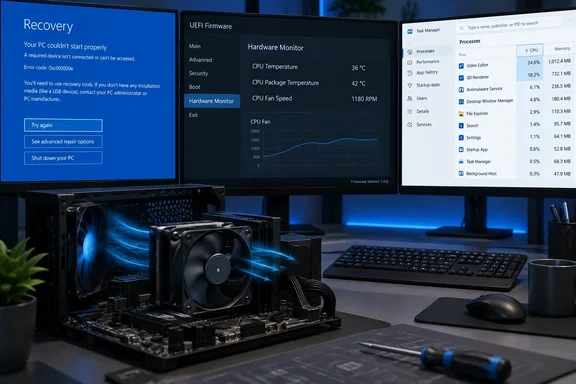
Microsoft documents the route into UEFI through Windows Recovery, while motherboard vendors such as ASUS show CPU and CPU-package temperatures in their firmware monitoring pages. The practical result is straightforward: UEFI is a useful first check when a PC feels unusually hot at idle, crashes during startup, or needs a basic cooling inspection. It is not a substitute for temperature logging during a game, compile, render, or other workload inside Windows.
Before restarting, save open work. Entering UEFI is normally safe when you only view information and exit without changing settings, but firmware menus also contain boot, storage, TPM, Secure Boot, memory, and voltage controls that can stop Windows from starting if altered incorrectly.
 Open UEFI Firmware Settings from Windows 11

In Windows 11, open Settings with Win + I, then go to System > Recovery. Under Recovery options, find Advanced startup and select Restart now.
Windows will reboot to the blue Windows Recovery Environment screen. Choose:
Quick walkthrough
- Troubleshoot
- Advanced options
- UEFI Firmware Settings
- Restart
The computer should restart into its firmware setup utility rather than the normal Windows sign-in screen. Microsoft uses this same recovery route in its Secure Boot and virtualization documentation, although the final menu label can appear as UEFI Firmware Settings, UEFI Settings, BIOS Setup, or something similar depending on the device.
If BitLocker device encryption is enabled, know where your recovery key is before making any firmware configuration changes. Merely opening UEFI and looking at temperatures should not trigger a recovery-key prompt, but changing boot security, TPM, Secure Boot, or storage settings can.
Open UEFI Firmware Settings from Windows 10
Windows 10 uses a slightly different Settings layout. Open Settings, then select Update & Security > Recovery. Under Advanced startup, choose Restart now.
After the restart, select:
- Troubleshoot
- Advanced options
- UEFI Firmware Settings
- Restart
If Windows starts normally instead of showing the recovery screen, try the alternate Microsoft-supported method: hold down Shift while selecting Restart from the Start menu’s Power button. Keep holding Shift until the recovery menu appears, then follow the same Troubleshoot and Advanced options path.
You can also use the firmware-entry key during a cold boot. Common keys include F2, Delete, Esc, F1, F10, F11, and F12; laptops sometimes use a dedicated recovery button or a volume-button combination. The correct key is manufacturer- and model-specific, so a brief startup logo screen or the PC maker’s documentation is more reliable than guessing.
Find the CPU Temperature Screen Without Changing Settings
Once in UEFI, first look for a page named Monitor, Hardware Monitor, PC Health Status, Health, System Information, Status, Sensors, or Fan Control. Desktop motherboard firmware is more likely to expose detailed values, including CPU package temperature, motherboard temperature, fan speeds, voltages, and sometimes VRM or chipset sensors.
An ASUS UEFI manual, for example, shows a Monitor page with CPU Temperature and CPU Package Temperature alongside fan RPM. Other manufacturers use different names and may offer only fan information, a broad system-health indicator, or no thermal readout at all.
Treat labels carefully:
- CPU temperature may be a single processor sensor or a firmware-selected summary value.
- CPU package temperature generally refers to the processor package rather than an individual core.
- Motherboard, system, or ambient temperature is not the same measurement as CPU temperature.
- Fan RPM confirms that a fan is reporting speed, but it does not prove the heatsink is mounted correctly or that airflow is adequate.
Write down the temperature and fan readings if the system provides them, then use the menu’s Exit, Save & Exit, or Discard Changes and Exit option. Do not select Load Optimized Defaults, reset CMOS options, alter fan curves, switch storage modes, or change CPU tuning settings merely to investigate a temperature reading.
The number you see in UEFI is best understood as a low-activity baseline. Windows, startup programs, browser tabs, antivirus scanning, games, and GPU-intensive applications are not running normally while the firmware screen is open. A CPU that looks reasonable in UEFI can still run much hotter under a sustained Windows workload; conversely, a high UEFI reading after a fresh cold boot deserves closer attention because it appears without ordinary desktop load.
Use Task Manager to Find the Workload Behind the Heat
Task Manager does not replace a temperature sensor, but it is the built-in Windows tool that can identify whether software demand is likely contributing to heat. Microsoft describes Task Manager as a system monitor for CPU, memory, disk, network, and GPU activity; use it to find a process keeping the processor busy before assuming the cooling hardware has failed.
Press Ctrl + Shift + Esc to open Task Manager. In Windows 11, select Processes from the left navigation if it is not already displayed. In Windows 10, select the Processes tab. If you see only a compact list of applications, choose More details.
Click the CPU column heading to sort processes by processor use. Watch the list for 30 to 60 seconds rather than reacting to a momentary spike. Windows Update, Microsoft Defender scans, browser tabs, video meetings, game launchers, cloud-sync clients, virtual machines, and installers can all use substantial CPU time legitimately.
A sustained high number is more useful than a brief burst. If one unfamiliar process remains near the top while the PC is otherwise idle, right-click it and choose Search online, inspect its publisher and file location, or check whether it belongs to software you intentionally installed. Do not end a process simply because its name looks technical: Windows services and security software often use names that are not self-explanatory.
The Performance section provides the wider context. Select CPU to see total processor utilization, current speed, uptime, core and logical-processor counts, and a recent activity graph. High CPU usage combined with noisy fans and a warm chassis points toward a workload problem; low CPU usage combined with persistent heat points more strongly toward cooling, firmware, power, or hardware issues.
Task Manager’s limitation is deliberate and often misunderstood. It shows CPU utilization and speed, but it is not a CPU thermometer. Microsoft’s documented WMI Win32_TemperatureProbe class does contain a CurrentReading field, yet Microsoft also states that real-time readings cannot be extracted from SMBIOS tables and that current WMI implementations do not populate that value. A PowerShell command built around that class may therefore return nothing useful, even on a perfectly healthy PC.
When UEFI Shows No CPU Temperature
The absence of a temperature field does not establish that the processor lacks sensors. Modern processors and platforms use thermal data internally for protection and performance management, but the manufacturer decides whether and how to present those readings in firmware.
First, verify that the menu you opened is actually the full firmware setup utility. Some PCs distinguish between a one-time boot menu and the full UEFI configuration screen. A boot menu may let you choose a USB drive or Windows Boot Manager but provide no hardware monitoring pages.
Next, check whether the computer is operating in UEFI mode. Open System Information from the Start menu and look for BIOS Mode in the system summary. If it says UEFI, Windows should normally offer the UEFI Firmware Settings recovery option when the manufacturer supports that handoff. If it says Legacy, the option may not appear, and the startup-key method is the appropriate way to reach the older BIOS-style setup screen.
If the firmware has no thermal page, do not try to force a reading with registry edits, random PowerShell snippets, or a BIOS update whose only purpose is to add monitoring. Firmware updates can be valuable when a manufacturer specifically identifies a thermal, fan, stability, or sensor-reporting fix for the exact model, but they should be applied only through the vendor’s documented process and with AC power connected on a laptop.
For a Windows-time temperature reading, use the PC or motherboard manufacturer’s supported utility when one is available for the exact model. This is especially relevant for laptops, where vendor tools may expose thermal modes, fan diagnostics, and warranty-aware hardware tests that generic utilities cannot interpret. HP’s UEFI diagnostics, for example, include a fan thermal test on supported systems, illustrating the difference between a visible temperature number and an actual cooling-system check.
Act on Symptoms, Not One Number
A temperature reading is evidence, not a diagnosis. CPUs are designed to vary clock speed and heat output rapidly, and the relevant safe range depends on the exact processor, cooler, chassis, firmware power settings, and workload. Comparing an idle UEFI reading with somebody else’s gaming temperature on a different CPU tells you very little.
Investigate promptly when heat is paired with repeated shutdowns, blue screens, severe performance drops, fans running at maximum speed during light use, hot exhaust that suddenly disappears, or a laptop chassis becoming uncomfortable in normal work. Shut the system down if it smells of burning electronics, if a battery appears swollen, or if fans make grinding noises.
For a desktop, inspect whether the CPU cooler is securely mounted, its fan is spinning, dust is blocking the heatsink or front intake, and cables are not obstructing airflow. For a laptop, use it on a hard, flat surface; soft furnishings can block intake vents. Avoid opening a sealed laptop unless you have the service instructions and the confidence to reassemble it correctly.
The immediate value of UEFI is that it separates a basic hardware baseline from the Windows workload. If CPU temperature appears elevated in UEFI shortly after a cold start, focus on cooling hardware, airflow, firmware diagnostics, or service. If it is normal there but heat rises alongside a process consuming CPU time in Task Manager, the next step is to identify, update, reconfigure, or remove the workload causing that sustained demand.