

That gets the window back where you can see it. The rest of this guide helps make the correction stick: verify the physical display map, select the correct primary monitor, enable Windows’ saved-window-location behavior, and rule out a detection or graphics-driver problem.
Applies to: Windows 11. Windows 10 also has most of the same display controls, but Microsoft ended free Windows 10 security updates and support on October 14, 2025.
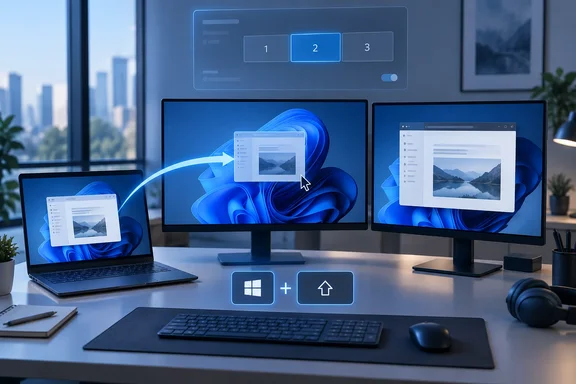 Start with the fastest fix
If the app is visible but opens on the monitor you did not intend:
Quick walkthrough
- Click the app window to make it active.
- Press Windows key + Shift + Left Arrow to send it to the monitor on the left.
- Press Windows key + Shift + Right Arrow to send it to the monitor on the right.
- Move the window where you want it, then close the app normally from that monitor.
For many apps, closing the window after repositioning it is enough to encourage the next launch to appear there. Not every application follows the same rules, though: some remember their own last position, while others defer more heavily to Windows’ display configuration. That explains why a browser may behave perfectly while an older business app keeps wandering off to Screen 2 like it pays rent there.

Confirm Windows sees your monitors in the right order
The physical arrangement of monitors matters. If your secondary monitor sits to the left of your laptop but Windows thinks it is to the right, the pointer and app windows can travel in ways that appear downright supernatural.
- Open Settings with Windows key + I.
- Go to System > Display.
- Select Identify. A number appears on each connected display.
- In the display diagram, drag the numbered rectangles so they match the monitors on your desk.
- Put a left-hand monitor to the left.
- Align their top or bottom edges roughly as they are in real life.
- Select Apply if Windows asks for confirmation.
Microsoft’s multiple-monitor guidance also places display identification and arrangement in Settings > System > Display, which is the control center for this whole operation.
Make sure you are extending, not duplicating
Press Windows key + P and choose Extend.
In Duplicate mode, both displays show the same desktop, which is useful for presenting but not for a proper multi-monitor workspace. In Extend mode, Windows treats the screens as one larger desktop and can move windows between them.
Choose the correct primary display
Your primary display affects where Windows places certain system elements and where some programs prefer to open for the first time. It does not guarantee that every individual app will always launch there—software can remember its own window state—but setting the right main display removes one common source of confusion.
- Open Settings > System > Display.
- Click the numbered rectangle for the monitor you want as the main screen.
- Scroll to the Multiple displays section.
- Turn on Make this my main display.
A sensible choice is usually the monitor where you work most often: the external display at a desk, for example, or the laptop panel when travelling without the dock.
After changing the primary display:
- Open the affected app.
- Move it to the preferred monitor if necessary.
- Resize or maximize it as desired.
- Close it normally.
- Reopen it to test whether it retained that placement.
Tell Windows to remember your monitor layout
Windows 11 has an important setting for dock-and-undock life: Remember window locations based on monitor connection.
To enable it:
- Go to Settings > System > Display.
- Expand Multiple displays.
- Enable Remember window locations based on monitor connection.
- Consider enabling Minimize windows when a monitor is disconnected as well.
Microsoft documents both settings in the Multiple displays section. The first is particularly useful when you routinely connect the same external monitor or dock: Windows can restore windows according to that recognized monitor connection rather than leaving them scattered across whichever displays happen to be awake first.
A practical docked-laptop routine
For more predictable results:
- Connect the dock and monitors.
- Wait until both displays are fully awake.
- Sign in, then confirm Extend mode if needed.
- Open your usual apps and arrange them.
- Close the apps normally before undocking.
Avoid yanking the dock while an app is still launching or while a monitor is powering down. Windows is generally good at recovering windows from a disconnected display, but timing, display adapters, and application-specific position memory can still produce odd results.
If an app window is completely off-screen
Sometimes the app is running—you can see its taskbar icon—but the window seems to have vanished into a monitor that no longer exists.
Try these in order:
- Select the app from the taskbar.
- Press Windows key + Shift + Left Arrow or Right Arrow repeatedly.
- If it appears, drag it to the desired screen and close it there.
If that shortcut does not help, use the older window-management route:
- Select the app on the taskbar.
- Press Alt + Spacebar.
- Press M for Move.
- Press an arrow key once.
- Move the mouse until the window reappears, then click to place it.
The keyboard shortcut is the cleaner first choice because Microsoft explicitly lists it as the command for moving an app between monitors.
When Windows keeps forgetting: detect the display
If apps repeatedly choose a phantom location, Windows may not be consistently detecting the monitor, dock, or connection path.
In Settings > System > Display:
- Expand Multiple displays.
- Select Detect if an expected monitor is missing.
- Check that the display is set to Extend, not disconnected or duplicated.
- Re-run Identify and confirm the numbered layout still matches the desk.
Microsoft recommends using Detect when an attached display is not appearing in Settings.
Also check the unglamorous hardware suspects:
- Reseat the HDMI, DisplayPort, USB-C, or Thunderbolt cable.
- Test a different cable or port.
- If using a dock, disconnect and reconnect it after the monitors are powered on.
- Avoid changing ports unnecessarily once the setup is stable; Windows can treat a display connected through a different path as a different monitor connection.
Check the graphics driver only when the issue is persistent
A wrong-monitor launch by itself does not automatically mean a broken graphics driver. Start with the display layout and saved-location settings first. But if monitors disappear, reorder themselves after sleep, flicker, or fail after a driver or Windows update, graphics troubleshooting is justified.
Microsoft’s recommended sequence includes:
- Restart the PC.
- Press Windows key + Ctrl + Shift + B to reset the graphics driver.
- Open Device Manager and expand Display adapters.
- Update the display driver if a newer compatible driver is available.
- If the trouble started immediately after a driver update, open the adapter’s Properties > Driver tab and use Roll Back Driver when that option is available.
Do not uninstall drivers at random just because an app opened on Screen 2. That is using a chainsaw to butter toast. Reserve driver reinstall steps for genuine display instability after the simpler checks fail.
The reliable fix order
When Windows apps open on the wrong monitor, use this sequence:
- Move the active window with Windows key + Shift + Arrow.
- Set the desired main display in Display settings.
- Match the on-screen display arrangement to your real desk.
- Turn on Remember window locations based on monitor connection.
- Make sure the desktop is set to Extend.
- Use Detect if a monitor is missing.
- Investigate cables, docks, and graphics drivers only if the setup is unstable.
With those settings in place, most multi-monitor Windows 11 setups stop playing musical chairs with application windows—and your spreadsheets, chats, and browser tabs can stay exactly where you left them.