

That distinction matters because the right response is rarely to reinstall Windows, disable random services, or roll back a patch immediately. A methodical check of resource usage, update history, drivers, startup software, and system integrity will usually identify the bottleneck without creating new problems.
For Windows 11 users dealing with slow boot times, laggy clicks, high disk activity, elevated memory use, game stutter, or battery drain after an update, the best troubleshooting path starts with diagnosis rather than guesswork.
Background: Why Windows 11 Can Feel Slow After an Update
Windows Update does more than download and install a cumulative patch. A completed update can trigger a chain of lower-priority tasks intended to bring the system back into a fully optimized state.
These tasks may include:
- Windows Search indexing, which rebuilds or updates the local search database.
- Microsoft Defender scans, particularly after large component changes.
- Driver detection and replacement, including display, storage, audio, Bluetooth, and chipset drivers.
- Component cleanup and servicing, which manages the Windows component store.
- Microsoft Store app updates, which can begin quietly in the background.
- Cloud synchronization, as OneDrive and other services notice changed files after a restart.
On a modern desktop with a fast NVMe SSD and 16GB or more of memory, this work may be barely noticeable. On an older laptop with a mechanical hard drive, 8GB of RAM, a low-power CPU, or nearly full storage, the same post-update activity can make the computer feel unusable for a while.
The important word is while. A computer that is busy immediately after an update may normalize after 20 to 30 minutes of plugged-in idle time. A computer that remains slow after several restarts and several hours of normal use deserves closer investigation.
Start With a Quick Performance Triage
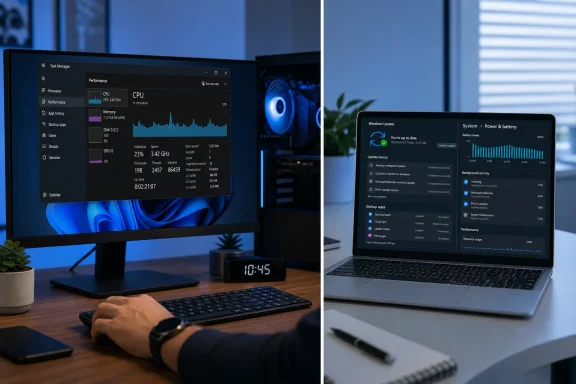
Before changing settings, establish what is actually under pressure. The most useful built-in diagnostic tool remains Task Manager.
Press Ctrl + Shift + Esc, then select the Performance tab. Watch the CPU, Memory, Disk, and GPU graphs for at least a minute. A brief spike is normal. A resource remaining near 100 percent with few visible applications open is more revealing.
Then switch to the Processes tab and sort by the relevant column:
- Sort by CPU if the PC is hot, noisy, or slow to react.
- Sort by Memory if apps are freezing, browsers reload tabs, or the system begins using the page file heavily.
- Sort by Disk if File Explorer hangs, apps take a long time to launch, or the disk activity light stays active.
- Sort by GPU if video playback stutters, games perform poorly, or the desktop flickers.
Make a note of the process name before ending anything. Some high-usage processes are legitimate Windows maintenance tasks, while others point to a driver, update service, third-party app, or malware issue.
Perform a Real Restart
Use Start > Power > Restart, rather than simply shutting down and starting the PC again.
On many Windows 11 systems, Shut down can use Fast Startup behavior, which preserves part of the system session for a quicker boot. Restart performs a fuller reset of the Windows kernel session and services. It is the better first step when troubleshooting a post-update problem.
After restarting, leave the device connected to power and mostly idle for 20 to 30 minutes. Avoid opening a large game, launching a dozen browser tabs, or starting a backup during this period. That gives Windows time to finish any pending maintenance without competing directly with your workload.
Temporary Background Work: The Most Common Explanation
A slow PC immediately after an update is often doing exactly what it should be doing, although Windows does not always explain this clearly.
Search Indexing and Security Scanning
Search indexing makes Start menu and File Explorer searches faster by maintaining a catalog of file names, properties, and selected content. After a significant update, changes to user profiles, system files, or search components can lead Windows to revisit portions of that catalog.
At the same time, Antimalware Service Executable may use noticeable CPU, disk, or memory while Microsoft Defender scans updated files and definitions.
Look in Task Manager for processes such as:
SearchIndexer.exe- Antimalware Service Executable
- Windows Modules Installer Worker
- Service Host processes associated with update or maintenance work
High activity from these processes shortly after an update is not, by itself, a fault. The practical test is whether the load declines after the PC has been left alone.
When Waiting Is No Longer the Answer
Temporary maintenance should gradually settle. It becomes suspicious when one or more of these conditions applies:
- Disk use remains excessively high for hours after multiple restarts.
- The same process consumes CPU constantly across several days.
- The PC freezes even when Task Manager shows no meaningful resource pressure.
- A specific app, game, printer, Wi-Fi adapter, or display feature fails only after the update.
- The slowdown corresponds with crashes, blue screens, or repeated error messages.
At that point, move from passive waiting to targeted troubleshooting.
Check Update History Before Blaming the Latest Patch
Windows updates arrive in layers. A monthly security update may introduce a defect that is corrected by a later cumulative update, a servicing update, or a revised driver. Conversely, an issue that appears to be caused by an update may actually stem from a driver installed around the same time.
Open Settings > Windows Update > Update history and review the dates and entries around the time performance changed.
Pay particular attention to:
- Quality Updates
- Driver Updates
- Definition Updates
- Feature Updates
- Other Updates
The update history gives context, but it does not prove causation. If a slowdown began after a quality update, install any newer cumulative update that is available, restart, and test again. Microsoft regularly includes reliability and performance corrections in follow-up releases.
Use Windows Release Health as a Reality Check
Windows 11 release health information is especially useful when a problem feels widespread. It can reveal whether Microsoft has acknowledged a known issue involving a particular Windows version, update build, game, device driver, or hardware configuration.
This is more reliable than assuming that a viral social-media complaint applies to every PC. A known issue may affect only specific models, specific drivers, or a narrow configuration such as certain enterprise policies.
Avoid uninstalling a security update merely because the timing looks suspicious. Rollback should be a measured response when there is clear evidence of a regression, a documented compatibility issue, or a reproducible fault that disappears when the update is removed.
Reduce Startup Clutter for Faster Sign-Ins
A slow post-update experience is sometimes most noticeable in the first few minutes after logging in. That does not necessarily mean the update itself is the cause. It may simply have exposed an existing problem: too many programs launching at startup.
Cloud storage clients, game launchers, chat platforms, printer utilities, RGB control suites, browser updaters, audio tools, and vendor support apps frequently add startup entries without much fanfare.
Open Task Manager, choose Startup apps, and inspect the Startup impact column.
Consider disabling auto-start for applications that do not need to be ready the moment you sign in, such as:
- Game launchers
- Music players
- Messaging apps used only occasionally
- Adobe or other application updaters
- Peripheral lighting utilities
- Retailer support tools
- Secondary cloud-sync services
- Browser background launchers
Right-click an item and choose Disable. This does not uninstall the program or prevent it from opening normally later. It only stops automatic launch at sign-in.
What Not to Disable Casually
Do not disable an item just because its name is unfamiliar. Security software, touchpad services, audio enhancements, graphics utilities, backup tools, and corporate endpoint management agents can be important.
If the publisher and purpose are unclear, search the executable name first or leave it enabled. Startup cleanup should improve responsiveness, not create missing functionality.
Delivery Optimization: Useful Feature, Potential Source of Confusion
Delivery Optimization is Windows’ update delivery technology. It can download Microsoft content from standard online servers and, depending on configuration, obtain portions of eligible content from other PCs.
It is often described as a torrent-like system, but that comparison is incomplete. Delivery Optimization is a Microsoft-managed update mechanism with validation controls; it does not expose your personal documents or turn your PC into a general file-sharing device.
Still, it can consume bandwidth, disk activity, and system resources while it downloads or shares update content. It is therefore worth checking when a connection feels slow or an update-related process appears unusually active.
Confirm the Current Delivery Optimization Setting
Open:
Settings > Windows Update > Advanced options > Delivery Optimization
For most home users, Allow downloads from other PCs can remain enabled with the option limited to Devices on my local network. This allows local Windows devices to help each other obtain update files without enabling broader internet peer sharing.
If the household has only one Windows PC, or if you want the simplest possible behavior, turn the option off. Windows Update will continue to work by downloading content directly from Microsoft.
This is an important correction to common advice: Delivery Optimization is not automatically configured to share with the entire internet on a typical Windows 11 installation. Local-network peer sharing is the normal consumer default. The internet option is a separate, more expansive choice and is rarely necessary for a home PC.
Check Activity Instead of Assuming a Memory Leak
A high-memory Windows process after an update does not automatically mean that Delivery Optimization has a memory leak. Windows may legitimately cache data, perform servicing work, or be affected by another component entirely.
Use the Activity monitor in the Delivery Optimization settings page to see whether the feature is actively downloading or uploading. If it is not transferring meaningful data, changing its settings is unlikely to resolve a separate memory issue.
If memory remains high over time, identify the exact process in Task Manager, check for current updates, and restart before making more aggressive changes.
Graphics Driver Problems Can Masquerade as Windows Performance Failures
A Windows update can install a newer display driver, revert to a more generic driver, or expose an incompatibility between a current driver and a game or media application. Symptoms are often dramatic:
- Flickering or black screens
- Changed resolution or refresh-rate settings
- Game stutter and crashes
- Video playback dropped frames
- Missing GPU control-panel features
- Poor performance after waking from sleep
Open Device Manager, expand Display adapters, right-click the graphics device, and select Properties > Driver. Record the driver provider, version, and date.
Roll Back Only When the Driver Is the Clear Trigger
The Roll Back Driver option is useful when all of the following are true:
- A new driver appeared around the time the problem began.
- The system worked correctly with the prior driver.
- The issue is reproducible after the new driver is installed.
- Windows still has the previous driver package available.
If Roll Back Driver is unavailable, Windows may no longer retain the previous package. In that case, obtain a current driver from the PC manufacturer or GPU vendor.
For desktops, NVIDIA, AMD, or Intel’s current driver packages are usually appropriate. For laptops, the PC manufacturer’s driver may be safer when the device uses custom graphics switching, tuned power behavior, or a specialized display panel. A newer generic driver is not always better than an OEM-tested laptop driver.
Repair Windows System Files Without Reinstalling the Operating System
When slowdowns are accompanied by random errors, crashes, failed updates, or missing system components, Windows file corruption becomes a reasonable possibility.
The two principal repair tools are System File Checker and Deployment Image Servicing and Management.
Run System File Checker First
Open Terminal (Admin) or Command Prompt (Admin) and run:
sfc /scannow
System File Checker scans protected Windows system files and attempts to replace corrupted versions using the local component store.
Possible outcomes include:
- No integrity violations found: protected system files appear healthy.
- Corrupt files found and successfully repaired: restart and test again.
- Corrupt files found but some could not be repaired: continue with DISM.
Repair the Component Store With DISM
If SFC cannot repair all files, run:
DISM /Online /Cleanup-Image /RestoreHealth
DISM checks and repairs the Windows image component store that SFC relies on for replacement files. The process can take time and may appear to pause at certain percentages. Leave the PC connected to the internet and avoid interrupting it.
When DISM finishes, run SFC again:
sfc /scannow
The desired final result is a clean SFC scan with no integrity violations.
What These Tools Do Not Fix
SFC and DISM are valuable, but they are not universal performance cures. They do not fix:
- A failing SSD or hard drive
- Insufficient RAM
- A buggy third-party application
- Excessive startup software
- Overheating
- An outdated BIOS or chipset driver
- A faulty GPU driver
- A weak Wi-Fi connection
- A system that is simply underpowered for current workloads
Running repair commands repeatedly without evidence of corruption wastes time and can distract from the real cause.
Power Mode, Heat, and Battery Performance
Windows 11 power modes can make a laptop feel noticeably different on battery versus AC power. Open Settings > System > Power & battery, then review Power mode.
The available choices generally prioritize either energy efficiency, balanced behavior, or maximum responsiveness. Best performance can improve responsiveness when a laptop is plugged in, especially during demanding work, but it may increase fan noise, heat, and power consumption.
That trade-off is not a flaw. It is the intended design.
Use the Right Setting for the Device
For a desktop, performance-oriented settings are generally sensible because the machine remains on wall power. For a laptop, Balanced is often the best default, while Best performance is useful for plugged-in gaming, video editing, compiling, virtual machines, and other demanding work.
If a laptop suddenly runs hot after an update, do not assume the power mode is solely responsible. Check Task Manager for CPU usage. A fan spinning loudly at idle usually indicates an active workload, a driver issue, dust buildup, poor ventilation, or a background service that needs attention.
The Hard Limit: 8GB of RAM and Storage Pressure
Windows 11 can run on 8GB of RAM, but the real-world experience depends heavily on workload. A browser with many tabs, video conferencing, cloud synchronization, antivirus scanning, and desktop apps can exhaust 8GB surprisingly quickly.
When memory pressure rises, Windows uses the storage drive as virtual memory. This can be tolerable on a fast SSD, but it is far slower than physical RAM. On a hard drive, the result can be severe lag, slow app switching, and constant disk activity.
Check Task Manager > Performance > Memory during normal use. Consistently high memory utilization, especially when combined with active paging and disk use, points to a capacity problem rather than an update defect.
Practical Options
- Close browser tabs and unused applications.
- Enable browser memory-saving features where available.
- Reduce unnecessary startup apps.
- Ensure the page file remains system-managed unless there is a specific technical reason to change it.
- Upgrade to 16GB RAM if the device supports it.
- Consider replacement if memory is soldered, storage is slow, and the system is already struggling with ordinary tasks.
Storage capacity matters too. A nearly full system drive reduces room for updates, temporary files, caches, page-file activity, and restore points. Keeping meaningful free space on the Windows drive is not optional maintenance; it is part of maintaining consistent performance.
Use Reliability Monitor to Connect the Dots
When the slowdown is intermittent or does not show up clearly in Task Manager, Reliability Monitor can be more useful than Event Viewer for ordinary users.
Press Win + R, type:
perfmon /rel
Reliability Monitor displays a timeline of application failures, Windows failures, hardware errors, driver installation events, and updates. It can help establish whether a new crash pattern started on the same day as a Windows update, driver update, or application installation.
Event Viewer remains valuable for deeper diagnosis, but it contains enormous amounts of normal background noise. Start with Reliability Monitor, then use Event Viewer > Windows Logs > System to investigate a specific recurring error, shutdown event, or driver failure.
A Safer Post-Update Recovery Order
The most efficient way to fix Windows 11 performance issues after an update is to move from low-risk checks to more targeted repairs.
- Restart the PC, then leave it idle for 20 to 30 minutes.
- Check Task Manager to identify whether CPU, memory, disk, or GPU is actually under pressure.
- Review Windows Update history and install newer cumulative updates if available.
- Trim unnecessary startup apps to improve sign-in responsiveness.
- Review Delivery Optimization, especially if bandwidth or update activity is abnormal.
- Inspect graphics drivers if games, videos, displays, or GPU-accelerated applications are affected.
- Run SFC and DISM when corruption, update failures, or system errors are plausible.
- Review Power mode and confirm the device is not unnecessarily restricted while plugged in.
- Assess RAM, free disk space, and hardware age before chasing endless software tweaks.
- Check Reliability Monitor for a timeline that connects the slowdown with a driver, application, or Windows event.
This order avoids the two most common mistakes: treating every temporary post-update workload as a catastrophe, and using drastic measures before identifying the resource or component actually causing the slowdown.
Conclusion
Windows 11 performance problems after an update are real, but the update is often the trigger rather than the root cause. A restart may expose too many startup applications. A driver refresh may reveal a graphics compatibility issue. A maintenance task may expose that an older PC no longer has enough RAM or storage headroom for modern workloads.
The most productive response is disciplined troubleshooting. Let legitimate background work finish, measure what is consuming resources, validate the installed updates, and make changes that match the symptoms. With that approach, most post-update slowdowns can be resolved without a factory reset, a rushed hardware purchase, or an unnecessary retreat from Windows Update.