

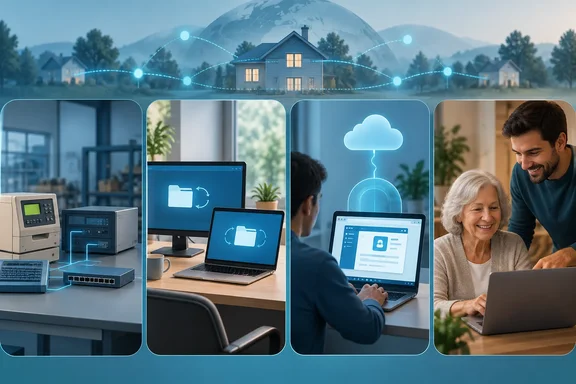
That's a fair point, but "beat" in the headline needs a qualifier. None of these four replaces Tailscale outright. Each fits a different kind of remote-access problem better. Below, each recommendation is checked against the vendors' own documentation, with notes on setup, safety and where the pitch goes too far.
First, what Tailscale actually does
Tailscale's documentation lists three connection types inside a tailnet: direct UDP connections, DERP relayed connections through Tailscale's servers, and Peer Relay connections that route through another device on your own tailnet. All three are end-to-end encrypted with WireGuard. The company says the difference between them is performance, not security.
Every connection starts on a DERP relay. Tailscale then tries to upgrade it to a direct path, then to a peer relay, and stays on DERP if neither works. Tailscale says DERP is generally slower, and names running on a relay when a direct path was possible as one of the most common causes of performance problems.
A practical check for Windows users who already run Tailscale: run tailscale status and look at the entry for the other device. "direct" means peer-to-peer, "relay" means DERP, and "peer-relay" means another tailnet device is carrying the traffic. tailscale ping shows the path being negotiated in real time. If you're stuck on a relay, Tailscale lists blocked UDP and "hard NAT" as the usual causes. Its fixes include turning on UPnP or NAT-PMP on the router, or opening UDP port 41641, which is the default.
Takeaway: Tailscale is a full mesh network with automatic NAT traversal. That's a lot of machinery if all you need is one file, one web app or one support session.
ZeroTier: for software that needs to think it's on the same LAN
White's first pick targets a different problem: Layer 2 behavior. Tailscale mostly works at Layer 3 (IP routing). ZeroTier emulates Ethernet, including multicast and ARP. Some older gear and software only work if they can find each other through broadcast discovery, and ZeroTier handles that case. Her examples are cameras, AV equipment, embedded devices, and apps that won't let you type in an IP address.
ZeroTier's protocol documentation backs this up. It describes the product as an emulated Ethernet switch, with a network ID that works much like a VLAN ID. The same documentation includes a few caveats the How-To Geek piece left out:
- Bridging is deliberate, not automatic. The network controller has to designate a member as a bridge before it can join a physical LAN to the virtual network. ZeroTier says this is a security measure, because ordinary members can only send traffic from their own MAC address.
- Bridges carry extra load. Designated bridges receive all broadcast traffic and ARP requests, so they see more multicast overhead.
- Platform support varies. ZeroTier says bridging has been tested extensively on Linux using the kernel's native bridge. Other platforms only have third-party reports that it works. If your bridge will be a Windows box, test it first.
- ARP behaves differently. ZeroTier converts IPv4 ARP into something closer to unicast so it scales over WAN links. Apps won't notice, but packet sniffers won't see all ARP traffic.
- Public networks are risky. ZeroTier can run networks with access control turned off, and its own documentation warns members of those networks not to expose vulnerable services or open file shares.
Takeaway: If a legacy device can't find its partner over Tailscale, ZeroTier is worth trying. Test your specific discovery behavior before you rely on it.
Syncthing: when you want local copies, not remote browsing
White's second argument is that remote file access and file synchronization are different jobs. That distinction matters. Syncthing keeps chosen folders identical across machines, so the file is already on your laptop when you need it. You don't have to connect back to your desktop.
Syncthing's own documentation says sync runs in both directions: creating, modifying or deleting a file on one machine is copied to the others. Nothing is uploaded to a cloud service. Devices exchange data when they're online at the same time. On Windows, the default configuration directory is under %LOCALAPPDATA%\Syncthing.
Keep three things in mind before you treat it as a set-and-forget file mover:
- Sync is not backup. Deleting a file in a standard Send & Receive folder deletes it everywhere.
- Folder types change behavior. In a Send Only folder, the "Override Changes" button pushes that machine's state to every other device. Files it doesn't have get deleted on the others. Receive Only folders keep local changes to themselves, and "Revert Local Changes" deletes local additions.
- Relays are on by default. When two devices can't connect directly, Syncthing routes traffic through a relay and keeps retrying a direct link. The data stays end-to-end encrypted. The relay operator can still see your IP, your device ID and how much traffic you move, and transfers are much slower.
White notes that Tailscale has its own file features: Taildrop for sending files and Taildrive for sharing folders. Tailscale's documentation lists Taildrop as an alpha feature that you have to turn on for your tailnet. It only works between your own personal devices, and both ends must run Tailscale. That's a one-off transfer, which is a different job from Syncthing keeping folders in sync all the time.
Takeaway: For people who switch between a desktop and a laptop all day, Syncthing is often the right tool. Choose folder types carefully and keep a real backup as well.
Cloudflare Tunnel: publish one app, not your whole network
If you only need to reach one thing from outside, such as Home Assistant or a dashboard, White recommends Cloudflare Tunnel. Cloudflare's routing documentation describes the model: you map a public hostname to a local service (its example is app.example.com to [url]http://localhost:8080[/url]), and the cloudflared connector sends that traffic to your origin. One tunnel can publish several applications. Adding a route in the dashboard automatically creates a DNS record pointing at the tunnel's cfargotunnel.com subdomain.
A few practical notes from the same documentation:
- If the tunnel stops, the DNS record stays in place and visitors get a 1016 error.
- The tunnel subdomain only proxies records in your own Cloudflare account. Someone who learns your tunnel UUID can't point their own domain at it.
- Non-HTTP services like SSH, RDP and SMB can be published too, but end users need
cloudflaredon their side. - Published apps inherit your hostname's cache rules, WAF rules and other settings.
Security needs the most emphasis here. A published hostname is, by design, reachable from the internet. White's advice to put Cloudflare Access in front of the app, so users have to authenticate first, is the part that makes this setup safe. Don't treat it as an optional extra. You also need a domain managed in Cloudflare.
Takeaway: For one browser-based service, a tunnel plus an access policy is often cleaner than putting every client device on a mesh network. It is a published web endpoint, though, not a private network, so manage it like one.
Quick Assist: help Grandma without adding her PC to your network
This pick matters most to Windows users. For occasional family tech support, White argues that adding someone's PC to your private network is overkill. She's right.
Here's the process according to Microsoft's support documentation: Open Quick Assist. Select Help someone, then share the 6-digit code with the person you're helping. After they've entered the code, wait for the person you're helping to allow the connection and share their screen. On the other end, the recipient types the code into the Code from assistant box, enter the 6-digit code they gave you, then select Submit. To allow the connection and start sharing your screen, select Allow.
Full control is a separate step. The helper must select Request control, then wait for them to allow it. Once connected, you can use different tools in Quick Assist if you like, such as a laser pointer, annotation, chat for typing messages, and more. The recipient can back out at any point, since you can click/tap on Cancel control at anytime to stop allowing them full control, and resume only screen sharing.
Things that trip people up:
- The helper has to sign in. According to Eleven Forum's walkthrough, the helper will be required to sign in to the Quick Assist app with your Microsoft account.
- Use the Store version. Guides at iTechGuides note that the current app is distributed through the Microsoft Store, so it may need to be installed even if an older Quick Assist shortcut was already present. The keyboard shortcut is Win+Ctrl+Q.
- Codes expire. UConn's IT knowledge base tells technicians to note the code expiration time. If the connection fails, generate a new code.
- Store problems. Microsoft's troubleshooting advice includes resetting the Store cache: press the Windows Logo Key + R to open the Run dialog box, type wsreset.exe, and then select OK. Also note that if your Windows 10 version is lower than 15063, you'll need to update Windows.
Know its limits: Quick Assist is for sessions where someone is sitting at the other PC. It doesn't give you unattended access, and Microsoft says it closes completely when the session ends. Quick Assist closes completely when you end the session. It does not stay open in the background. If you support a relative every day, White concedes that something permanent may make sense.
There's also a scam angle. Fake tech-support callers use tools like Quick Assist, so the most important rule to teach your relatives is: Never give a Quick Assist code to an unsolicited caller claiming to be Microsoft or technical support.
Takeaway: For occasional family support on Windows 10 and 11, Quick Assist is the simplest option, and the person being helped approves every step.
So when is Tailscale still the right answer?
White ends by making the case for the tool she spent the article arguing against. That balance helps the piece. If you have several devices across different networks, multiple services to reach, or a whole home LAN to expose through a subnet router, Tailscale's extra machinery earns its keep.
Here's how the options line up:
| Your actual job | Simplest fit | Watch out for |
|---|---|---|
| Legacy gear needs LAN discovery | ZeroTier | Bridges need explicit setup; extensively tested only on Linux |
| Same folders on multiple PCs | Syncthing | Deletions sync too; it's not backup |
| One web app from anywhere | Cloudflare Tunnel | Hostname is public unless Access protects it |
| Occasional family tech support | Quick Assist | Attended only; scam risk |
| Many devices, many services, whole LAN | Tailscale | Check for relayed connections |
Pick the tool for the job you actually have. A focused tool is usually easier to set up, has less to go wrong, and leaves fewer places open to attack than a full private network you're running just to click one button on Grandma's PC.
References
- These 4 tools beat Tailscale for remote access—and they're way simpler How-To Geek · 2026-09-29T18:30:15+00:00
- Windows 11 Quick Assist: Get or Give Remote Help itechguides.com
- Windows Quick Assist FAQs: Install, Connect, Fix Errors itechguides.com