Create and Export a Custom Windows Theme Pack in Windows 10/11
Difficulty: Beginner | Time Required: 10 minutesA custom Windows theme pack is a handy way to save your favorite desktop look and share it with another PC or another user. Instead of manually setting the wallpaper, accent color, sound scheme, and mouse cursor every time, you can bundle your personalization settings into a shareable
.deskthemepack file.This is especially useful if you want the same desktop style across multiple computers, want to share a family photo slideshow theme, or simply want a backup of your favorite Windows appearance before reinstalling or resetting your PC.
Prerequisites
Before you begin, make sure you have:Quick walkthrough
- A Windows 11 or Windows 10 PC
- A few wallpaper images saved locally on your computer
- Optional: a custom sound scheme, mouse cursor scheme, or accent color preference
- About 10 minutes
Windows version note: The steps are very similar in Windows 10 and Windows 11. The Settings app layout may look slightly different, but the main path is the same: Settings > Personalization > Themes.
Windows 10 note: Windows 10 reached end of support on October 14, 2025. The theme feature still exists on Windows 10, but for security and reliability, use a supported Windows version whenever possible.
What a Windows Theme Pack Includes
A Windows theme can include several personalization items, such as:- Desktop background picture or slideshow
- Accent color
- Window color behavior
- Sound scheme
- Mouse cursor scheme
.deskthemepack file. This file can be copied, emailed, stored on a USB drive, or saved for later use.Note: A theme pack is not the same as a full system backup. It saves personalization settings, not apps, files, Start menu layouts, taskbar pins, or Windows settings outside the theme system.
Step 1: Prepare Your Wallpaper Images
- Create a folder for your theme images.
For example, create a folder named:
Pictures\My Custom Theme - Copy the images you want to use into that folder.
- Use common image formats such as:
.jpg.jpeg.png.bmp- If you plan to share the theme, avoid using images from temporary locations such as Downloads, browser cache folders, or removable drives.
Tip: For best results, use images that match your display resolution or are larger than your screen resolution. This helps prevent blurry or stretched wallpapers.
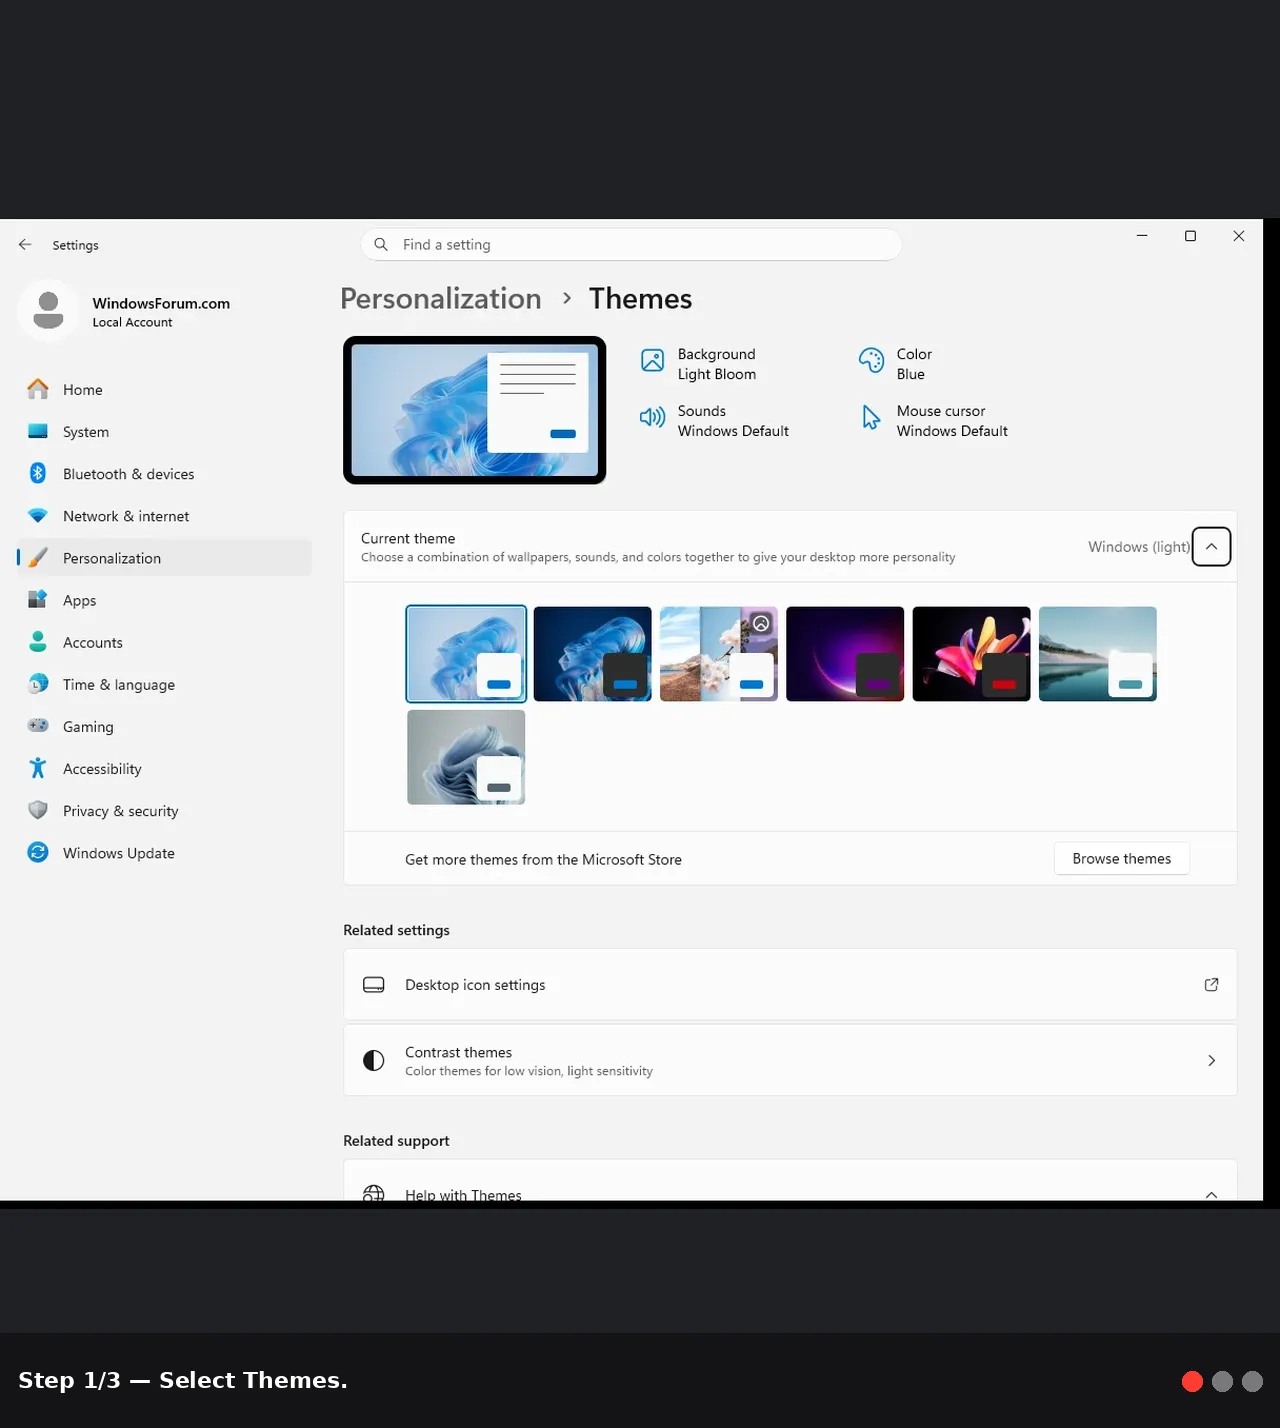
Step 2: Open the Themes Settings Page
- Right-click an empty area of the desktop.
- Select Personalize.
- In the Settings app, select Themes.
Alternatively:
- Open Start.
- Select Settings.
- Go to Personalization.
- Select Themes.
Step 3: Choose a Desktop Background
- On the Themes page, select Background.
- Under Personalize your background, choose one of the following:
- Picture for a single wallpaper
- Slideshow for multiple wallpapers
- Solid color if you prefer a simple color background
- If you choose Picture, select Browse photos and pick your image.
- If you choose Slideshow, select Browse and choose the folder containing your wallpaper images.
- Under Choose a fit for your desktop image, select your preferred layout:
- Fill usually looks best for modern widescreen displays
- Fit keeps the whole image visible
- Stretch fills the screen but may distort the image
- Center displays the image at its original size
- Span is useful for some multi-monitor setups
Tip: If you use a slideshow, keep all images in the same folder before saving and exporting the theme. This helps Windows package the theme more reliably.
Step 4: Customize Your Colors
- Return to Settings > Personalization.
- Select Colors.
- Choose your preferred mode:
- Light
- Dark
- Custom
- Choose an accent color, or let Windows automatically pick an accent color from your background.
- Optional: Turn transparency effects on or off.
- Optional: Choose whether the accent color appears on title bars, window borders, Start, or the taskbar.
Windows 11 note: Some accent color options may only appear when compatible color modes are selected. For example, showing accent color on the taskbar may depend on whether dark mode is active.
Step 5: Customize Sounds
- Go back to Settings > Personalization > Themes.
- Select Sounds.
- In the Sound dialog box, choose a sound scheme from the Sound Scheme drop-down menu.
- Optional: Select individual program events and assign custom
.wavsound files. - Select Apply.
- Select OK.
Warning: Use short, clean.wavfiles for custom sounds. Very long or loud sounds can become annoying quickly, especially for frequent events such as notifications or system alerts.
Step 6: Customize the Mouse Cursor
- Return to Settings > Personalization > Themes.
- Select Mouse cursor.
- In the Mouse Properties window, open the Pointers tab.
- Choose a pointer scheme from the Scheme drop-down menu.
- Optional: Select individual pointer roles and choose custom cursor files.
- Select Apply.
- Select OK.
Tip: If you plan to share the theme, stick with standard Windows cursor schemes unless you are certain your custom cursor files will be included and work correctly on the other PC.
Step 7: Save Your Custom Theme
Once your background, colors, sounds, and mouse cursor are set, Windows usually shows the current theme as an unsaved custom theme.- Go to Settings > Personalization > Themes.
- Look for the current theme preview near the top of the page.
- Select Save.
- Enter a clear name for your theme, such as:
Blue Mountains Dark Theme - Select Save again.
Note: Saving the theme stores it for your user account. Exporting it is a separate step.
Step 8: Export the Theme Pack for Sharing
- Stay on Settings > Personalization > Themes.
- Find the saved theme you just created.
- Right-click the theme tile.
- Select Save theme for sharing.
- Choose where to save the file, such as your Desktop or Documents folder.
- Enter a file name.
- Select Save.
.deskthemepack file.You can now copy that file to another PC, upload it to cloud storage, place it on a USB drive, or share it with another Windows user.
Step 9: Install the Theme Pack on Another PC
To apply the exported theme on another Windows 10 or Windows 11 computer:- Copy the
.deskthemepackfile to the target PC. - Double-click the file.
- Windows will open Personalization settings and apply the theme.
- If needed, go to Settings > Personalization > Themes to confirm that the theme is selected.
Warning: Only open theme files from people or sources you trust. Theme files can reference local or packaged resources, and it is always best to avoid unknown customization files from random websites.
Tips and Troubleshooting
The “Save theme for sharing” option is missing
Make sure you already saved the theme first. If the theme is still unsaved, select Save, give it a name, and then right-click the saved theme tile again.The wrong wallpaper appears after importing
This can happen if the original image was moved, deleted, or stored in a synced or removable location. Recreate the theme using images stored in a normal local folder, then export it again.The theme looks different on another computer
Display resolution, scaling, light/dark mode settings, and Windows version differences can affect the final appearance. For best results, use high-resolution images and test the theme on a second PC before sharing widely.Custom sounds do not work
Use.wav files and keep them in a stable local folder before saving the theme. If a sound file is missing or unsupported, Windows may fall back to default sounds or no sound.Can I delete the theme later?
Yes. Go to Settings > Personalization > Themes, right-click a non-active custom theme, and select Delete. You cannot delete the theme that is currently active, so switch to another theme first.Conclusion
Creating and exporting a custom Windows theme pack is a quick way to preserve your desktop style and reuse it across multiple PCs. With just a few minutes of setup, you can package your wallpaper, colors, sounds, and cursor preferences into a convenient.deskthemepack file.Whether you are building a clean work setup, a gaming desktop look, a seasonal wallpaper collection, or a family photo slideshow, Windows themes make personalization easy to save, share, and restore.
Key Takeaways:
- A custom theme saves your wallpaper, color, sound, and cursor preferences.
- Exporting a theme creates a shareable
.deskthemepackfile. - Use local, high-quality images for the most reliable results.
- Windows 10 and Windows 11 both support theme customization through Settings.
- Theme packs are great for sharing a consistent desktop look across multiple PCs.
This tutorial was generated to help WindowsForum.com users get the most out of their Windows experience.
Structured References for Editorial Review
- Microsoft Support: Windows themes include desktop backgrounds, colors, sounds, and other personalization elements, and can be saved and shared as
.deskthemepackfiles. (support.microsoft.com) - Microsoft Learn: Windows theme packs are cabinet-based packages containing a
.themefile and supporting assets such as images and sound files. (support.microsoft.com) - Microsoft Learn: Theme packs support common image, sound, cursor, icon, and PNG brand logo file types. (support.microsoft.com)
- Microsoft Support: Saved themes can be right-clicked and exported using Save theme for sharing. (support.microsoft.com)
- Microsoft Support: Windows 10 support ended on October 14, 2025. (support.microsoft.com)
References
- Official source: support.microsoft.com
Personalize Your Windows Experience With Themes | Microsoft Support
Learn about Windows Themes, how to use, create, and share them.support.microsoft.com
Last edited: