Enable Storage Sense to automatically free disk space (Windows 10/11)
Difficulty: Beginner | Time Required: 10 minutesStorage Sense is built into Windows to help you keep a healthy amount of free space without constantly babysitting your PC. It automatically trims temporary files, empties the Recycle Bin, and can tidy up files in your Downloads folder after a set period. If you’re juggling a smaller SSD or a drive with limited capacity, Storage Sense is a simple, low-effort way to reclaim space on a regular basis.
While the exact wording of settings can vary a bit between Windows 10 and Windows 11 builds, the general steps are the same. If you’re on a corporate PC, a policy may limit or override Storage Sense options, and you might see some options greyed out. In that case, check with your IT admin.
Prerequisites
Quick walkthrough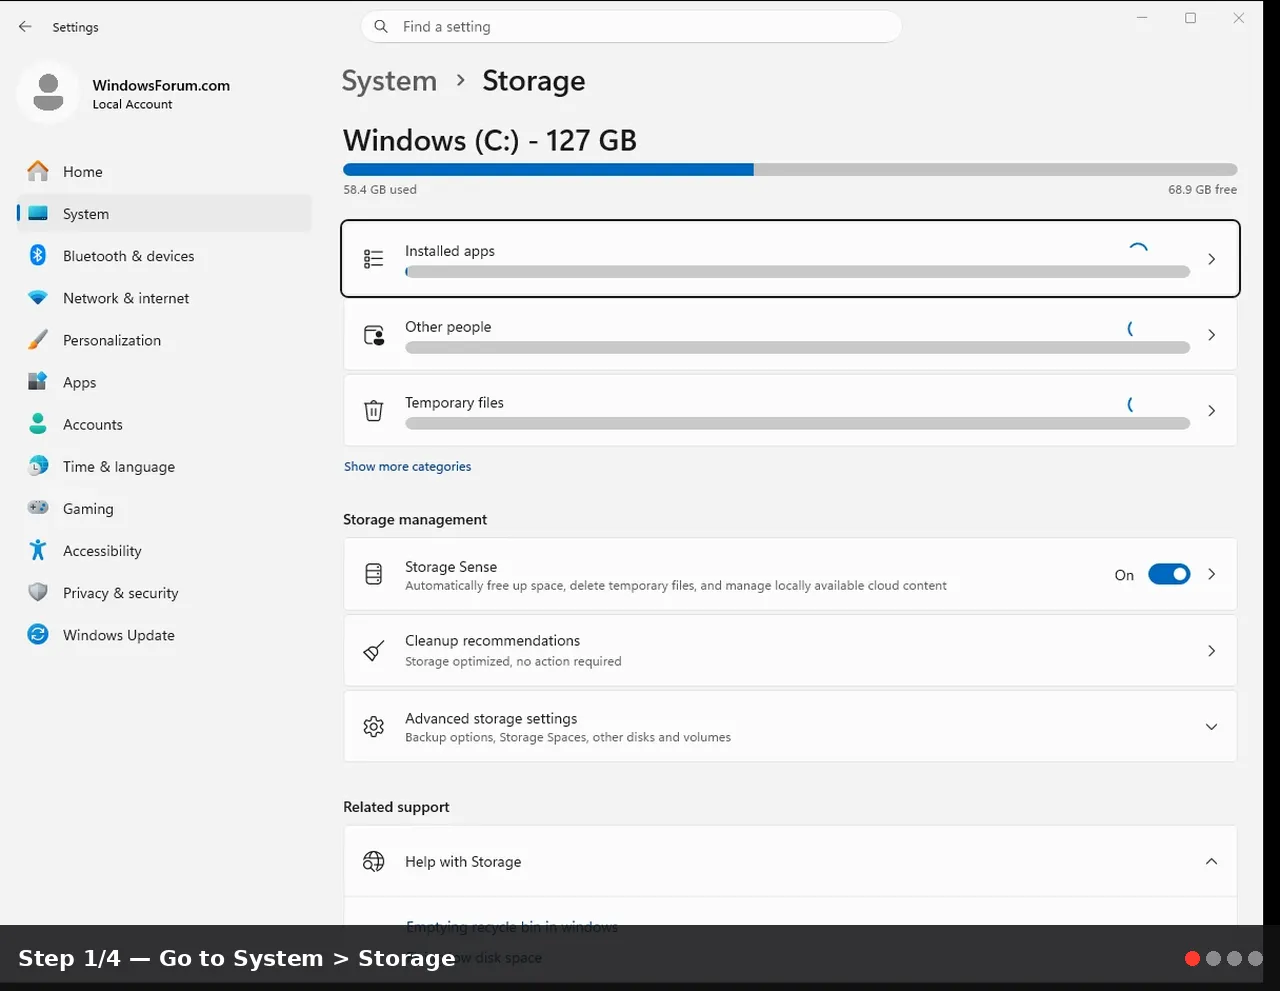
- A PC running Windows 10 or Windows 11.
- A standard user account or an admin account (no special software needed).
- An internet connection is not required, but a quick Windows update can help ensure you have the latest Storage Sense options and wording.
Step-by-step instructions
- Open Settings
- Use the keyboard shortcut Windows key + I, or click the Start menu and select Settings.
- If you prefer the classic path, you can also right-click the Start button and choose Settings.
- Go to System > Storage
- In Windows 10 and Windows 11, Storage is under System. Click on Storage to view disk and space details.
- Turn on Storage Sense (and prepare to configure)
- Look for Storage Sense and switch it On if it isn’t already.
- You’ll usually see a button or link to “Configure Storage Sense or run it now.” Click that.
- Configure how Storage Sense runs (and what it cleans)
You’ll typically see two sets of options: a toggle to enable Storage Sense and a set of configurable rules.
- How often Storage Sense runs
- Choose how often Storage Sense runs: options often include
- During low free disk space
- Every day
- Every week
- Every month
- Pick the one that matches how aggressively you want it to work. If you’re short on space, “During low free disk space” is a sensible default.
- What Storage Sense cleans up
- Delete temporary files that my apps aren’t using
- Delete files in my Downloads folder that have been there for more than a set number of days (e.g., 30 days)
- Delete files in Recycle Bin after a set number of days (e.g., 30 days)
- Some builds may offer additional toggles or phrasing; the core idea is the same: remove unused temporary data, older Downloads, and empty the Recycle Bin automatically.
- Run Storage Sense now (optional)
- There is usually a “Clean now” or “Run Storage Sense” button. Use it if you want to reclaim space immediately rather than waiting for the next scheduled run.
5) Save and exit (or simply close Settings)
- Changes typically apply automatically as you close Settings. If you used “Run Storage Sense” now, you’ll see the results shortly after it finishes.
- Optional checks and quick tests
- After Storage Sense runs, go back to the Storage page to check how much free space you gained.
- If you have a lot of temporary files, Downloads, or a full Recycle Bin, you may notice a noticeable bump in free space.
- If you rely heavily on large downloads or installers, consider adjusting the Downloads cleanup window to a longer period (e.g., 60 or 90 days) or disabling the Downloads cleanup entirely.
- If you use OneDrive, remember that Storage Sense targets local files. Large local copies of files stored for offline use may still occupy space unless you adjust OneDrive settings or keep files online only.
Tips and troubleshooting notes
- Why Storage Sense might be unavailable or greyed out
- On some corporate devices, Storage Sense is controlled by group policy. If you don’t see the options as editable, ask your IT admin or check Settings > Privacy & security (Windows 11) or the Local Group Policy Editor (gpedit.msc) if you’re allowed to. Look for policies like “Turn off Storage Sense” or “Configure Storage Sense.”
- Storage Sense isn’t freeing space as expected
- Ensure you’ve enabled Storage Sense and configured it to run at a reasonable interval.
- Confirm that there are actual eligible files to delete (temporary files, old Downloads, and items in the Recycle Bin). If your system doesn’t have many of these, the space gain will be minimal.
- If you’re using disk-heavy applications (video editing, large games, etc., the space reclaimed might be modest unless those caches and temp folders are sizable. Consider periodically checking and manually cleaning large cache folders if needed.
- How Storage Sense interacts with Downloads and Recycle Bin
- The Downloads cleanup only removes files that have sat in the Downloads folder for longer than the set period. If you routinely keep downloads, this option won’t reclaim much space.
- Emptying the Recycle Bin automatically can reclaim space that would otherwise be unavailable until you manually empty it.
- On systems with OneDrive or Files On-Demand
- Storage Sense focuses on locally stored items. If you want to reclaim space on a drive where OneDrive files are fully synced, consider making some files online-only or using OneDrive’s “Free up space” feature for specific folders.
- Using Storage Sense on multiple drives
- The interface generally applies to the primary OS drive (usually C
") . If you have secondary drives, Storage Sense may offer to clean up on them if Windows deems it relevant; otherwise, you can still manage cleanup on C: and rely on other tools for other drives.
. If you have secondary drives, Storage Sense may offer to clean up on them if Windows deems it relevant; otherwise, you can still manage cleanup on C: and rely on other tools for other drives.
Conclusion
Storage Sense is a simple but powerful way to keep Windows responsive on devices with limited storage. By enabling automatic cleanup of temporary files, older downloads, and items in the Recycle Bin, you gain reliable, hands-off space management. It’s especially handy for laptops and compact desktops where every gigabyte counts. With a few clicks, you can set it to run at a frequency that fits your usage and then let Windows take care of the rest.Key benefits include:
- Automated space recovery without manual disk cleanup
- Simple controls for common culprits (temp files, Downloads, Recycle Bin)
- Quick option to run cleanup immediately to reclaim space now
Key Takeaways:
- Storage Sense automatically frees disk space by removing temporary files, emptying the Recycle Bin, and cleaning old Downloads.
- You can tailor when it runs and what it cleans up, with an option to “Run Storage Sense now” for immediate results.
- If options are greyed out, your PC may be managed by an administrator or policy—check with IT or your system policy settings.
- For best results, review the cleanup settings periodically and adjust to your download habits and file usage.
This tutorial was generated to help WindowsForum.com users get the most out of their Windows experience.
Last edited: