

A Razer BlackShark V2 microphone that plays headset audio but records silence is usually muted, connected through the wrong path, not selected as Windows’ recording device, or blocked by app permissions. This guide covers the wired BlackShark V2 and BlackShark V2 X, plus BlackShark V2 Pro and BlackShark V2 HyperSpeed wireless models on Windows 11 and Windows 10, with separate checks for Discord, Teams, PlayStation 5, and Xbox.
Do these checks before changing Windows settings. If the microphone fails here, no app setting will repair it.
Warning: Do not uninstall unrelated USB controllers, chipset devices, or all audio devices at once. Removing the wrong device can temporarily disable other audio hardware, keyboards, mice, or network-connected docks.
For a supported BlackShark connected through its USB sound card or wireless dongle:
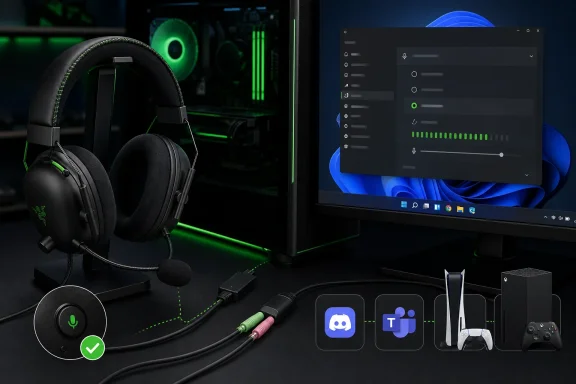 Check the headset and connection first
Do these checks before changing Windows settings. If the microphone fails here, no app setting will repair it.- Check the headset’s physical microphone control.
- On models with a Mic Mute button or switch, unmute it.
- If your BlackShark has a detachable boom mic, remove it and push it fully back into the microphone port.
- Position the microphone diaphragm in front of your mouth, with the vent facing away. Do not point the rear/vent side toward your mouth.
- Confirm the connection matches your BlackShark model.
- BlackShark V2 X: Connect the 3.5 mm plug directly to a combo headset jack. If your desktop has separate headphone and microphone jacks, use the supplied splitter cable.
- BlackShark V2 with USB sound card: Connect the headset through its supplied USB sound card directly to the PC. Avoid USB hubs while troubleshooting.
- BlackShark V2 Pro or V2 HyperSpeed: Use the supplied wireless USB dongle for PC troubleshooting. Move it to another USB port if Windows does not see a microphone.
- If your wireless model supports Bluetooth, use the USB dongle for the first test. Bluetooth can expose a separate hands-free microphone device and is not the best baseline test.
- Inspect the plug, headset port, splitter, and USB connector for debris or visible damage. Reseat every connector firmly.
- Test the headset on another compatible device if possible.
- A headset that records correctly elsewhere points to a Windows, driver, app, or console setting.
- A headset that records silence on multiple compatible devices, after the boom is reseated and unmuted, may have a faulty microphone, cable, splitter, dongle, or headset port.
Select and test the BlackShark microphone in Windows
Windows can send audio to the BlackShark headphones while using a different microphone for recording. Set the input device explicitly and test it outside Discord or Teams.Windows 11
- Open Start > Settings > System > Sound.
- Under Input, locate Choose a device for speaking or recording.
- Select the Razer or BlackShark microphone.
- Select the > button beside that input device.
- Under Input settings, select Start test.
- Speak normally into the boom mic for several seconds.
- Select Stop test, then select Play to hear the sample.
- Raise the Input volume slider if the recording is too quiet.
Windows 10
- Open Start > Settings > System > Sound.
- Under Input, select the BlackShark microphone in Choose your input device.
- Speak into the headset and watch Test your microphone.
- If the meter does not react, return to the physical connection checks and continue with the privacy and legacy recording-device checks below.
Allow microphone access in Windows
A correctly connected BlackShark will still record silence if global or app microphone permission is disabled.Windows 11
- Open Start > Settings > Privacy & security > Microphone.
- Turn on Microphone access.
- Turn on Let apps access your microphone.
- Turn on access for the affected Microsoft Store app, if it appears in the list.
- Turn on Let desktop apps access your microphone for programs such as Discord, Chrome, many versions of Teams, game launchers, and browser-based calling services.
Windows 10
- Open Start > Settings > Privacy > Microphone.
- Turn on Allow apps to access your microphone.
- Enable access for the affected app where it is listed.
- Turn on Allow desktop apps to access your microphone when using a traditional desktop program.
Set the BlackShark as the default recording device
Use the legacy sound panel when apps keep selecting a webcam, monitor, controller, or laptop microphone.- Open Start > Settings > System > Sound.
- Under Advanced, select More sound settings.
- Open the Recording tab.
- Right-click the Razer/BlackShark microphone and select Set as Default Device.
- Right-click it again and select Set as Default Communication Device.
- Select Properties > Levels.
- Confirm the microphone is not muted and raise its level as needed.
- Select Apply, then OK.
Rule out driver and Windows audio faults
If Windows does not detect the microphone or the Windows test remains silent, use Microsoft’s built-in repair path before reinstalling anything.- Disconnect and reconnect the headset or wireless dongle.
- Restart the PC.
- Open Start > Settings > System > Sound.
- Under Advanced, use the input-device option under Troubleshoot common sound problems if it is available.
- Follow the troubleshooter’s prompts, then repeat the microphone test.
- Right-click Start and select Device Manager.
- Expand Audio inputs and outputs and Sound, video and game controllers.
- Right-click the affected Razer or audio device and select Update driver.
- Restart Windows after updating.
Warning: Do not uninstall unrelated USB controllers, chipset devices, or all audio devices at once. Removing the wrong device can temporarily disable other audio hardware, keyboards, mice, or network-connected docks.
Configure Synapse only when the headset supports and detects it
Razer Synapse settings apply only when the BlackShark model and its connection type are supported and detected. The analog BlackShark V2 X normally depends on Windows and app settings rather than Synapse microphone controls.For a supported BlackShark connected through its USB sound card or wireless dongle:
- Open Razer Synapse 4.
- Select the detected BlackShark device.
- Open the Mic section.
- Confirm the microphone is not muted and increase microphone volume if necessary.
- Temporarily disable microphone enhancements, then retest in Windows.
- Use sidetone only as a confidence check that your voice is reaching the headset audio system; it is not a substitute for the Windows recording test.
- Exit Synapse from its notification-area icon.
- Confirm that the Windows microphone test now works.
- Restart Windows.
- Install the current Synapse version and the firmware updater specifically listed on your exact headset’s Razer support page.
Select the microphone inside Discord, Teams, and browser calls
When the Windows test works but one program records silence, the program is using the wrong input or lacks permission.Discord
- Open Discord and select User Settings.
- Select Voice & Video.
- Under Input Device, select the Razer or BlackShark microphone instead of leaving it on an incorrect device.
- Use Discord’s microphone test.
- Check whether Push to Talk is enabled. Switch to Voice Activity temporarily if you are unsure which keybind is assigned.
- If voice problems persist, temporarily disable Enable Quality of Service High Packet Priority in the same area and retest.
Microsoft Teams
- Before joining a meeting, select Settings and more > Settings > Devices.
- Choose the BlackShark microphone.
- During a meeting, use the arrow beside the microphone control and open More audio settings if Teams offers it.
- Confirm the selected microphone matches the BlackShark device selected in Windows.
Chrome or another browser
- Open the browser’s microphone permission controls.
- Ensure the calling website is allowed to use the microphone.
- Select the BlackShark as the browser’s preferred microphone if that choice is offered.
- Reload the calling page after changing permissions.
Fix PS5 and Xbox console chat
PlayStation 5
- Connect the BlackShark securely to the controller or use the compatible wireless connection.
- Press the PS button and select Mic in Control Center.
- Set Input Device to the headset microphone.
- Check mute status and select Adjust Microphone Level.
- Speak normally and set the level so the input reaches the good range.
- If party members still cannot hear you, open Game Base and verify you are in the intended party or game voice chat.
Xbox
- Confirm the headset microphone is not muted.
- Open the Xbox guide and check the Audio & music controls for headset volume and chat mixer settings.
- Confirm the correct party or game chat channel is active.
- Review Xbox communication privacy settings if you cannot speak to anyone, especially on child or managed accounts.
- Unmute or unblock the specific person if the problem affects only one contact.
When to treat it as hardware failure
Escalate to Razer support when all of the following are true:- The boom mic is fully seated and unmuted.
- The headset has been tested through the correct cable, splitter, USB sound card, or dongle.
- Windows’ microphone test stays silent.
- The microphone also fails on another compatible PC, console, or mobile device.
- Firmware and pairing steps were completed where applicable.
References
- Primary source: Technobezz
Published: 2026-07-19T16:52:14.900000+00:00
Razer BlackShark V2 Microphone Not Working? How to Fix It (2026) | Technobezz
Fix Razer BlackShark V2 microphone not working with checks for mute, Windows input, Synapse 4, apps, wireless, and consoles.www.technobezz.com - Related coverage: mysupport.razer.com

Razer BlackShark V3 X HyperSpeed | RZ04-054201 Support & FAQs
mysupport.razer.com
