

Glorious CORE can fail in several distinct ways: the app may refuse to launch, a connected mouse or keyboard may disappear, firmware may stall, wireless pairing may break, or the interface may place an essential Save button outside the visible screen. The fastest solution is not a random sequence of reinstalls and resets, but a symptom-led troubleshooting process that first verifies software and hardware compatibility, then isolates USB, configuration, firmware, wireless, and display problems without putting a working peripheral at unnecessary risk.
Glorious CORE is the configuration and firmware platform for most recent Glorious mice, keyboards, and related peripherals. It handles functions that Windows’ built-in device settings cannot, including DPI stages, polling rates, macros, key remapping, RGB lighting, Hall Effect keyboard calibration, wireless receiver pairing, onboard profiles, and device firmware.
That broad hardware responsibility also makes CORE more complicated than an ordinary desktop application. It must communicate with USB Human Interface Devices, recognize exact product revisions, coordinate firmware between wireless mice and their receivers, and write settings both to the computer and, in many cases, to onboard device memory.
Similarly, a keyboard that appears in CORE but does not retain its lighting may have a profile-saving problem rather than a connection problem. Firmware failures add another layer because they can temporarily leave the peripheral in a bootloader or recovery state that looks like hardware failure.
The practical lesson is simple: identify the failure category before applying a fix. Reinstalling the application will not correct an unsupported legacy mouse, and repeatedly retrying firmware will not repair an unstable USB path.
Check the label underneath the mouse or keyboard, the retail packaging, the purchase record, and the device-specific product guide. If CORE has never detected the peripheral, a generation mismatch is more plausible than configuration corruption.
The macOS edition of CORE 2.1 is intended for Apple silicon Macs using an M1-class processor or newer. Glorious lists Big Sur and later as the general requirement, while its download information has also identified a Big Sur-through-Sonoma range. Owners of newer macOS releases should verify current compatibility before installing because the published wording is not entirely uniform.
Intel-based Macs are not covered by the Apple M1+ requirement. CORE v1 is Windows-only, and Linux is not an officially listed CORE platform.
To check from inside the app:
A device may work for ordinary cursor movement through a hub yet fail during firmware transfer. Routine HID reports require very little bandwidth, while firmware updates depend on an uninterrupted sequence of commands and may switch the device into a different USB operating mode.
Test the following systematically:
If the same supported device appears in CORE on another PC, the original computer is the likely source of the failure. If the device fails on two computers with direct connections and known-good cables, device firmware or hardware becomes more suspect.
The AppData folder is hidden by default. It can be reached by enabling hidden items in File Explorer or by entering the location directly into the address bar.
Deleting these folders removes local customization and cached state, so record important DPI values, key assignments, macros, and lighting settings first. Cloud-saved profiles may be recoverable through a Glorious account, but local-only profiles should not be treated as backed up.
Install the latest official CORE package after Windows starts. Launch it normally and reconnect the device directly.
Do not automatically select Run as administrator after a clean reinstall. Elevation is a targeted firmware troubleshooting step for certain models, not the standard way to operate CORE.
Download the current Apple silicon build from the official Glorious software page. Reinstall it, reconnect the device directly, and test again without a dock or hub.
This is not universal advice. Glorious’s troubleshooting instructions for V2 wireless mice such as the Model O 2 Wireless explicitly state that CORE should not be run as administrator during that process.
That distinction matters because elevation can alter how the application accesses files, services, and per-user configuration. Follow the dedicated guide for the exact product instead of combining instructions from unrelated models.
Device Manager can also be used carefully:
Do not use a firmware package intended for a similarly named wireless or later-generation mouse. Firmware is tied to the hardware controller, and installing the wrong image can make recovery more difficult.
Open CORE and select the dongle icon near the lower-left corner. Choose the correct mouse, confirm that the wired mouse and receiver both appear as connected, and select Pair.
CORE will then display model-specific steps, which may include a scroll-wheel or button action to place the mouse into 2.4GHz pairing mode. Follow the displayed sequence exactly; do not substitute the reset combination used for other models.
Use the supplied extender where available and place the receiver on the desk near the mouse. Keep it away from crowded hubs, external drives, wireless routers, and large metal surfaces.
After the reset, reconnect the mouse and allow CORE to detect it again. Configure one simple profile first, save it, close CORE, and test whether the setting persists before recreating complex macros or multiple DPI stages.
Also avoid assuming that every Glorious mouse uses the same sequence. If the standard combination does not produce the expected LED confirmation, consult the exact model guide rather than experimenting with random button holds.
If an MX key still fails, remove the switch and inspect its metal pins. A bent pin can fold underneath the switch instead of entering the socket, producing a hardware fault that software cannot calibrate away.
This simple hardware setting is easy to overlook because CORE can still detect the keyboard. Reinstalling software will not override a physical mode switch.
Test with Bluetooth disabled temporarily if both wireless modes are configured. Also move the receiver away from congested rear-panel ports, external SSDs, and other 2.4GHz transmitters.
On Windows:
Use a simple test:
This is a priority conflict, not necessarily a failed Save operation. Two features cannot independently control the same LEDs at the same time.
On a work or school PC, organization policy may prevent firewall changes or block unapproved executables. Contact the administrator rather than trying to bypass endpoint protection.
Also check Task Manager for a background CORE process after the visible window closes. End the stale process before starting another instance.
Do not permanently remove every peripheral utility at once. Disable them one at a time so the conflicting application, if any, can be identified.
Likewise, avoid repeated manual recovery attempts when the official updater cannot identify the hardware on two computers. At that point, Glorious Support is better positioned to determine whether another recovery package or warranty service is appropriate.
Glorious CORE problems are usually solvable once the failure is placed in the right category. Verify the product generation, update the official app, establish a direct and stable USB connection, reinstall without stale configuration when necessary, and reserve firmware recovery, administrator mode, pairing utilities, and hardware resets for the models that explicitly require them. That measured approach protects profiles, avoids unnecessary security changes, and gives both Windows users and Glorious Support a much clearer path from an unresponsive application to a reliably configured peripheral.
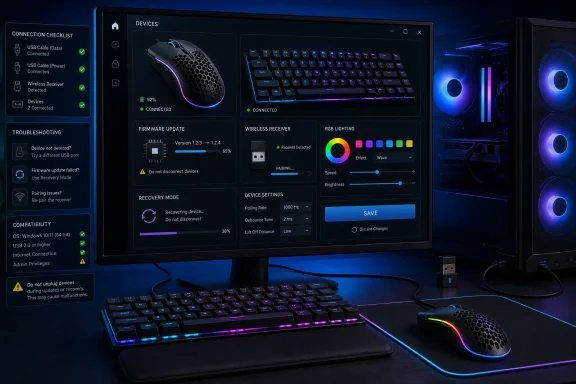 Overview
Glorious CORE is the configuration and firmware platform for most recent Glorious mice, keyboards, and related peripherals. It handles functions that Windows’ built-in device settings cannot, including DPI stages, polling rates, macros, key remapping, RGB lighting, Hall Effect keyboard calibration, wireless receiver pairing, onboard profiles, and device firmware.That broad hardware responsibility also makes CORE more complicated than an ordinary desktop application. It must communicate with USB Human Interface Devices, recognize exact product revisions, coordinate firmware between wireless mice and their receivers, and write settings both to the computer and, in many cases, to onboard device memory.
Why one symptom can have several causes
A mouse that works in Windows but does not appear in CORE is not necessarily defective. Windows may be using its generic HID driver successfully while CORE fails to recognize the product revision, reach the device through a USB hub, or match it to the correct software generation.Similarly, a keyboard that appears in CORE but does not retain its lighting may have a profile-saving problem rather than a connection problem. Firmware failures add another layer because they can temporarily leave the peripheral in a bootloader or recovery state that looks like hardware failure.
The practical lesson is simple: identify the failure category before applying a fix. Reinstalling the application will not correct an unsupported legacy mouse, and repeatedly retrying firmware will not repair an unstable USB path.
Check Device and Software Compatibility First
Before deleting files or changing drivers, confirm that the installed CORE release actually supports the peripheral. Glorious maintains both current and legacy software because some earlier products use a different configuration architecture.Devices that need legacy software
Glorious CORE 2.1 supports most current Glorious hardware, but important exceptions include:- GMMK 1 keyboards require their listed legacy software rather than CORE 2.1.
- Model O and Model O- Wired V1 mice are not supported by CORE 2.1.
- Model D and Model D- Wired V1 mice are not supported by CORE 2.1.
- Other product revisions should be checked against the current Glorious software and product-guide pages before troubleshooting detection.
Check the label underneath the mouse or keyboard, the retail packaging, the purchase record, and the device-specific product guide. If CORE has never detected the peripheral, a generation mismatch is more plausible than configuration corruption.
Windows and macOS requirements
The main Glorious software page lists Windows 10 or later as the broad PC requirement, while its installation FAQ may describe Windows 11 or later for the latest download workflow. In 2026, Windows 11 is the preferable environment because Microsoft ended free Windows 10 security support on October 14, 2025.The macOS edition of CORE 2.1 is intended for Apple silicon Macs using an M1-class processor or newer. Glorious lists Big Sur and later as the general requirement, while its download information has also identified a Big Sur-through-Sonoma range. Owners of newer macOS releases should verify current compatibility before installing because the published wording is not entirely uniform.
Intel-based Macs are not covered by the Apple M1+ requirement. CORE v1 is Windows-only, and Linux is not an officially listed CORE platform.
Install and Update CORE Safely
Once compatibility is established, obtain the installer from the official Glorious software page. Third-party software archives may host outdated, repackaged, or incorrect installers, any of which can reproduce the same launch and detection symptoms as a damaged official installation.Perform a clean initial installation
Use this order for a first installation or a replacement download:- Close any currently running copy of Glorious CORE from the notification area and Task Manager.
- Download the appropriate Windows or macOS build from the official Glorious software page.
- Open the downloaded installer.
- Complete the normal installation prompts.
- Launch CORE without changing compatibility settings or forcing administrator mode.
- Connect the supported peripheral directly to the computer when the software is ready.
Check for application updates
CORE updates can contain much more than visual changes. Glorious has used CORE 2.1 releases to improve firmware handling, address wireless-device update failures, refine RGB behavior, and correct profile-saving problems.To check from inside the app:
- Open Glorious CORE.
- Select the gear icon in the left toolbar.
- Enable automatic updates.
- Select Check for Updates.
- Allow the update to download and install.
- Let CORE restart when prompted.
- Return to Settings and confirm the installed version.
Fix USB Detection Problems
USB connectivity is the most important dividing line in CORE troubleshooting. If Windows and CORE cannot maintain stable communication with the device, firmware, pairing, lighting, and profile operations may all fail in different ways.Remove hubs, docks, and adapters
Connect the affected mouse or keyboard directly to the PC. Temporarily remove:- USB hubs.
- Monitor-integrated USB ports.
- Keyboard pass-through ports.
- Docking stations.
- KVM switches.
- Long extension cables.
- USB-C multiport adapters.
- Unnecessary converters between USB connector types.
A device may work for ordinary cursor movement through a hub yet fail during firmware transfer. Routine HID reports require very little bandwidth, while firmware updates depend on an uninterrupted sequence of commands and may switch the device into a different USB operating mode.
Try a known-good cable and port
A detachable cable can deliver power while failing to carry reliable data. This commonly produces lighting or charging without software detection.Test the following systematically:
- Connect the device to another USB port on the same computer.
- Prefer a direct motherboard USB port on a desktop.
- Test a USB 2.0 port where the product-specific guide recommends it.
- Replace the detachable cable with a known-good data-capable cable.
- Avoid charge-only USB cables.
- Inspect the device connector for looseness, debris, or physical damage.
- Disconnect nonessential USB devices during testing.
Test on another computer
A second computer is one of the most valuable troubleshooting tools available. It separates a peripheral fault from a Windows installation, USB-controller, security-policy, or local configuration problem.If the same supported device appears in CORE on another PC, the original computer is the likely source of the failure. If the device fails on two computers with direct connections and known-good cables, device firmware or hardware becomes more suspect.
Perform a Clean Reinstall on Windows
A normal uninstall may leave user configuration, cached device information, logs, or update state behind. Reinstalling immediately over that data can restore the same broken behavior.Remove the application and configuration
On Windows 11:- Open Settings.
- Select Apps.
- Open Installed apps.
- Find Glorious CORE.
- Select the three-dot menu.
- Choose Uninstall.
- Follow the Glorious removal prompts.
- Select the option to remove existing configuration files when offered.
Code:
C:\Users\[username]\AppData\Local\Glorious Core
C:\Users\[username]\AppData\Roaming\Glorious CoreDeleting these folders removes local customization and cached state, so record important DPI values, key assignments, macros, and lighting settings first. Cloud-saved profiles may be recoverable through a Glorious account, but local-only profiles should not be treated as backed up.
Shut down rather than merely relaunch
After removing the app and its folders, shut down the PC for roughly 7 to 10 seconds before turning it on again. A full power transition can clear device and controller state that survives an application restart.Install the latest official CORE package after Windows starts. Launch it normally and reconnect the device directly.
Do not automatically select Run as administrator after a clean reinstall. Elevation is a targeted firmware troubleshooting step for certain models, not the standard way to operate CORE.
Reinstall CORE on a Mac
The macOS procedure is shorter, but compatibility and security checks matter more. CORE 2.1 requires Apple silicon according to Glorious’s published Mac requirement, so reinstalling it repeatedly will not make an Intel Mac supported.Remove and replace the app
Open Finder, select Applications, and locate Glorious CORE. Drag it to Trash or use File > Move to Trash, then empty Trash if appropriate and restart the Mac.Download the current Apple silicon build from the official Glorious software page. Reinstall it, reconnect the device directly, and test again without a dock or hub.
If macOS blocks the app
macOS may prevent a downloaded application from opening when it cannot complete its usual trust check or when system security requires explicit approval. If the installer came directly from Glorious:- Open System Settings.
- Select Privacy & Security.
- Scroll to the security message concerning Glorious CORE.
- Select Open Anyway.
- Confirm by selecting Open on the warning dialog.
Repair Firmware Update Failures
Firmware updates deserve more caution than ordinary profile edits. Interrupting an update can leave a mouse or keyboard in a recovery state, and model-specific instructions can contradict generic troubleshooting advice.Prepare the connection
Before retrying an update:- Close games and unnecessary background applications.
- Connect a laptop to AC power.
- Disable sleep temporarily.
- Attach the device directly to the computer.
- Connect a wireless mouse by cable.
- Plug its receiver directly into a second port when instructed.
- Remove USB hubs and docking stations.
- Avoid moving or disconnecting the device during the process.
- Update CORE before updating peripheral firmware.
Use administrator mode only when directed
Some older or model-specific recovery workflows may require elevated access. In those cases, close CORE, right-click its executable, and choose Run as administrator before retrying the firmware update.This is not universal advice. Glorious’s troubleshooting instructions for V2 wireless mice such as the Model O 2 Wireless explicitly state that CORE should not be run as administrator during that process.
That distinction matters because elevation can alter how the application accesses files, services, and per-user configuration. Follow the dedicated guide for the exact product instead of combining instructions from unrelated models.
Update Windows and device drivers
If the appropriate firmware procedure still fails, install pending Windows updates and restart. Windows Update is generally the preferred route for current Microsoft-tested drivers.Device Manager can also be used carefully:
- Right-click Start and select Device Manager.
- Expand the relevant Human Interface Devices, Mice, Keyboards, or USB controller category.
- Identify the affected entry without guessing.
- Right-click it and select Update driver.
- Choose Search automatically for drivers.
- Restart if requested.
Recover a Model I Wired After a Failed Update
A Model I Wired with a red-flashing scroll wheel after a failed CORE or firmware update may be in a recoverable firmware state. Treat this as a specific recovery case rather than a reason to discard the mouse.Use the dedicated manual updater
Keep the mouse connected to a working direct USB port. Obtain the official manual firmware updater for the Model I Wired, extract it if necessary, run the updater executable as administrator, and select Update Firmware.Do not use a firmware package intended for a similarly named wireless or later-generation mouse. Firmware is tied to the hardware controller, and installing the wrong image can make recovery more difficult.
Force detection mode if necessary
If the manual updater does not recognize the mouse:- Unplug the Model I Wired.
- Hold the right mouse button and left mouse button simultaneously.
- Reconnect the USB cable while continuing to hold both buttons.
- Release the buttons after the connection is established.
- Launch the manual updater again.
- Retry the firmware process.
Fix Wireless Pairing and Receiver Problems
Wireless mice create a special case because CORE may detect the receiver even when the receiver no longer communicates with the mouse. Firmware mismatches, interrupted updates, or lost pairing data can break the link without damaging either component.Pair supported devices with the standalone utility
For models supported by the standalone Glorious Pairing Utility:- Download the utility from the official Glorious software page.
- Extract the ZIP archive completely.
- Run the utility from the extracted folder.
- Select the exact mouse model.
- Connect the receiver directly to the PC.
- Connect the mouse to the same PC in wired mode.
- Select Pair.
- Wait for completion before disconnecting anything.
- Test the mouse over 2.4GHz wireless.
Use CORE for V2 wireless mice
The standalone utility is not the correct pairing method for the Model O 2 Wireless or Model I 2 Wireless. These V2 models use the pairing interface inside CORE.Open CORE and select the dongle icon near the lower-left corner. Choose the correct mouse, confirm that the wired mouse and receiver both appear as connected, and select Pair.
CORE will then display model-specific steps, which may include a scroll-wheel or button action to place the mouse into 2.4GHz pairing mode. Follow the displayed sequence exactly; do not substitute the reset combination used for other models.
Improve receiver placement
After successful pairing, connection drops may come from radio placement rather than software. A receiver attached behind a metal desktop tower can be farther from the mouse than its physical distance suggests, while nearby USB 3.x equipment can add interference in the 2.4GHz band.Use the supplied extender where available and place the receiver on the desk near the mouse. Keep it away from crowded hubs, external drives, wireless routers, and large metal surfaces.
Reset Glorious Mice Correctly
A factory reset can clear damaged onboard profiles, unusual button mappings, DPI behavior, and lighting configuration. It is useful when the hardware works but repeatedly returns to an incorrect state.Standard mouse reset
For many Glorious mice, hold these three controls together for approximately five seconds:- Left mouse button.
- Right mouse button.
- Scroll-wheel click.
After the reset, reconnect the mouse and allow CORE to detect it again. Configure one simple profile first, save it, close CORE, and test whether the setting persists before recreating complex macros or multiple DPI stages.
When not to reset
Do not repeatedly reset a mouse in the middle of an unresolved firmware update. The device may already be in a bootloader state where the normal button combination has no effect.Also avoid assuming that every Glorious mouse uses the same sequence. If the standard combination does not produce the expected LED confirmation, consult the exact model guide rather than experimenting with random button holds.
Resolve GMMK 3 Keyboard Problems
The GMMK 3 family combines hardware profiles, operating-system modes, modular switches, RGB zones, and, on HE variants, magnetic sensing and calibration. A keyboard can therefore type normally while one advanced subsystem fails.Calibrate GMMK 3 HE switches
After installing or changing switches on a GMMK 3 HE or GMMK 3 PRO HE, open CORE 2.1 and run the calibration tool:- Connect the keyboard directly.
- Select it on the CORE home screen.
- Open the Performance tab.
- Start the calibration process.
- Follow every on-screen instruction.
- Confirm the calibration when prompted.
- Test every replaced key.
If an MX key still fails, remove the switch and inspect its metal pins. A bent pin can fold underneath the switch instead of entering the socket, producing a hardware fault that software cannot calibrate away.
Check the Windows and macOS toggle
If the Windows key, Command key, Option key, or bottom-row shortcuts behave incorrectly, inspect the physical operating-system switch near the keyboard’s USB port. Move it left for the Windows layout and right for macOS on supported GMMK 3 models.This simple hardware setting is easy to overlook because CORE can still detect the keyboard. Reinstalling software will not override a physical mode switch.
Stabilize GMMK 3 wireless connections
For a wireless GMMK 3 that disconnects over 2.4GHz, connect the USB-A receiver to the supplied extension adapter, attach the extender to the keyboard’s charging cable, and position the receiver close to the keyboard.Test with Bluetooth disabled temporarily if both wireless modes are configured. Also move the receiver away from congested rear-panel ports, external SSDs, and other 2.4GHz transmitters.
Fix Lighting, Saving, and Interface Problems
Some CORE failures occur entirely inside the interface. The device may be detected and responsive, yet settings do not save or important controls sit outside the usable desktop area.Restore an offscreen Save button
Display scaling can make CORE’s fixed-size interface larger than the available workspace, particularly on small laptop screens, low resolutions, or displays using 125%, 150%, or higher scaling.On Windows:
- Open Settings > System > Display.
- Set Scale to 100% temporarily.
- Select the highest recommended display resolution.
- Reopen CORE.
- Drag a lower corner to reduce the window size if resizing is available.
- If necessary, temporarily switch the display orientation to Portrait.
- Save the changes and restore the preferred display settings afterward.
Diagnose settings that will not persist
When CORE accepts a setting but the device reverts later, determine where the change is supposed to live. Some changes remain active only while a software profile is running, while others can be written to onboard memory.Use a simple test:
- Select one profile.
- Change one obvious setting, such as a DPI stage or static color.
- Apply or save it.
- Wait for CORE to finish writing.
- Close CORE completely.
- Disconnect and reconnect the device.
- Check whether the change remains.
Correct GMMK Numpad sidelight behavior
If GMMK Numpad sidelight changes do not save, disable the battery-level indicator or configure the side lighting through the Per Key lighting mode. A battery-status effect can take control of the same lighting zone and override the selected appearance.This is a priority conflict, not necessarily a failed Save operation. Two features cannot independently control the same LEDs at the same time.
Check Windows Security and Background Conflicts
CORE needs local hardware access, and some features may require network access for sign-in, cloud profiles, updates, or downloads. Security software can interfere, but the solution should remain narrowly scoped.Add a firewall exception instead of disabling protection
If CORE cannot download updates, sign in, or reach an online service:- Open Windows Security.
- Select Firewall & network protection.
- Choose Allow an app through firewall.
- Select Change settings.
- Locate Glorious CORE or add the official installed executable.
- Permit only the network types that are genuinely required.
- Save the change and test again.
On a work or school PC, organization policy may prevent firewall changes or block unapproved executables. Contact the administrator rather than trying to bypass endpoint protection.
Close conflicting peripheral software
RGB and peripheral suites can compete for device access, lighting control, startup priority, or system resources. Temporarily close software from other keyboard, mouse, motherboard, and lighting vendors, then relaunch CORE.Also check Task Manager for a background CORE process after the visible window closes. End the stale process before starting another instance.
Do not permanently remove every peripheral utility at once. Disable them one at a time so the conflicting application, if any, can be identified.
Strengths and Opportunities
Glorious CORE remains valuable because it brings advanced gaming-device functions into one interface rather than forcing users to rely entirely on fixed hardware shortcuts.- Centralized configuration gives users one place to manage compatible mice, keyboards, lighting, macros, and firmware.
- Onboard profiles can preserve important settings when the peripheral moves between computers.
- Integrated pairing can recover supported wireless devices without replacing otherwise functional hardware.
- Hall Effect calibration allows compatible keyboards to support adjustable actuation and Rapid Trigger accurately after switch changes.
- Firmware updates can correct device-level defects that an ordinary Windows driver update cannot reach.
- A native Apple silicon build expands configuration beyond Windows for supported products.
- Official legacy packages keep several older products configurable even though they are outside CORE 2.1’s support list.
Risks and Concerns
CORE troubleshooting can cause additional problems when instructions for different product generations are combined.- Installing the wrong software generation can make a healthy device appear unsupported or invisible.
- Interrupting firmware can place a peripheral in a recovery state and temporarily remove normal input functions.
- Running CORE as administrator without a model-specific reason can change behavior without fixing the underlying fault.
- Deleting AppData folders removes local profiles, macros, and customization that may not be backed up.
- Third-party firmware tools and unofficial installers create security and device-integrity risks.
- Broad firewall changes can expose the computer unnecessarily when a narrow application exception would suffice.
- Resetting a mouse erases onboard profile information and should not be the first response to every detection issue.
- Randomly removing USB or HID entries in Device Manager can disable unrelated input devices.
- Windows 10 may still run CORE, but its ended mainstream security support makes it a weaker long-term platform in 2026.
What to Watch Next
Glorious continues to update CORE 2.1, so application and firmware behavior can change after this troubleshooting guide is published. Release notes should be checked whenever a previously working device fails immediately after an update or when a known problem appears across several products.Record evidence before contacting support
If the appropriate fix does not work, prepare a concise support record containing:- The exact product name and hardware revision.
- The installed CORE version.
- The Windows or macOS version.
- Whether the computer uses Intel, AMD, or Apple silicon.
- The device firmware version, if visible.
- The connection mode: wired, Bluetooth, or 2.4GHz.
- The ports and cables tested.
- Whether a USB hub or dock was removed.
- The exact error message.
- A screenshot or short video of the failure.
- Whether the device behaves differently on another computer.
- Any recent firmware, CORE, or operating-system update.
Know when to stop
Stop firmware attempts if the device repeatedly disconnects, becomes unusually hot, smells damaged, shows visible connector damage, or loses power when the cable moves. Those symptoms suggest an electrical or mechanical fault rather than an ordinary software problem.Likewise, avoid repeated manual recovery attempts when the official updater cannot identify the hardware on two computers. At that point, Glorious Support is better positioned to determine whether another recovery package or warranty service is appropriate.
Glorious CORE problems are usually solvable once the failure is placed in the right category. Verify the product generation, update the official app, establish a direct and stable USB connection, reinstall without stale configuration when necessary, and reserve firmware recovery, administrator mode, pairing utilities, and hardware resets for the models that explicitly require them. That measured approach protects profiles, avoids unnecessary security changes, and gives both Windows users and Glorious Support a much clearer path from an unresponsive application to a reliably configured peripheral.
References
- Primary source: Technobezz
Published: 2026-07-20T16:46:41.279000+00:00
Glorious Core Not Working? How to Fix It | Technobezz
Glorious Core not working? Fix install, update, device detection, firmware, and save errors with official steps.www.technobezz.com - Related coverage: gloriousgaming.com
How To Update Glorious CORE Software
Glorious CORE software is regularly updated to add new features, fix potential bugs, and improve overall functionality. Staying up-to-date with the latest version ensures you are getting the best experience possible across all of your Glorious devices. www.gloriousgaming.com
