Manage Optional Updates and Driver Updates Safely in Windows 10/11
Difficulty: Beginner | Time Required: 15 minutesKeeping Windows updated is important, but not every update should be installed the moment you see it. Optional updates and driver updates can improve hardware support, fix bugs, and add compatibility for printers, graphics cards, Wi-Fi adapters, and more. However, installing the wrong driver at the wrong time can also cause issues like display glitches, sound problems, or unstable devices.
This guide shows you how to review optional updates carefully, decide what to install, and update drivers the safe way in Windows 10 and Windows 11.
Why this matters
Optional updates are different from normal security updates. Security and quality updates are usually important and should not be ignored. Optional updates, on the other hand, may include:Quick walkthrough
- Preview updates
- Non-critical fixes
- Driver updates for hardware devices
Prerequisites
Before you begin, make sure you have:- A Windows 10 or Windows 11 PC
- An administrator account
- A stable internet connection
- A few minutes to restart your PC if needed
Note: Windows 11 uses Settings > Windows Update, while Windows 10 uses Settings > Update & Security > Windows Update.
Windows 10 note: Windows 10 support has ended as of October 14, 2025. PCs may still function, but Microsoft no longer provides free security updates. If possible, consider moving to Windows 11.
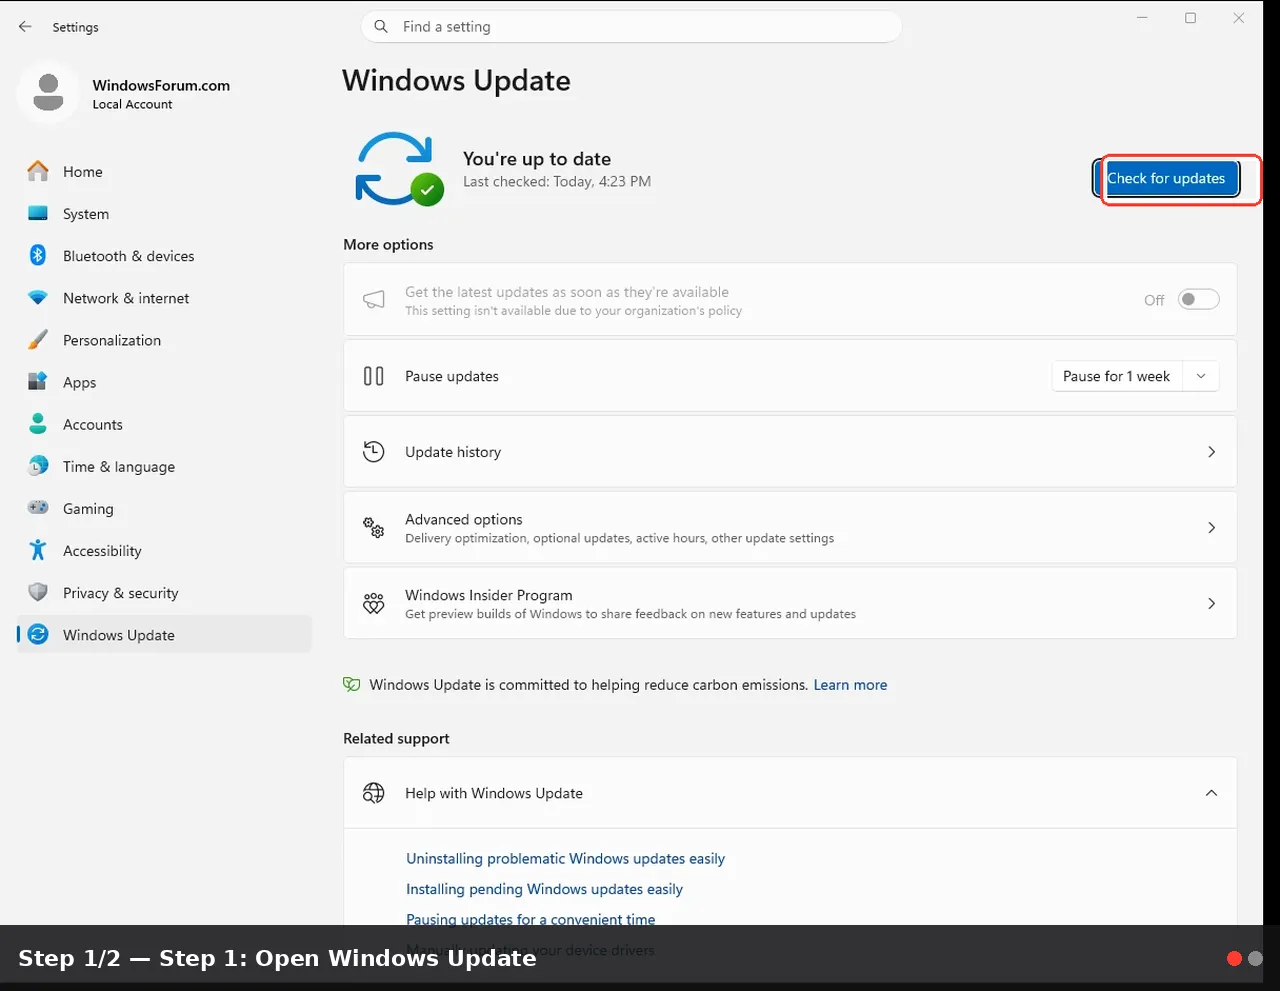
Step 1: Open Windows Update
In Windows 11
- Click Start.
- Open Settings.
- Select Windows Update from the left pane.
In Windows 10
- Click Start.
- Open Settings.
- Select Update & Security.
- Click Windows Update.
Step 2: Check for regular updates first
- In Windows Update, click Check for updates.
- Let Windows search for available updates.
- Install any important security or cumulative updates first.
- Restart the PC if prompted.
Tip: If your PC is running normally, install security and quality updates first, then review optional driver updates separately.
Step 3: Find the Optional Updates section
After Windows finishes checking:- Stay in the Windows Update page.
- Look for Advanced options or directly for Optional updates.
- Click Optional updates if it appears.
- Driver updates
- Feature updates
- Quality updates
- Preview updates
Note: If you do not see Optional updates, Windows may not currently have any for your device.
Step 4: Review driver updates carefully
- Expand the Driver updates section.
- Read each listed item.
- Look for names related to your hardware, such as:
- Intel, AMD, NVIDIA
- Realtek
- HP, Dell, Lenovo, ASUS
- Bluetooth, audio, Wi-Fi, display, touchpad, printer
- Is this device having a problem right now?
- Did I recently replace hardware?
- Am I trying to fix a known issue?
- Is Windows offering a newer driver than the one I already have?
Warning: Do not install every optional driver just because it is available. A stable driver already in use may be better than a newer one for your particular system.
Step 5: Choose which optional updates to install
- Check only the boxes for updates you actually want.
- Prefer updates for devices that are currently causing problems.
- Avoid preview updates unless you need a specific fix.
- Your screen flickers or has poor resolution
- Wi-Fi or Bluetooth is unreliable
- Audio is not working correctly
- A printer or scanner is not detected
- A manufacturer specifically recommended that driver
- Your device is working perfectly
- The update is labeled as a preview and you do not need it
- You are unsure what the driver is for
- Click Download and install.
Step 6: Verify the result after restart
After restarting:- Test the hardware related to the update.
- Check whether the original problem is fixed.
- Make sure no new problems appeared.
- Test sound playback after an audio driver update
- Open a game or video after a graphics update
- Connect to Wi-Fi after a network driver update
- Print a test page after a printer driver update
Step 7: Use Device Manager if needed
Windows Update is generally the safest first choice for driver updates. Microsoft recommends getting most driver updates automatically through Windows Update. If you need another method, use Device Manager.To update a driver automatically in Device Manager
- Right-click Start.
- Select Device Manager.
- Expand the category for the device.
- Right-click the device.
- Select Update driver.
- Choose Search automatically for updated driver software.
To manually install a downloaded driver
- Download the driver only from the official device manufacturer website.
- Open Device Manager.
- Right-click the device and choose Update driver.
- Select Browse my computer for drivers.
- Browse to the folder containing the downloaded driver.
- Click Next.
Warning: Avoid third-party driver websites. They can offer outdated, incorrect, or unsafe drivers.
Step 8: Roll back a driver if something goes wrong
If a newly installed driver causes a problem, you may be able to roll it back.- Right-click Start and open Device Manager.
- Find and right-click the affected device.
- Select Properties.
- Open the Driver tab.
- Click Roll Back Driver if available.
- Choose a reason and confirm.
- Restart the PC if prompted.
Important: The Roll Back Driver button is only available if Windows still has the previous driver version stored.
Step 9: Reinstall a driver if the device stops working
If a device becomes unstable or disappears after an update:- Open Device Manager.
- Right-click the affected device.
- Select Uninstall device.
- Confirm the uninstall.
- Restart the PC.
Tips and troubleshooting
Helpful tips
- Install optional driver updates one at a time if you are troubleshooting.
- Restart after each major driver update so you know which one changed behavior.
- Graphics, Wi-Fi, audio, and printer drivers are the most common ones users notice.
- On laptops, it is often best to use the manufacturer’s recommended drivers rather than generic ones.
If Optional Updates does not appear
- Run Check for updates again.
- Install pending required updates first.
- Restart your PC and check again.
If a driver update fails
- Try again after restarting.
- Make sure you are using an administrator account.
- Check the manufacturer’s support page for a newer driver.
If Windows says the best driver is already installed
That usually means Windows believes the current driver is the best available through its catalog. If you still have a problem, compare it with the driver on your PC maker’s support site.If the PC becomes unstable after an update
- Roll back the driver in Device Manager
- Use System Restore if enabled
- Reinstall the last known good driver from the manufacturer
Conclusion
Managing optional updates safely is really about being selective. Regular Windows security updates should usually be installed promptly, but optional driver updates deserve a quick review first. By checking what the update is for, installing only what you need, and knowing how to roll back a bad driver, you can keep your system stable while still fixing real hardware issues.A careful approach helps you avoid unnecessary problems and gives you more control over how Windows 10 and Windows 11 handle your hardware.
Key Takeaways:
- Optional updates are useful, but not all of them need to be installed
- Windows Update is the safest first place to get driver updates
- Install driver updates mainly when fixing a known problem or improving compatibility
- Use Device Manager to update, roll back, or reinstall drivers when necessary
- Download manual drivers only from the official hardware manufacturer website
This tutorial was generated to help WindowsForum.com users get the most out of their Windows experience.
Last edited: