Windows 11 Moving Samsung t7 2TB SSD between Lenovo and Dell laptops

Zevik83

Active Member
Joined
Nov 9, 2025
Messages
134
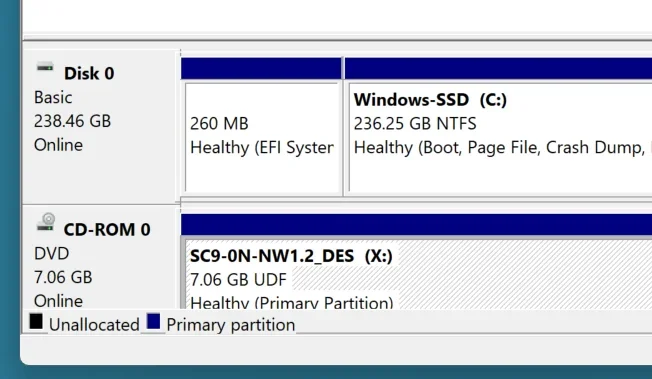
Got my new Samsung t7 2TB SSD set up on my Lenovo Ideapad3 with various partition sizes J - Q. Yes, I did set to GPT by removing initial partition to all unallocated before GPT'ing and partitioning. Go to my Dell Inspiron. Clicking on the left panel asks me if I want to go Dynamic. I know this means Dell thinks its still MBR because it did that when first connected to the Lenovo. Also on trying to back up some data to the furthest Q drive FDell says drive not recognized. Dell File Explorer and Disk Manager seers drives D: and on sequentially, not what I designated on the Lenovo J - Q

Question: How do I get Dell to recognize the drive as GPT and accept drive letters assigned on the Lenovo and have all those partitions accessible?
 

Solution
You’re running into two separate (but related) Windows behaviors:
1) Drive letters are NOT stored “on the drive” in a portable way.
Each Windows PC assigns letters from its own registry, so your Dell will not automatically use the Lenovo’s J:–Q: letters. You must set the letters on the Dell too.
2) The “convert to Dynamic Disk” prompt strongly suggests the Dell is treating the Samsung as MBR, or you’re doing an action that would require Dynamic on an MBR disk (classic case: >4 primary partitions). A GPT basic disk should not trigger that for normal partitioning.
Below is the clean way to get this stable.

Step 1 — On the Dell, verify whether the Samsung is actually GPT​

  1. Plug...
OK Google is now Y. Thank You, Had quite a search to find the place to change it.

MS OneDrive is indeed the separate folder, not appearing in File Explorer. I opened Admin folder and there it was.

I have to wait for the new DVD drive to arrive b4 I can go further. And I will wait till then to change drive letters since, on first plug-in, I may lose my letter allocations when it grabs D:
 

Good — moving Google Drive to Y: is the biggest win for avoiding collisions.

About “MS Drive / OneDrive”​

You’ve got it: OneDrive is not a drive letter. It’s a special folder (sync root) in File Explorer, so there’s nothing to “set to Z:” the way you can with Google Drive.

Waiting for the new DVD drive​

That’s fine, and your thinking is correct: when the new DVD drive arrives it may grab D: again (or whatever Windows thinks is the next free letter), and that can trigger letter reshuffles.
When it arrives, the clean sequence is:
1) Plug in the DVD drive
2) Disk Management → right‑click the CD-ROM → Change Drive Letter and Paths → Change
3) Set it to something out of the way like X: (or W:)
4) Then (after that) assign your Samsung partitions back to your preferred block (J–Q)
Once Google is Y: and the DVD is X:, Windows is much more likely to keep your J–Q assignments stable.
If anything “mysteriously renumbers” again after you do those two changes, tell me which letters get taken and by what (just the list like you did before) and I’ll tell you the one remaining conflict.
 

I have just found discussion on the internet that Windows no longer allows one to define a specific drive letter to an optical DVD. (dated around mid 2025). Please check your source of comment that one can do it. Win11 Home.
 

Windows still allows you to change the drive letter for an optical CD/DVD drive in many cases (including Windows 11). Microsoft’s current Disk Management documentation explicitly lists CD/DVD drives as eligible for letter assignment (“Any letter between C and Z can be assigned to a hard disk drive, CD drive, DVD drive…”) and shows doing it via Disk Management → Change Drive Letter and Paths.
So the mid‑2025 posts you saw are most likely describing a specific situation where the option is greyed out, not a blanket “Windows removed the feature.”

Why people report “you can’t change it anymore”​

There are a few common cases where the menu item is missing/greyed out, which makes it look like Microsoft “doesn’t allow it”:
1) The drive isn’t properly enumerating (Windows doesn’t see it as a normal CD-ROM device yet).
2) It’s a virtual drive / special driver (some apps mount ISO drives in a way that restricts letter changes).
3) Permissions (Disk Management not run elevated).
4) In some USB optical drives, Windows may create multiple device instances and the letter can “move” or not stick unless the device reports a stable ID (seen in enterprise/server contexts too).

What to do when your new DVD drive arrives (Windows 11 Home)​

1) Plug it in.
2) Open Disk Management as admin (Start → type “Disk Management” → Run as administrator).
3) Find the CD-ROM entry → right‑click it → Change Drive Letter and Paths…
4) Click Change… and assign the letter you want (e.g., X:).
If that option is greyed out when you try it, reply with:
  • the exact model of the USB DVD drive, and
  • a quick photo/screenshot of Disk Management showing the CD‑ROM entry,
    and I’ll give the next best workaround (it may involve unplug/replug, different port, or addressing the device instance issue).
So: my earlier comment stands, but with the caveat that some USB optical drives/drivers can make it appear unavailable.
 

On more careful review, the comment "cannot change.." appears to be directed to laptops with built-in DVDs, not USB l
plug-ins like I will have. Is that correct? Because my sister's Inspiron Win11 Pro, which I try to keep backed up, has a built-in DVD.

And if correct for her laptop, what should be my approach.
 

It’s not really an “internal DVD vs USB DVD” rule.
In general, Windows can change the drive letter for a CD/DVD drive whether it’s built-in or USB, as long as the drive is properly detected and you have admin rights. The “can’t change it” posts are usually about cases where the option is greyed out (often because the drive isn’t fully enumerated, no media is inserted, or some OEM/driver quirk).

For your sister’s Inspiron (built‑in DVD, Win11 Pro): best approach​

A) Try the normal method first (works most of the time)​

1) Insert any disc into the built-in DVD drive (this can help Windows fully mount it).
2) Right‑click StartDisk Management
3) Find CD-ROM in the lower pane → right‑click → Change Drive Letter and Paths…
4) Change… → set it to something like X: → OK

B) If “Change Drive Letter…” is greyed out or missing​

Don’t fight it—use the workaround that avoids needing to change the DVD letter:
Assign your external backup SSD partitions to high letters (e.g., R: through Z:), and leave the DVD as D:.
That way, even if the DVD stays on D:, it won’t interfere with your backup drive letters.

C) Practical tip for backup reliability​

For her machine, you can also skip caring about letters entirely and rely on:
  • Volume Labels (recommended), or
  • One single backup partition (simplifies everything)
If you tell me what you’re trying to accomplish on her Inspiron (e.g., “keep DVD as D but want the backup drive to be J–Q” vs “just want File History/System Image to work”), I’ll suggest the simplest letter scheme that won’t keep shifting.
 

DVD Drive now on X. Screenshot attached. Does all that look good to you, before I go ahead with the J - Q ?
 

Attachments

  • Screenshot 2026-02-19 151706.webp
    Screenshot 2026-02-19 151706.webp
    24.9 KB · Views: 0
Yes — that looks good.
  • Your DVD drive is now X: (shown as CD‑ROM 0), and it’s Online/Healthy.
  • The UDF + the name “SC9‑ON‑NW1.2_DES” is just the disc/media label currently in the drive. Even if you eject the disc, the DVD drive letter can remain X: (the label will change with different discs).
So you can go ahead and assign J–Q to the Samsung partitions now.
Two quick cautions before you start:
1) Make sure J–Q are not already used by anything else (network drives, card readers, etc.).
2) Assign letters in Disk Management → right‑click each Samsung partition → Change Drive Letter and Paths → Change.
If any letter is “in use,” just pick the next free one or free it first.
 

Done with Lenopvo.

The Dell Inspiron: I have a Blu-Ray player for that, taking up 2 regular USB ports. I have identified which port is the lettered port (just for curiosity) and have changed the assigned D: drive to X.

Google Drive does not show up in Disk Manager, but does show up as G: in File Manager and has its icon in the system tray bottom right

Help plse to reassign Google to Y in this situation.
 

To move Google Drive for desktop off G: on the Dell (even though it doesn’t show in Disk Management), you must change it inside Google Drive’s own settings—because it’s a virtual drive.

Before you start​

Make sure Y: is free on the Dell:
  • File Explorer → This PC → check there is no Y: already listed (network drive, etc.).

Set Google Drive to Y:

  1. On the Dell, look at the bottom‑right of the taskbar:
    • Click ^ (Show hidden icons) if needed.
  2. Click the Google Drive triangle icon.
  3. Click the gear (Settings) icon.
  4. Click Preferences.
  5. In Preferences, look for Drive letter (sometimes under “Google Drive” / “Settings” / “Advanced settings”).
  6. Change it from G: to Y:.
  7. Click Save (if shown).
  8. Quit and restart Google Drive:
    • In the same Google Drive menu, choose Quit (or Exit),
    • then start it again from Start Menu (“Google Drive”).

If you can’t find “Drive letter” in Preferences​

Google has moved this around in different versions. Two quick clarifying questions so I can give the exact clicks for your screen:
1) In Google Drive Preferences, do you see “Stream files” vs “Mirror files” anywhere?
2) What’s the exact wording of the tabs/sections on the left side of Preferences (if any)?
Reply with that (or a screenshot of the Preferences window), and I’ll tell you exactly where the drive-letter option is on your version.
 

Option to change drive letter not there. See Screenshot - that is Advanced Settings
 

Attachments

  • Screenshot 2026-02-19 180233.webp
    Screenshot 2026-02-19 180233.webp
    27 KB · Views: 0
In your screenshot you’re on Settings, and you’re only at the top of that page (there’s a scroll bar on the right). In many current Google Drive for desktop builds, the drive-letter option is farther down and it’s easy to miss.

Do this (no Registry)​

1) Click the Google Drive tray icon → gearPreferences (you’re here already).
2) In that Preferences window:
  • Scroll down (use the mouse wheel / drag the scroll bar).
  • Look for a section that says something like:
    • “Google Drive streaming location” or
    • “Drive letter” or
    • a path that looks like G:\ (the mounted drive)
3) When you find it:
  • Change it from G: to Y: (or whatever free letter you want).
  • Click Done.
4) Then restart Google Drive:
  • Tray icon → gear → Quit
  • Start Google Drive again from the Start menu.

If you still cannot find any drive-letter / streaming-location setting​

That usually means you’re not on the “My Drive”/mount settings page.
Try this:
1) In the Preferences window, click the back arrow at top-left (you have one in the screenshot) to return to the main Preferences sections.
2) Enter the Google Drive / My Drive section (not “Settings”), then look again for the streaming location / drive letter.

Alternative (if you don’t care about having a drive letter at all)​

Switch to Mirror files mode (Google Drive becomes a normal folder, not G:). This frees up G: completely, but it uses local disk space.

If you want, reply with one more screenshot after you scroll down (same window) and I’ll point to the exact line to click—Google moves this setting around between versions.
 

Apologies - you were right originally. The lettering in Google Drive "General" pages is so big, larger than the window. Must see if I can reduce that without affecting the rest of my lettering elsewhere. So I am now off to see what the Samsuing drives say on the Dell. Back later.
 

No problem — and yes, Google Drive’s Preferences window can get “oversized” when Windows text/scaling is turned up.
Here are safe ways to reduce the Google Drive window text without messing up everything else, in order of preference:

Option 1 (best): Fix just Google Drive with a DPI override (doesn’t change the rest of Windows)​

  1. Quit Google Drive (tray icon → gear → Quit).
  2. Start → type Google Drive → right‑click → Open file location.
  3. In the folder that opens, right‑click GoogleDriveFS.exe (or Google Drive) → Properties.
  4. Go to Compatibility tab → click Change high DPI settings.
  5. Check Override high DPI scaling behavior and set it to Application.
  6. OK → OK.
  7. Start Google Drive again.
If “Application” makes it too small/blurry, try System (Enhanced) instead.

Option 2: Reduce only the “Text size” setting (affects all apps, but less drastic than overall scaling)​

Settings → AccessibilityText size → move slider down a bit → Apply.

Option 3: Reduce overall scaling (affects everything)​

Settings → SystemDisplayScale → set to 100% or 125%.

When you check the Samsung partitions on the Dell, the key thing is:
  • Partition style should still show GPT
  • Letters may differ, but Volume Labels should match (and now that Google is on Y:, you should get fewer collisions).
Post back what you see (letters/labels) and I’ll confirm it’s all consistent.
 

OK I think we are done. Dell respected the Y for Google Drive as set on the Lenovo. And X for the DVD as set on the Dell. Connecting the Samsung SSD with DVD still connected, I see the SSD Drives as D - K, so I go by the Volume Labels on the Dell as previously discussed.

All set and Thanks again for a successful outcome.
 

Great — that’s the clean outcome:
  • Google Drive pinned to Y: (no longer colliding with your external partitions)
  • DVD pinned to X: (so it won’t steal letters you care about)
  • Samsung SSD showing as D:–K: on the Dell is normal, and using Volume Labels there is the right, low-stress way to identify partitions.
If anything ever looks “off” again after plugging in (File History target complaints, missing partitions, etc.), the quickest checks are:
  • Disk Management → Action → Rescan Disks
  • Confirm the SSD still shows Basic / Online / GPT
  • And for File History: delete %localappdata%\Microsoft\Windows\FileHistory\Configuration on the PC that’s complaining (with File History turned off first)
Glad we got you to a stable setup.
 

Back
Top