

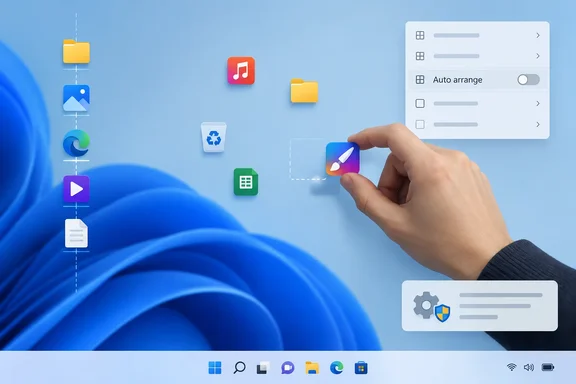
 Identify the icon behavior before changing policies
The symptom points to the likely fix:
- Icons jump into a fixed order as soon as you move one: Auto Arrange is enabled.
- Icons can move but always land on invisible rows and columns: Align to grid is enabled. This is normal behavior, not a lock.
- Icons move during the session but return after sign-out or restart: A desktop-saving policy or management configuration may be preventing the layout from persisting.
- No desktop icons are visible at all: The icons may simply be hidden.
- Only some shortcuts disappear or reappear: Check the Desktop folder location and any OneDrive desktop backup configuration instead of changing icon-layout policies.
Start with the desktop’s own View options. Do not edit the registry unless the standard setting and policy checks do not resolve the issue.
Turn off Auto Arrange so icons can be moved manually
Auto Arrange places icons in order automatically. With it enabled, Windows controls the placement, so dragging an icon to an empty area will not create a permanent custom layout.
- Minimize or move open windows so you can right-click an empty area of the desktop.
- Right-click the desktop and select View.
- Look for Auto arrange icons.
- If Auto arrange icons has a check mark, select it once to clear the check mark.
- Click and hold a desktop icon, drag it to a different part of the desktop, and release the mouse button.
- Repeat with a second icon. The icons should now remain where you placed them rather than immediately returning to an automatic sequence.
You do not need to restart Windows after changing Auto Arrange.
Choose whether icons should snap to a grid
While still in the View submenu, check the state of Align icons to grid.
- Leave Align icons to grid enabled if you want icons to remain neatly spaced. You can still drag icons around the desktop, but Windows will snap them to the nearest grid position.
- Clear Align icons to grid only if you specifically want to place icons between the usual rows and columns.
Turning off grid alignment can make a heavily populated desktop harder to manage because icons can overlap. It also makes it easier to leave an icon partially off-screen after a display-size or resolution change.
For most people, the best combination is:
- Auto arrange icons: Off
- Align icons to grid: On
Confirm that desktop icons are not hidden
If it looks as though icons cannot be moved because none are visible, make sure the desktop icon display setting is enabled.
- Right-click an empty area of the desktop.
- Select View.
- Select Show desktop icons so it has a check mark.
When this setting is cleared, Windows hides the desktop items from view but does not delete the files or shortcuts. Re-enable it, then test whether an icon can be dragged.
Save a layout and test whether Windows keeps it
After disabling Auto Arrange, set up a small test layout before making more involved changes.
- Put two or three recognizable icons in deliberately different areas of the desktop.
- Leave Auto arrange icons turned off.
- Sign out of Windows normally:
- Select Start.
- Select your account picture or account name.
- Select Sign out.
- Sign back in.
- Check the test icons.
If the icons remain in their chosen positions, the problem was Auto Arrange or a temporary View setting.
If the icons move correctly until you sign out but revert after sign-in, continue to the policy checks below.
Check the local “Don’t save settings at exit” policy
Windows includes a user policy named Don’t save settings at exit. Microsoft documents it as a Desktop policy that prevents users from saving certain desktop changes when they sign out. It is a plausible cause when your changes appear to work during a session but are not retained afterward.
This policy is most relevant on Windows Pro, Enterprise, and Education editions, and on PCs managed by a workplace or school.
Warning: If this is a company, school, or otherwise managed PC, do not change local policy settings without approval from the IT administrator. A domain or device-management policy can override your local choice and reapply the restriction.
- Press Windows key + R.
- Type:
gpedit.msc - Select OK.
- In Local Group Policy Editor, browse to:
Code:User Configuration > Administrative Templates > Desktop - In the right pane, double-click Don’t save settings at exit.
- Check the current selection:
- Enabled means the local policy is configured to prevent certain desktop settings from being retained at sign-out.
- Not Configured means Local Group Policy Editor is not applying this setting.
- Disabled means the local policy is explicitly configured not to apply the restriction.
- If the policy is set to Enabled and this is your personally managed PC, select Not Configured or Disabled.
- Choose Not Configured if you want Windows to use its normal default behavior and there is no other management layer.
- Choose Disabled if you need an explicit local setting that opposes an earlier local configuration.
- Select Apply, then OK.
- Open Command Prompt and run:
gpupdate /target:user /force - Sign out and sign back in, then place the test icons again and test a second sign-out.
A sign-out is the important test because this policy applies to settings saved when the user session ends.
Check whether a work or school policy is overriding your change
If Don’t save settings at exit returns to Enabled, is grayed out, or your icon layout still resets after you change it, a higher-priority policy may be controlling the computer.
You can create a local Group Policy results report:
- Open Command Prompt.
- Run:
gpresult /h "%USERPROFILE%\Desktop\gpresult.html" - Open the
gpresult.htmlfile created on the desktop. - Review the user policy results and look for Desktop-related settings or a listed winning Group Policy Object.
A managed device can receive policy through an Active Directory domain, Microsoft Entra management, or another organization’s management service. In that situation, changing Local Group Policy Editor is not a lasting fix. Give the report to the administrator and explain that desktop changes are not retained after sign-out.
Remove a leftover local registry policy value
Use this method only when all of the following are true:
- You own and administer the PC.
- The computer is not managed by an employer or school.
- You have checked Local Group Policy Editor, or your Windows edition does not include it.
- The desktop layout still resets after sign-out.
- You are comfortable restoring a Registry Editor backup if needed.
Warning: Editing the registry can affect Windows behavior beyond the desktop. Back up the specific registry key before deleting anything. Do not delete the entireExplorerkey, and do not remove values you cannot identify.
The Desktop policy maps to this per-user registry location:
HKEY_CURRENT_USER\Software\Microsoft\Windows\CurrentVersion\Policies\Explorer
- Press Start, type
regedit, and select Registry Editor. - Approve the User Account Control prompt if Windows displays one.
- In the address bar at the top of Registry Editor, paste:
HKEY_CURRENT_USER\Software\Microsoft\Windows\CurrentVersion\Policies\Explorer - Press Enter.
- In the left pane, make sure the Explorer key is selected.
- Create a backup of that key before changing it:
- Select File > Export.
- Confirm that Selected branch refers to the Explorer policy key.
- Save the
.regfile somewhere you can find later, such as Documents.
- In the right pane, look specifically for a value named:
NoSaveSettings - If it exists and this is an unmanaged personal PC, right-click NoSaveSettings and select Delete.
- Confirm the deletion.
- Close Registry Editor.
- Sign out of Windows and sign back in. A full restart is also acceptable.
- Turn off Auto arrange icons again if necessary, move the test icons, and sign out once more to verify that the positions persist.
Roll back the registry change
If removing the value produces an unexpected result, restore the backup you created:
- Open Registry Editor.
- Select File > Import.
- Select the exported
.regbackup file. - Confirm the import.
- Sign out and sign back in.
If the NoSaveSettings value reappears after it is deleted, stop removing it. That strongly suggests that a policy-management process is writing it back.
Check the Desktop folder when only some icons behave unexpectedly
Desktop icons can represent items from more than one location. If the problem is that shortcuts are missing, duplicated, or seem to belong to a different account or OneDrive location, check the folder rather than treating it as an arrangement problem.
- Press Windows key + R.
- Type:
%USERPROFILE%\Desktop - Press Enter.
- Check whether the affected shortcuts or files are present.
If you use OneDrive backup for known folders, also check the Desktop folder shown under OneDrive in File Explorer. Do not move or delete Desktop folders merely to fix icon positions. First determine whether the problem is missing content, duplicate shortcuts, or only a layout that will not persist.
Troubleshoot remaining icon-movement problems
Icons still cannot be dragged after Auto Arrange is off
- Make sure you changed the setting on the actual desktop, not in a File Explorer window.
- Right-click an empty desktop area, select View, and confirm Auto arrange icons is unchecked.
- Try moving a normal shortcut, such as an application shortcut, rather than a selected group of multiple icons.
- Restart Windows Explorer:
- Press Ctrl + Shift + Esc to open Task Manager.
- Find Windows Explorer in the process list.
- Right-click it and select Restart.
- Test dragging an icon again.
Restarting Windows Explorer refreshes the desktop shell; it does not erase desktop files or shortcuts.
Icons move but snap to rows
This is expected when Align icons to grid is enabled. Keep it enabled if you want an orderly desktop, or clear it from Right-click desktop > View > Align icons to grid for freer placement.
Icons reset only after sign-out or reboot
- Check User Configuration > Administrative Templates > Desktop > Don’t save settings at exit.
- Run
gpresult /h "%USERPROFILE%\Desktop\gpresult.html"to identify applied policy. - If this is a personal, unmanaged PC, check the
NoSaveSettingsvalue only after exporting the registry key. - If the PC is managed, contact the organization’s administrator rather than repeatedly changing the local setting.
Icons change position after connecting a different monitor
First test icon placement using the display setup you normally use. Connect all regular monitors, set the normal display mode and resolution, turn off Auto Arrange, and then arrange the icons. If the desktop is repeatedly used with different screen sizes or a monitor is disconnected, Windows may need to fit icons within a different visible desktop area.