

Microsoft still lists Windows Media Player Legacy as an optional Windows feature on supported Windows 10 and Windows 11 installations. It remains especially handy for this decidedly physical-media task, even if its interface looks like it remembers when people carried flip phones without irony.
 What you need before you start
- A PC with a working CD or DVD drive. Most newer laptops do not include one, so an external USB optical drive may be necessary.
- An audio CD.
- Windows Media Player Legacy.
- An internet connection if you want the player to retrieve album name, artist, track titles, and cover art automatically.
This process is for ordinary audio CDs that you own or are authorized to copy for personal use. A commercially released disc may be copyrighted, and copying or distributing music beyond what the law permits can create legal trouble faster than a scratched disc at track 11.
Install Windows Media Player Legacy if it is missing
On some PCs, especially Windows 11 systems, Windows Media Player Legacy is not installed by default.
- Open Settings.
- Go to Apps.
- Open Optional features.
- Select View features next to Add an optional feature.
- Search for Windows Media Player Legacy.
- Select it, then choose Next and Add.
On Windows 10, the wording and location can differ slightly by version, but the app is also offered through Optional Features on applicable editions.
If you use a Windows N edition, install the Media Feature Pack from Optional Features first. Microsoft says N editions omit certain media technologies, including components used for Windows Media Player and audio-CD functions.
Set MP3 format, audio quality, and the save location
Do this before ripping. Windows Media Player applies these choices to tracks you rip after changing the settings; it does not convert previously ripped music into a new format or quality level.
- Open Windows Media Player Legacy.
- Switch to Library view if the player opens in a compact playback view.
- Maximize the window so the full toolbar and menus are visible.
- Select Rip settings.
- Choose Format, then select MP3.
- Return to Rip settings and choose Audio quality.
Choosing the right audio quality
Higher audio quality generally preserves more detail but produces larger files. Lower quality conserves space but can make complex music—cymbals, orchestras, and anything with an enthusiastic bass line—sound less natural.
For most personal libraries, choose the highest quality you are comfortable storing. If the music is mainly for small speakers, a car stereo, or casual listening, a middle setting can be a reasonable space-saving compromise. The important part is consistency: ripping an album with wildly different quality settings is a little like framing every photo from a vacation in a different size.
Change where ripped MP3s are saved
By default, Windows Media Player saves ripped music in your Windows Music folder. To use another drive or a dedicated collection folder:
- In Windows Media Player Legacy, open Organize.
- Select Options.
- Open the Rip Music tab.
- Under the folder location section, choose Change.
- Browse to or create the folder where you want the MP3 files stored.
- Select OK to confirm the folder, then select OK again to save the setting.
A dedicated folder on a secondary internal drive, external backup drive, or well-organized music library is often easier to manage than leaving everything in the default Music folder. Do not choose a removable drive unless it is reliably connected whenever you plan to play or manage the files.
Rip the CD to MP3
With the settings in place, the actual copy process is straightforward:
- Insert the audio CD into the optical drive.
- Open Windows Media Player Legacy if it does not open automatically.
- Wait for the disc and its track list to appear.
- Review the listed tracks.
- Clear the check boxes beside any songs you do not want to copy.
- Confirm that the album and track details look correct.
- Select Rip CD.
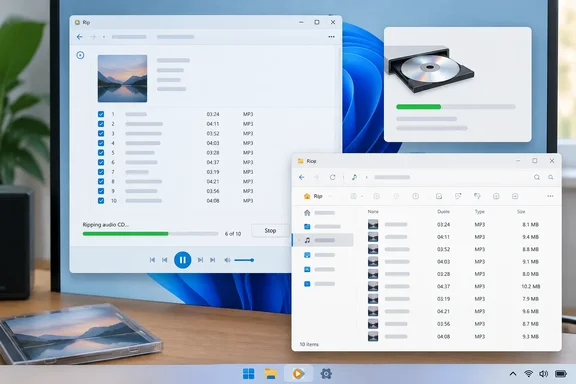
Windows Media Player will copy the selected tracks, compress them as MP3 files, and place them in the save location you selected. The interface shows ripping progress as the work proceeds.
Avoid ejecting the disc, disconnecting an external USB drive, or putting the PC to sleep until the process finishes. A ten-minute rip is a much better use of time than redoing a half-finished ten-minute rip.
Get the correct album title, artist, and track names
If the PC is connected to the internet, Windows Media Player can try to retrieve album information automatically. This can include:
- Album title
- Artist name
- Song titles
- Genre
- Album artwork
Metadata matters more than it may seem. Proper titles and artist details make the library searchable, improve sorting in other media players, and save you from a future collection full of mysteries named “Track 01.”
If the information is missing or incorrect:
- Find the album or track in the Windows Media Player Library.
- Right-click the album.
- Select Find album info.
- Choose the correct result if it appears.
- Follow the on-screen prompts to apply the details and album art.
If Windows Media Player reports that it needs permission to retrieve media information, open Organize > Options > Privacy and enable the option to update music files by retrieving media information from the internet. Microsoft notes that even when the right album is found, cover art may not be available for download.
Find your finished MP3 files
There are two easy ways to locate the ripped music.
In Windows Media Player Legacy
Open the Music section of the Player Library. The newly ripped album should appear with the artist, album title, and tracks—assuming the metadata was available or you corrected it.
In File Explorer
Open File Explorer, then go to:
- Music, if you used the default location; or
- The custom folder you chose under Organize > Options > Rip Music.
The files are ordinarily organized in album and artist folders, which makes copying them to another device or backing them up substantially less painful.
If ripping does not work
Start with the uncomplicated causes before assuming your PC has developed a philosophical objection to compact discs.
- The disc is not detected: Remove it, check for visible dirt or damage, reinsert it, and try again. Test another disc if available.
- The Rip CD button is unavailable: Confirm that the disc is an audio CD, not a data disc containing already-created music files.
- Album information is blank: Connect to the internet, then use Find album info after ripping.
- Windows Media Player Legacy is missing: Add it through Optional Features. On Windows N editions, install the Media Feature Pack.
- Files are not where expected: Check Organize > Options > Rip Music to verify the selected folder.
- Only some tracks were copied: Review the track check boxes before starting another rip; unchecked tracks are intentionally skipped.
Microsoft confirms that Windows Media Player can rip audio CDs as WMA, WAV, or MP3. For a music library intended to work across phones, car stereos, media players, and older devices, MP3 is usually the practical default. WAV offers uncompressed audio at much larger file sizes, while WMA is less universally convenient outside the Windows ecosystem.
Once the files are safely on your PC, back them up. CDs can degrade, optical drives can disappear from modern hardware, and a music collection deserves better than being one misplaced disc away from silence.