

This guide uses the built-in Certificates Microsoft Management Console snap-in—opened with certmgr.msc—to import, inspect, export, and safely back up certificates.
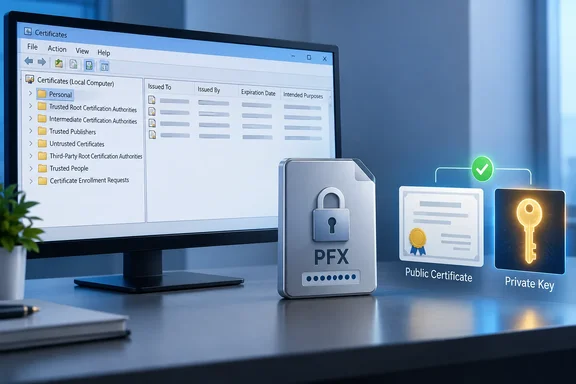 Start with the correct certificate store
Press Win + R, type:
certmgr.msc
Then press Enter. This opens Certificates – Current User, meaning certificates available only to the account currently signed in.
That distinction is critical:
| Need | Use |
|---|---|
| Certificate for one signed-in user, such as S/MIME mail, a VPN profile, or an individual code-signing identity | certmgr.msc |
| Certificate needed by services, IIS, Remote Desktop, or all users on the PC | certlm.msc, or add the Certificates snap-in to MMC for the Computer account |
Microsoft documents these as separate certificate stores: the Current User store is tied to the user profile, while the Local Computer store applies across the device. A certificate can be perfectly valid and still fail if the app is looking in the other store. That is not cryptography being mysterious; it is Windows being extremely literal.
Know what you are importing
Before launching the wizard, identify the file:
.cer,.crt,.der— usually a public certificate only. It does not contain a private key..p7b,.p7c— usually a certificate chain or collection of public certificates..pfx,.p12— a PKCS #12 package that can contain the certificate, its private key, and related certificates. Treat it like a password-protected master key, because it may be exactly that.
Never install a root certificate merely because a browser download, email, or pop-up tells you to. Adding a root to Trusted Root Certification Authorities lets Windows trust certificates that chain to it. Microsoft warns that changes to this store can affect device security and functionality. Only use a root certificate supplied and verified by your organization, administrator, or a service you independently trust.
Import a trusted public certificate
Use this process for a trusted root, intermediate CA, publisher certificate, or another public certificate supplied for a defined purpose.
- In
certmgr.msc, expand the relevant folder. - Right-click the target Certificates folder.
- Select All Tasks > Import.
- Select Next, then browse to the certificate file.
- When prompted for a store, choose Place all certificates in the following store and verify it before continuing.
- Select Finish.
Choose the destination deliberately
- Trusted Root Certification Authorities: only for a root CA you explicitly intend to trust.
- Intermediate Certification Authorities: for a subordinate or issuing CA certificate.
- Trusted Publishers: for publisher trust scenarios, when specifically required.
- Personal: ordinarily where certificates tied to your identity live; it is not the default landing spot for random CA certificates.
Do not use automatic store selection when the instructions accompanying the certificate identify a specific destination. The wizard can make a reasonable guess, but “reasonable” is not the same thing as “correct for your environment.”
Import a PFX certificate and private key
A PFX import is usually for a certificate that must prove possession of a private key—for example, a personal client-authentication certificate, code-signing certificate, or a certificate being moved to another Windows device.
- Open
certmgr.mscfor the current user, orcertlm.mscwhen the certificate belongs to the machine or a Windows service. - Open Personal > Certificates.
- Right-click Certificates, then choose All Tasks > Import.
- Select the
.pfxor.p12file. - Enter the PFX password when prompted.
- If offered, select Include all extended properties unless the certificate provider’s instructions say otherwise.
- Choose Personal as the destination store.
- Complete the wizard and confirm that Windows reports a successful import.
For a PFX, do not casually select an option that permits the key to be exported again. It can be appropriate when creating a controlled migration or recovery copy, but it weakens the containment of that private key. A non-exportable key is not invincible, but it reduces the chances that a routine export turns a protected credential into a portable secret.
Verify that the private key arrived
After importing, remain in Personal > Certificates and locate the certificate by its subject, issuer, expiration date, or thumbprint.
Double-click it and check the General tab. Windows should state:
You have a private key that corresponds to this certificate.
That is the practical confirmation that the certificate and key are paired. A certificate imported from a .cer file will not show this message, because public certificate files do not contain the private key.
Also inspect:
- Validity dates — expired certificates are not revived by reimporting them.
- Enhanced Key Usage — confirms whether the certificate is intended for client authentication, server authentication, code signing, or another task.
- Certification Path — helps identify a missing intermediate or an untrusted issuing authority.
- Thumbprint — compare this value with the issuer’s documented fingerprint when validation matters.
If the private-key message is absent after importing a PFX, stop before deleting anything. Common causes include importing the wrong file, importing into Current User when the application expects Local Computer, a missing key association, or a key stored in hardware such as a smart card or HSM. Microsoft’s troubleshooting guidance notes that some server scenarios may require repairing the association rather than simply importing the certificate again.
Export a password-protected backup
A backup should be made only when policy permits it and when you can store it safely. Anyone who obtains a PFX and its password may be able to impersonate its owner.
- Open the appropriate store and find the certificate under Personal > Certificates.
- Right-click the certificate and select All Tasks > Export.
- In the Certificate Export Wizard, choose Yes, export the private key.
- If this option is unavailable, the key was imported or created as non-exportable, is protected by hardware, or Windows cannot access it.
- Select Personal Information Exchange – PKCS #12 (.PFX).
- Select Include all certificates in the certification path if possible to preserve the chain where appropriate.
- Protect the file with a strong, unique password. Microsoft’s current guidance for private-key exports recommends the AES256-SHA256 encryption option when it is available.
- Save the file to an approved encrypted location—not a shared folder, Downloads, ordinary email attachment, or cloud folder with broad access.
- Confirm the wizard’s completion message, then verify that the file is present without opening or redistributing it.
For high-value certificates, keep the PFX and password separate. An encrypted removable drive, organization-approved secrets vault, or controlled offline recovery location is far preferable to a desktop folder named important-cert-final-final.pfx. Digital keys deserve better than the classic “final_v7_reallyfinal” treatment.
Common mistakes that break certificate deployments
Imported to the wrong scope
An app or service cannot find a certificate imported under Current User, because it is running as a service account or expects it in Local Computer. Re-import to the correct store only after confirming the application’s requirement.
Imported a public certificate instead of the PFX
A .cer file may look like the certificate you need, but it cannot supply the private key. Obtain the original PFX/P12 package or restore the private key using the organization’s approved recovery process.
Installed a root certificate in Personal
A root CA belongs in Trusted Root Certification Authorities only when it should become trusted. Conversely, a user or server identity certificate with a private key generally belongs in Personal. The stores are labels with consequences, not decorative filing cabinets.
The export option for the private key is missing
Do not assume the certificate is damaged. The key may deliberately be non-exportable, located on a smart card, protected by an HSM, or inaccessible under the current account. That restriction is often a security control doing exactly what it was hired to do.
Backed up the PFX but lost the password
A PFX backup without its password may be operationally useless. Record recovery information in an approved password manager or enterprise vault, never in the same folder as the exported file.
The practical takeaway
certmgr.msc is ideal for managing certificates for the signed-in user; certlm.msc is the comparable shortcut for computer-wide certificates. Import public trust certificates only into the store their purpose requires, import PFX files into Personal, and always confirm the private-key message before relying on a certificate for authentication, signing, or encryption.
The certificate itself is public identity data. The private key is the crown jewel. Windows will help you move it—but it will not protect you from putting the crown in the wrong drawer.