

A controller that drifts, pulls off-center, under-reports a trigger press, or sends erratic motion data can make an otherwise healthy PC or console feel broken. In 2026, the correct remedy depends less on the game and more on which input layer is producing the error: controller firmware, operating-system calibration, a platform profile, Steam Input, or the game’s own deadzone settings. The fastest route to a reliable fix is therefore to test first, calibrate only with a tool designed for the controller, and recognize when software tuning is merely hiding worn hardware.
Controller calibration has become more complicated as gamepads have evolved beyond the simple two-axis joysticks common on older PCs. Modern devices can include two analog sticks, analog triggers, gyroscopes, accelerometers, touch surfaces, trigger stops, rear buttons, interchangeable stick modules, onboard profiles, and platform-specific firmware.
At the same time, the word calibration is used loosely. Windows may calibrate raw joystick axes, Xbox Accessories may write new center or range information for supported hardware, and a game may call its deadzone slider a calibration setting even though it changes only that game’s interpretation of the input.
Deadzone and sensitivity settings do something different. They alter the response after the input has already been measured:
Calibration can compensate for minor inconsistent readings or changed component tolerances, particularly after an authorized repair. It cannot permanently reverse physical wear. Microsoft has explicitly cautioned that its self-calibration tool cannot resolve every case of drift, including drift caused by normal wear and tear.
Use these clues:
It is not the universal answer for every modern XInput controller. Xbox models with dedicated support should generally be managed through Xbox Accessories instead.
For wheels, throttles, and joysticks, move the relevant axes smoothly to their real limits. Do not force an axis beyond its normal mechanical stop, and do not assume that every device uses the same sequence shown by the generic wizard.
Run >
Test again before recalibrating. Resetting is particularly useful when a controller was calibrated incorrectly, when a different adapter is now being used, or when old calibration data no longer matches repaired hardware.
If no Calibrate button appears, that does not automatically mean Windows is malfunctioning. The driver may expect configuration through vendor software, or the controller may expose only a test interface to the legacy control panel.
By 2026, Xbox Accessories remains the appropriate first stop for supported Xbox Wireless Controller and Xbox Elite Wireless Controller Series 2 hardware. Availability can vary by model, firmware, platform, and repair state, so the Recalibration options menu may not appear for every Xbox One-era controller.
For the most reliable Windows connection:
Thumbstick recalibration is intended for relatively minor response problems. It may also be necessary after replacing supported internal parts because the original calibration values may no longer correspond to the new components.
Trigger calibration addresses minor discrepancies in LT or RT travel and reporting. Before running it, move any physical trigger locks to the position requested by the app, because shortened trigger travel can prevent the software from observing the expected range.
A response curve changes how output grows as the stick moves. It does not repair an unstable sensor or guarantee that an off-center stick is physically healthy.
Useful profile adjustments include:
The DualSense Edge is different because it includes extensive stick and trigger profile settings. Those settings can mitigate light center noise or customize response, but they remain profile tuning rather than a universal hardware recalibration routine.
The available response-curve types can include behavior intended for fast reactions, precise aiming, stable movement, near-digital response, or a mixed dynamic response. The app also allows users to test the selected stick behavior before applying it.
DualSense Edge profiles can include:
A profile cannot correct a stick that jumps, disconnects internally, or reports rapidly fluctuating values. Those symptoms justify module inspection or service.
On Nintendo Switch, the relevant category is Controllers and Sensors. On Nintendo Switch 2, it is Controllers & Accessories.
If the result is not reflected immediately, put the console into sleep mode and wake it. Nintendo also advises resetting a Joy-Con or Pro Controller connection by pressing the SYNC button once and then pressing another button to power it on again.
For Joy-Con or Joy-Con 2:
A controller that feels stuck, gritty, or mechanically difficult to move has a different problem from a mathematically incorrect center. Software should not be expected to overcome physical obstruction.
The correct tool depends on whether the suspected fault is in the physical device or the active layout.
Valve also recommends checking firmware for connected Xbox controllers when they behave unexpectedly with Steam Deck. Firmware incompatibility can resemble an input fault even when the analog hardware is healthy.
The tool is designed to optimize the joystick, trackpads, and gyro. Place the controller on a stationary surface when calibrating motion sensors, and avoid resting fingers on the trackpads unless instructed.
Temporarily apply a basic gamepad template or disable a custom layout when practical. If the controller behaves correctly with a default layout, the problem is configuration rather than calibration.
Calibration may not affect every game because modern software can read input through SDL, evdev, Steam Input, or another abstraction layer instead.
A typical calibration sequence is:
The shorter form is:
Follow the prompts to establish center positions and full axis ranges. On Debian- or Ubuntu-style systems, calibration can commonly be stored with:
Run commands only against the intended joystick device. Calibrating the wrong entry can create confusing results for a wheel, pedal set, or virtual controller.
The graphical view is particularly valuable for detecting:
The goal is not to make the deadzone as large as possible. It is to set the smallest value that reliably prevents unintended movement.
Choose one primary tuning layer whenever possible. For a Steam game, that might be the game’s native settings or Steam Input, but not aggressive values in both.
The principal paths are:
Use the appropriate platform tool:
It does not permanently repair drift caused by worn or damaged hardware. A deadzone can hide mild drift, but that is compensation rather than a mechanical fix.
If Xbox Accessories does not show the controller, connect it through USB or an Xbox Wireless Adapter, update the app, and check the firmware. Bluetooth may not provide the full maintenance interface.
DualSense Edge supports extensive stick and trigger profile tuning, but those settings should not be mistaken for a universal repair of failing hardware.
If the required deadzone becomes large enough to harm precision, hardware service is the better long-term solution.
Increase the value only until unintended movement stops. If that point requires a conspicuously large adjustment, treat it as evidence of hardware degradation.
Other controllers may expose triggers as ordinary axes in Windows or vendor software. Check the device-specific tool rather than assuming stick and trigger calibration share the same process.
Windows is particularly well positioned to improve this area. The continued presence of
Until that documentation becomes universal, users should stay within the calibration path provided for the exact model and firmware. A procedure intended for one controller revision should not be assumed safe or effective for another.
A well-calibrated controller should rest at neutral, reach its intended range, and behave consistently without sacrificing precision to an oversized deadzone. The best 2026 troubleshooting strategy is to test the raw input, use the controller maker’s supported calibration tool, apply profile or game tuning sparingly, and stop treating software as a substitute for hardware repair. Done in that order, calibration remains a valuable maintenance step rather than another variable in an already complicated input chain.
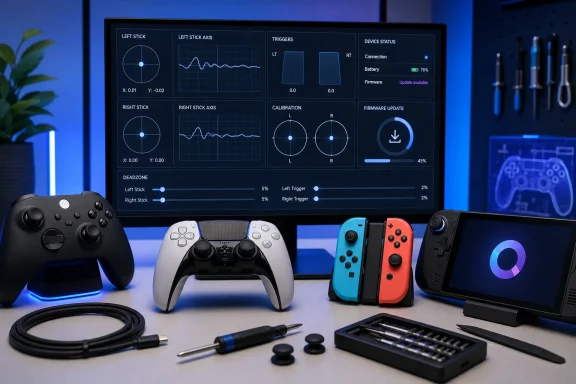 Overview
Controller calibration has become more complicated as gamepads have evolved beyond the simple two-axis joysticks common on older PCs. Modern devices can include two analog sticks, analog triggers, gyroscopes, accelerometers, touch surfaces, trigger stops, rear buttons, interchangeable stick modules, onboard profiles, and platform-specific firmware.At the same time, the word calibration is used loosely. Windows may calibrate raw joystick axes, Xbox Accessories may write new center or range information for supported hardware, and a game may call its deadzone slider a calibration setting even though it changes only that game’s interpretation of the input.
What calibration actually changes
True calibration teaches a supported device or operating system how to interpret the controller’s physical range. It may establish the neutral center of a stick, the minimum and maximum values of a trigger, or the resting orientation of a motion sensor.Deadzone and sensitivity settings do something different. They alter the response after the input has already been measured:
- Stick calibration corrects an inaccurate center or incomplete axis range when the platform supports it.
- Trigger calibration corrects minor discrepancies between the trigger’s physical travel and its reported input.
- Deadzone tuning ignores a selected amount of movement near a stick’s center.
- Sensitivity tuning changes how rapidly output increases as the stick moves.
- Response curves reshape the relationship between physical movement and reported movement.
- A controller reset clears certain controller states or pairing information but does not necessarily recalibrate analog components.
- A driver reinstall rebuilds the operating system’s device configuration but does not repair a worn sensor.
Why controller drift happens
Analog sticks generally report position through internal sensors linked to the physical stick mechanism. Wear, contamination, spring fatigue, manufacturing tolerances, damaged components, or replacement parts can cause the reported center to move away from the true resting position.Calibration can compensate for minor inconsistent readings or changed component tolerances, particularly after an authorized repair. It cannot permanently reverse physical wear. Microsoft has explicitly cautioned that its self-calibration tool cannot resolve every case of drift, including drift caused by normal wear and tear.
Diagnose the Problem Before Calibrating
Do not begin by repeatedly running every calibration utility you can find. A structured diagnosis helps identify whether the problem follows the controller, the connection method, a particular profile, or one specific game.Match the symptom to the likely input layer
A controller that drifts in every game probably has a system-level or hardware problem. A controller that behaves normally in a platform test but drifts in only one title is more likely affected by that game’s deadzone or configuration.Use these clues:
- Drift in every menu and game suggests a controller, firmware, or platform-level problem.
- Drift in only one game suggests a game-specific deadzone or configuration issue.
- Problems over Bluetooth but not USB suggest a wireless, pairing, driver, or feature-compatibility problem rather than analog calibration.
- A trigger that never reaches 100 percent may need trigger calibration, a trigger-range adjustment, or hardware service.
- A stick that does not reach the edge in one direction may have incorrect range data or mechanical damage.
- A stick that jumps unpredictably is more concerning than a small, consistent offset and may indicate a failing sensor.
- Motion aiming that slowly rotates while the controller is stationary points to gyro calibration rather than stick calibration.
- Incorrect buttons with otherwise accurate axes points to remapping, Steam Input, or a game layout rather than calibration.
Use a controlled test sequence
Before changing settings, establish a baseline:- Disconnect other controllers, wheels, pedals, adapters, and virtual input devices.
- Restart the PC or console and reconnect only the affected controller.
- Install the latest stable system and controller firmware updates available for the device.
- Test the controller in the platform’s input-test screen, if one exists.
- Test with a wired connection when the controller supports both wired and wireless operation.
- Test a second game that uses the same stick or trigger.
- Record or photograph existing deadzone and profile values before changing them.
- Calibrate only if the platform test confirms an incorrect center, range, or sensor reading.
Calibrate Traditional Controllers in Windows
Windows 10 and Windows 11 retain the classic Game Controllers control panel, opened withjoy.cpl. Despite its old appearance, it remains useful for many HID and DirectInput-style devices, including joysticks, flight controls, older gamepads, arcade controls, and some steering wheels.It is not the universal answer for every modern XInput controller. Xbox models with dedicated support should generally be managed through Xbox Accessories instead.
Run the Windows Device Calibration Wizard
To calibrate a compatible controller:- Press Windows key + R to open Run.
- Type
joy.cpl. - Select OK or press Enter.
- Select the affected controller from the installed game-controller list.
- Choose Properties.
- Open the Settings tab.
- Select Calibrate.
- Follow the Device Calibration Wizard without touching an axis unless instructed.
- Move each requested stick, lever, wheel, or directional control through its full physical range.
- Finish the wizard and inspect the Test tab.
For wheels, throttles, and joysticks, move the relevant axes smoothly to their real limits. Do not force an axis beyond its normal mechanical stop, and do not assume that every device uses the same sequence shown by the generic wizard.
Reset Windows calibration data
If the result is worse, return to:Run >
joy.cpl > Controller > Properties > Settings > Reset to defaultTest again before recalibrating. Resetting is particularly useful when a controller was calibrated incorrectly, when a different adapter is now being used, or when old calibration data no longer matches repaired hardware.
Understand the limitations of joy.cpl
The Windows wizard is most effective when a controller exposes conventional joystick axes to the operating system. It may be irrelevant, unavailable, or incomplete for devices managed through a manufacturer’s app, an XInput driver, or a proprietary wireless protocol.If no Calibrate button appears, that does not automatically mean Windows is malfunctioning. The driver may expect configuration through vendor software, or the controller may expose only a test interface to the legacy control panel.
Recalibrate Supported Xbox Controllers
Microsoft introduced user-guided thumbstick recalibration in Xbox Accessories in February 2024. The feature was intended to address minor inconsistent responses and to support repair scenarios in which a controller’s base or circuit board had been replaced.By 2026, Xbox Accessories remains the appropriate first stop for supported Xbox Wireless Controller and Xbox Elite Wireless Controller Series 2 hardware. Availability can vary by model, firmware, platform, and repair state, so the Recalibration options menu may not appear for every Xbox One-era controller.
Prepare Xbox Accessories correctly
On a Windows PC, install or update Xbox Accessories through the Microsoft Store. On an Xbox console, open the installed Xbox Accessories app from the apps library or controller settings.For the most reliable Windows connection:
- Connect the controller with a USB data cable or Xbox Wireless Adapter.
- Avoid Bluetooth during maintenance if the app does not detect the device or expose all configuration functions.
- Open Xbox Accessories and select the controller.
- Install any available controller firmware update.
- Restart the app if the controller was updated.
- Open the three-dot More options menu.
- Select Recalibration options when available.
Recalibrate Xbox thumbsticks and triggers
Choose the stick or trigger procedure presented by the app and follow each prompt exactly. Keep the controller level, release the controls when asked, and use smooth full-range movements rather than snapping the sticks aggressively against the gate.Thumbstick recalibration is intended for relatively minor response problems. It may also be necessary after replacing supported internal parts because the original calibration values may no longer correspond to the new components.
Trigger calibration addresses minor discrepancies in LT or RT travel and reporting. Before running it, move any physical trigger locks to the position requested by the app, because shortened trigger travel can prevent the software from observing the expected range.
Elite Series 2 response curves are not calibration
Xbox Elite Wireless Controller Series 2 owners can create profiles and adjust stick behavior through Xbox Accessories. These settings can improve aiming, steering, camera movement, or accessibility, but they should not be confused with recalibration.A response curve changes how output grows as the stick moves. It does not repair an unstable sensor or guarantee that an off-center stick is physically healthy.
Useful profile adjustments include:
- A gentler initial curve for precise aiming.
- A faster curve for quick camera rotation.
- Separate left- and right-stick behavior.
- Trigger ranges tailored to racing or shooting games.
- Different profiles for individual genres.
Configure PlayStation Controllers on PS5 and Windows
Sony’s controller tools emphasize resets, firmware maintenance, and profile customization. The standard DualSense does not provide a broadly documented user-facing stick calibration wizard comparable to Nintendo’s calibration screen or the supported Xbox Accessories process.The DualSense Edge is different because it includes extensive stick and trigger profile settings. Those settings can mitigate light center noise or customize response, but they remain profile tuning rather than a universal hardware recalibration routine.
Reset a standard DualSense controller
If a standard DualSense behaves incorrectly:- Turn off the PS5 completely.
- Disconnect the controller’s USB cable.
- Locate the small reset hole on the rear of the controller near the Sony logo.
- Use a suitable narrow tool to press and hold the internal reset button for at least five seconds.
- Connect the controller to the PS5 with a compatible USB data cable.
- Press the PS button.
- Install any offered controller device-software update.
- Test the controller with default in-game settings.
Tune DualSense Edge on PS5
To create or edit a DualSense Edge profile on PS5:- Open Settings.
- Select Accessories.
- Choose DualSense Edge Wireless Controller.
- Open Custom Profiles.
- Create a profile or edit an existing profile.
- Open Stick Sensitivity/Deadzone.
- Select the left or right stick.
- Adjust the response and use the available playtest function.
- Save the profile and assign an appropriate shortcut.
Configure DualSense Edge on Windows
Sony’s PlayStation Accessories app for Windows can update DualSense Edge firmware and create controller profiles. Connect the controller, select or create a profile, and open Stick Sensitivity/Deadzone.The available response-curve types can include behavior intended for fast reactions, precise aiming, stable movement, near-digital response, or a mixed dynamic response. The app also allows users to test the selected stick behavior before applying it.
DualSense Edge profiles can include:
- Button assignments.
- Stick sensitivity curves.
- Stick deadzones.
- Trigger deadzones.
- Vibration intensity.
- Trigger-effect intensity.
Check the replaceable Edge stick modules
DualSense Edge uses replaceable stick modules, which creates an additional troubleshooting option unavailable on the standard DualSense. If recalibration-like profile tuning cannot stabilize an input, reseating or replacing the affected module may be more appropriate than increasing the deadzone indefinitely.A profile cannot correct a stick that jumps, disconnects internally, or reports rapidly fluctuating values. Those symptoms justify module inspection or service.
Calibrate Nintendo Switch and Switch 2 Controllers
Nintendo provides one of the clearest system-level calibration flows. Both the original Nintendo Switch family and Nintendo Switch 2 include dedicated stick and motion-control calibration tools, although the menu category changed on the newer console.On Nintendo Switch, the relevant category is Controllers and Sensors. On Nintendo Switch 2, it is Controllers & Accessories.
Calibrate control sticks
Begin by updating the console. Then follow this sequence:- Open System Settings from the HOME Menu.
- Select Controllers and Sensors on Nintendo Switch, Switch Lite, or Switch OLED.
- Select Controllers & Accessories on Nintendo Switch 2.
- Choose Calibrate Control Sticks.
- Fully tilt the affected stick in one direction for several seconds when prompted.
- Follow the displayed calibration and verification steps.
- Return the stick to neutral without holding the controller at an angle that presses against it.
If the result is not reflected immediately, put the console into sleep mode and wake it. Nintendo also advises resetting a Joy-Con or Pro Controller connection by pressing the SYNC button once and then pressing another button to power it on again.
Calibrate motion controls
Motion calibration is separate because it concerns gyroscope and accelerometer data rather than analog-stick position.For Joy-Con or Joy-Con 2:
- Detach the controller from the console.
- Remove straps, grips, or other accessories.
- Open the system’s Calibrate Motion Controls option.
- Select controller calibration when the Switch 2 menu requests it.
- Hold the indicated minus or plus button.
- Place the controller on a flat, stable surface with the stick facing upward.
- Do not touch or move it while calibration runs.
- Select OK when complete.
Know when Nintendo calibration is not enough
If the test indicator cannot remain centered immediately after calibration, or the stick cannot complete the required circular movement, the mechanism may need service. Repeatedly calibrating a physically damaged stick usually produces only temporary or inconsistent results.A controller that feels stuck, gritty, or mechanically difficult to move has a different problem from a mathematically incorrect center. Software should not be expected to overcome physical obstruction.
Test Steam Deck and Steam Controller Inputs
Steam provides several controller layers, and they should not be treated as interchangeable. The original 2015 Steam Controller has a dedicated calibration system, while Steam Deck includes an input-testing suite and extensive per-game Steam Input configuration.The correct tool depends on whether the suspected fault is in the physical device or the active layout.
Test Steam Deck controls
On Steam Deck:- Press the Steam button.
- Open Settings.
- Select Controller.
- Choose Test Controller Inputs.
- Complete the displayed tests.
- Exit the suite as instructed, typically with a long press of the B button.
Valve also recommends checking firmware for connected Xbox controllers when they behave unexpectedly with Steam Deck. Firmware incompatibility can resemble an input fault even when the analog hardware is healthy.
Calibrate the original Steam Controller
For the 2015 Steam Controller, use its calibration tool through Steam’s controller settings. Menu wording may vary as the Steam client evolves, but the process generally involves selecting the detected Steam Controller and opening its calibration or advanced device options.The tool is designed to optimize the joystick, trackpads, and gyro. Place the controller on a stationary surface when calibrating motion sensors, and avoid resting fingers on the trackpads unless instructed.
Separate Steam Input from hardware behavior
Steam Input can apply response curves, deadzones, anti-deadzones, action layers, virtual mouse output, and community layouts. These features are powerful, but they can also make diagnosis confusing.Temporarily apply a basic gamepad template or disable a custom layout when practical. If the controller behaves correctly with a default layout, the problem is configuration rather than calibration.
Calibrate Linux Joysticks
Linux supports controllers through several input interfaces, including the older joystick API exposed as/dev/input/js* and the newer event-device system. The classic jscal utility remains useful when an application or controller relies on the joystick interface.Calibration may not affect every game because modern software can read input through SDL, evdev, Steam Input, or another abstraction layer instead.
Use jscal from the terminal
First identify the correct device. A single connected controller is commonly exposed as/dev/input/js0, but that assumption should be verified when multiple input devices are present.A typical calibration sequence is:
jscal --calibrate /dev/input/js0The shorter form is:
jscal -c /dev/input/js0Follow the prompts to establish center positions and full axis ranges. On Debian- or Ubuntu-style systems, calibration can commonly be stored with:
jscal-store /dev/input/js0Run commands only against the intended joystick device. Calibrating the wrong entry can create confusing results for a wheel, pedal set, or virtual controller.
Use jstest-gtk for a graphical workflow
jstest-gtk provides a visual test and calibration interface for joystick devices. Select the controller, open its properties, inspect each axis, and use the calibration controls where available.The graphical view is particularly valuable for detecting:
- A center that slowly wanders.
- An axis that never reaches its minimum or maximum.
- Electrical noise that causes rapid flickering.
- A trigger represented as a shared or inverted axis.
- Extra axes generated by motion sensors or throttles.
Adjust Deadzones and Profiles When Calibration Is Unavailable
Not every platform offers true analog recalibration for every controller. In those cases, a carefully chosen deadzone is the least disruptive workaround for mild center drift.The goal is not to make the deadzone as large as possible. It is to set the smallest value that reliably prevents unintended movement.
Set a game-level deadzone methodically
Use this procedure:- Restore the game’s controller settings to a known baseline.
- Find the inner deadzone for the affected stick.
- Increase it by one small step.
- Release the stick and observe movement for at least 20 to 30 seconds.
- Repeat only until the unwanted movement stops.
- Test slow aiming, menu navigation, and diagonal motion.
- Save the value separately for each stick if the game allows it.
Avoid stacking deadzones
A controller may pass through several processing layers: hardware calibration, a vendor profile, Steam Input, and a game setting. If each layer adds a deadzone, the total effect can become much larger than any individual value suggests.Choose one primary tuning layer whenever possible. For a Steam game, that might be the game’s native settings or Steam Input, but not aggressive values in both.
Customize Apple controller behavior
Apple platforms provide controller customization for supported devices, but Apple’s documented settings are not a general-purpose analog calibration wizard. Compatible customization features require at least iOS 16, iPadOS 16, tvOS 16, macOS Ventura 13, or visionOS.The principal paths are:
- On iPhone or iPad, open Settings > General > Game Controller, select the controller, and open Default Controls.
- On Apple TV, open Settings > General > Remotes and Devices > Bluetooth, select the controller, and choose Customization.
- On Mac, open System Settings > Game Controllers and select the connected device.
Firmware, Drivers, Resets, and Connection Problems
Calibration should be performed only after the controller is communicating reliably. Packet loss, outdated firmware, a damaged cable, or duplicate virtual devices can create symptoms that resemble analog failure.Update before changing response values
Install stable controller firmware through the manufacturer’s official utility. Firmware updates can improve compatibility, correct device behavior, or expose newer maintenance options.Use the appropriate platform tool:
- Xbox controllers use Xbox Accessories.
- DualSense and DualSense Edge firmware can be maintained through PS5 or Sony’s Windows accessory software.
- Nintendo controllers are updated through console system settings.
- Third-party controllers generally require their manufacturer’s app or console update path.
- Connected Xbox controllers on Steam Deck may need firmware updated from an Xbox console or Windows PC.
Reinstall a Windows controller cleanly
If Windows creates a bad device entry, the following process may help:- Disconnect the controller.
- Restart Windows.
- Reconnect through a known-good USB data cable.
- Check whether
joy.cpland the manufacturer’s app detect it. - Open Device Manager if the device remains missing or shows an error.
- Remove only the affected controller entry when appropriate.
- Reconnect the controller and allow Windows to rebuild the device.
- Reinstall the official accessory app if its configuration interface is corrupted.
Strengths and Opportunities
The controller-maintenance landscape in 2026 is fragmented, but platform vendors have gradually moved more diagnostic and repair capabilities into software.- Windows preserves broad legacy support. The
joy.cplinterface remains valuable for older joysticks, specialist controls, wheels, and DirectInput devices. - Xbox supports guided self-repair workflows. Thumbstick recalibration can reduce unnecessary returns after certain repairs or minor response inconsistencies.
- Nintendo exposes direct stick and motion calibration. Its system-level tools make it relatively easy to distinguish a configuration error from a controller that requires service.
- Sony offers sophisticated profile control on DualSense Edge. Separate stick curves, deadzones, and trigger ranges let users optimize different genres and accessibility needs.
- Steam provides deep per-game flexibility. Steam Input can compensate for games with weak controller support and allows layouts to follow the player across devices.
- Linux retains transparent low-level tools. Utilities such as
jscalandjstest-gtklet advanced users observe axis behavior directly. - Onboard profiles improve portability. Controllers that store profiles internally can preserve customized behavior when moved between PCs or other compatible devices.
- Replaceable components create a better repair path. Modular sticks and officially available parts can reduce electronic waste when supported by correct recalibration procedures.
Risks and Concerns
Calibration is generally safe when performed through official tools, but it is not risk-free. Incorrect procedures can replace usable values with worse ones, while excessive software compensation can conceal deteriorating hardware until it becomes unusable.- Bad calibration can create a new offset. Touching the stick during neutral detection teaches the system the wrong center.
- Deadzone inflation reduces precision. A large deadzone may stop drift but make fine aiming, steering, or character movement sluggish.
- Multiple tuning layers can conflict. Vendor software, Steam Input, and game settings may each modify the same axis.
- Unsupported controllers may not expose the expected menus. A missing calibration option can be a model limitation rather than an app failure.
- Bluetooth can limit maintenance features. Some Windows accessory utilities require USB or a proprietary wireless adapter for firmware and configuration access.
- Physical wear remains physical wear. Calibration cannot rebuild springs, clean damaged contacts, or repair a cracked mechanism.
- Third-party calibration tools carry additional uncertainty. Utilities that write undocumented controller values may behave differently across firmware revisions.
- Warranty implications vary. Opening a controller or replacing internal parts without following the manufacturer’s service policy may affect support options.
- Competitive settings can become inconsistent. A profile that feels excellent in one game can create acceleration or deadzone problems in another.
- Accessibility configurations can be lost during resets. Record custom assignments and profile values before resetting or reinstalling software.
Frequently Asked Questions
Does calibration permanently fix stick drift?
Calibration can permanently correct stored center or range values when those values—not physical wear—are the cause. It may also restore correct operation after supported internal parts are replaced.It does not permanently repair drift caused by worn or damaged hardware. A deadzone can hide mild drift, but that is compensation rather than a mechanical fix.
Why does joy.cpl not fix my Xbox controller?
The legacy Windows wizard primarily serves conventional HID and DirectInput-style devices. Modern Xbox controllers use a different software and driver path, so Xbox Accessories is usually the more appropriate tool when the model supports recalibration.If Xbox Accessories does not show the controller, connect it through USB or an Xbox Wireless Adapter, update the app, and check the firmware. Bluetooth may not provide the full maintenance interface.
Can a standard DualSense be calibrated on PS5?
Sony does not provide the standard DualSense with the same user-facing stick-calibration workflow Nintendo provides. The official troubleshooting route includes resetting the controller, reconnecting it by USB, updating its device software, and arranging service if the fault remains.DualSense Edge supports extensive stick and trigger profile tuning, but those settings should not be mistaken for a universal repair of failing hardware.
Should I use calibration or a deadzone?
Use calibration when an official tool supports the controller and a platform test shows an incorrect center or range. Use a deadzone when the raw input is slightly noisy, calibration is unavailable, or one game interprets otherwise acceptable input too aggressively.If the required deadzone becomes large enough to harm precision, hardware service is the better long-term solution.
How much deadzone is too much?
There is no universal percentage because games scale input differently. The practical threshold is reached when small deliberate movements no longer register comfortably or aiming begins to feel stepped and unresponsive.Increase the value only until unintended movement stops. If that point requires a conspicuously large adjustment, treat it as evidence of hardware degradation.
Can triggers be calibrated?
Supported Xbox controllers may expose trigger calibration through Xbox Accessories. DualSense Edge permits trigger-deadzone and input-range customization through its profiles.Other controllers may expose triggers as ordinary axes in Windows or vendor software. Check the device-specific tool rather than assuming stick and trigger calibration share the same process.
What to Watch Next
Controller makers are under growing pressure to provide better repairability, longer-lasting sensors, replaceable components, and transparent calibration tools. Xbox’s self-calibration system, DualSense Edge’s replaceable modules, Nintendo’s system-level diagnostics, and the rise of Hall-effect and TMR-equipped third-party controllers all point toward controllers becoming more serviceable rather than disposable.Better separation between testing and tuning
Future platform tools should display raw input, calibrated input, profile-adjusted input, and final game output separately. That would let users see exactly where a fault enters the chain instead of guessing whether a deadzone, driver, or sensor is responsible.Windows is particularly well positioned to improve this area. The continued presence of
joy.cpl is useful, but a modern unified controller panel could combine XInput, DirectInput, Bluetooth, firmware, axis visualization, and per-device calibration without forcing users through several applications.More repair-aware calibration
Calibration increasingly matters after component replacement, not just during troubleshooting. As official replacement parts and modular controllers become more common, vendors will need to document which repairs require new center values, which require firmware pairing, and which can be completed without rewriting controller data.Until that documentation becomes universal, users should stay within the calibration path provided for the exact model and firmware. A procedure intended for one controller revision should not be assumed safe or effective for another.
A well-calibrated controller should rest at neutral, reach its intended range, and behave consistently without sacrificing precision to an oversized deadzone. The best 2026 troubleshooting strategy is to test the raw input, use the controller maker’s supported calibration tool, apply profile or game tuning sparingly, and stop treating software as a substitute for hardware repair. Done in that order, calibration remains a valuable maintenance step rather than another variable in an already complicated input chain.
References
- Primary source: Technobezz
Published: 2026-07-20T18:42:57.649000+00:00
How to Calibrate a Controller on PC and Console (2026) | Technobezz
Controller calibration steps for Windows, Xbox, PlayStation, Nintendo Switch, Steam Deck, Linux, and in-game deadzones.www.technobezz.com
