

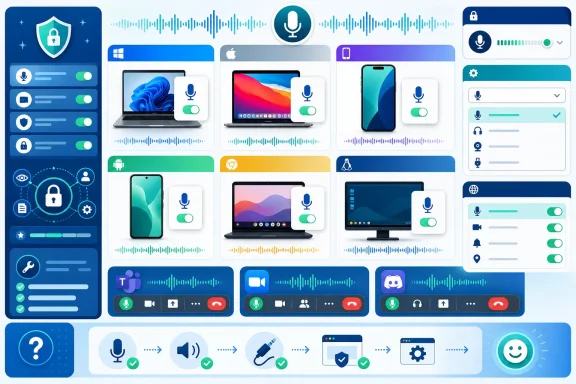
To enable your microphone on any device in 2026, first allow microphone access in the operating system, then select the correct input device, and finally permit the app or website that needs it. The instructions below cover Windows 11 and Windows 10, current macOS, iPhone and iPad, Android 12 or later, Chromebook, GNOME Linux, Chrome, Edge, Safari, Firefox, Microsoft Teams, Zoom, and Discord.
Before changing permissions, rule out a hardware mute or connection problem.
When an app uses only the microphone, an orange indicator appears near the top of the screen. Open Control Center to see which app recently used it.
For a website in Safari, visit the page and select Allow when Safari requests microphone access. If the prompt was previously denied, review the website settings in Safari or clear the saved website permission and reload the page.
You can also look under Settings > Security & privacy > Privacy > Privacy controls, although the path varies by manufacturer.
Android 12 and later display a green privacy indicator when an app uses the microphone. Swipe down and tap the indicator to identify the app.
Current Chrome versions may offer Allow this time, Allow while visiting the site, or Never allow. Choose a temporary option when you do not want the permission saved permanently.
An organizer or administrator can prevent attendees from unmuting. If the Mic control is unavailable, request permission from the meeting organizer.
The microphone is fully enabled when the operating system’s input meter responds, the correct device is selected in the browser or app, and a recording or test call plays your voice back clearly.
 Check the physical microphone first
Before changing permissions, rule out a hardware mute or connection problem.- Turn off any mute switch on the microphone, headset cable, webcam, or USB audio interface.
- Check the keyboard for a microphone key with a light or crossed-out microphone symbol.
- Reconnect USB microphones directly to the device rather than through an unpowered hub.
- Confirm that Bluetooth earbuds or headsets show as connected for calls or audio input, not only media playback.
- Close other recording or calling programs that may be using the microphone.
- If the device has a physical privacy switch for the microphone, move it to the enabled position.
Enable the microphone in Windows 11
Windows 11 separates privacy permission from input-device selection. Check both.Turn on Windows microphone permissions
- Open Start and select Settings.
- Go to Privacy & security > Microphone.
- Turn on Microphone access.
- Turn on Let apps access your microphone.
- Enable the switch for the Microsoft Store app that needs access.
- Turn on Let desktop apps access your microphone if you use programs such as a desktop browser, Teams, Zoom, Discord, or audio-recording software.
Select and test the Windows microphone
- Open Settings > System > Sound.
- Under Input, select the microphone under Choose a device for speaking or recording.
- Select the arrow beside the device to open its properties.
- Make sure Input volume is not set to zero.
- Under Microphone test or Input settings, select Start test.
- Speak normally for several seconds.
- Select Stop test, then use Play if offered to hear the recorded sample.
Re-enable a disabled recording device
A microphone disabled in the classic Sound panel may not appear as a normal input choice.- Open Settings > System > Sound.
- Select More sound settings under the advanced settings area.
- Open the Recording tab.
- Right-click an empty area and enable Show Disabled Devices if that option appears.
- Right-click the microphone and select Enable.
- Select Properties.
- On the General tab, set Device usage to Use this device (enable).
- Select Apply, then OK.
Enable the microphone in Windows 10
Windows 10 uses a different privacy path.- Open Start > Settings > Privacy.
- Select Microphone.
- Under Allow access to the microphone on this device, select Change and turn access on if necessary.
- Turn on Allow apps to access your microphone.
- Enable access for the required listed app.
- Turn on Allow desktop apps to access your microphone for conventional desktop programs.
Enable the microphone on a Mac
macOS controls app permission separately from the selected sound input.Allow an app to use the microphone
- Open the Apple menu > System Settings.
- Select Privacy & Security in the sidebar.
- Select Microphone.
- Turn on access for the app that needs the microphone.
- Quit and reopen the app if macOS requests it or the change does not take effect immediately.
Select the Mac input device
- Open Apple menu > System Settings > Sound.
- Find the Input section.
- Select the built-in microphone, USB microphone, headset, or audio interface.
- Speak and confirm that the input-level meter responds.
- Adjust Input volume if your voice is too quiet.
Enable the microphone on iPhone or iPad
Microphone access is normally granted separately to each app.- Open Settings.
- Go to Privacy & Security > Microphone.
- Find the app that needs access.
- Turn on its switch.
- Close and reopen the app.
When an app uses only the microphone, an orange indicator appears near the top of the screen. Open Control Center to see which app recently used it.
For a website in Safari, visit the page and select Allow when Safari requests microphone access. If the prompt was previously denied, review the website settings in Safari or clear the saved website permission and reload the page.
Enable the microphone on Android
The exact labels vary among Google Pixel, Samsung Galaxy, Motorola, and other Android devices. Android 12 and later can have both a global microphone control and a separate permission for each app.Turn on global microphone access
- Swipe down twice from the top of the screen.
- Find the Microphone access or Mic access tile.
- Tap it so microphone access is on.
You can also look under Settings > Security & privacy > Privacy > Privacy controls, although the path varies by manufacturer.
Allow a specific Android app
- Open Settings > Apps.
- Select the app that needs the microphone.
- Select Permissions > Microphone.
- Choose Allow only while using the app or Ask every time.
Android 12 and later display a green privacy indicator when an app uses the microphone. Swipe down and tap the indicator to identify the app.
Allow a website to use the microphone
A website requires permission from both the operating system and the browser. Enabling the device microphone alone does not remove a saved browser block.Google Chrome on a computer
- Open Chrome.
- Select More > Settings.
- Go to Privacy and security > Site settings.
- Under Permissions, select Microphone.
- Choose the microphone from the device selector.
- Review the sites under the allowed and blocked sections.
- Select the affected site and change Microphone to Allow.
Current Chrome versions may offer Allow this time, Allow while visiting the site, or Never allow. Choose a temporary option when you do not want the permission saved permanently.
Microsoft Edge
- Open Edge and select Settings and more > Settings.
- Open Privacy, search, and services.
- Select Site permissions > All permissions > Microphone.
- Allow sites to ask for microphone access.
- Review the allowed and blocked site lists.
- Remove the block or change the required website to Allow.
Firefox
- Open the Firefox menu and select Settings.
- Select Privacy & Security.
- Scroll to Permissions.
- Beside Microphone, select Settings.
- Find the affected website.
- Change its status to Allow, or remove the saved entry so Firefox asks again.
- Select Save Changes.
Safari on Mac
- Open Safari.
- Select Safari > Settings > Websites.
- Select Microphone in the left column.
- Find the website.
- Set it to Allow or Ask.
- Reload the website.
Unmute the microphone in Teams, Zoom, or Discord
Meeting and chat programs can remain muted even when operating-system permission is correct.Microsoft Teams
- Join or open the meeting.
- Select the arrow beside Mic to open audio options.
- Choose the correct microphone.
- Select Mic to unmute.
An organizer or administrator can prevent attendees from unmuting. If the Mic control is unavailable, request permission from the meeting organizer.
Zoom
- Join the meeting and choose Join Audio or Join with Computer Audio if shown.
- Select the arrow beside Mute or Unmute.
- Under Select a Microphone, choose the required device.
- Select Unmute.
Discord
- Open User Settings.
- Select Voice & Video.
- Under Input Device, choose the microphone.
- Raise Input Volume if necessary.
- Run the available microphone test.
- Return to the call and select the microphone icon if it is muted.
Enable the microphone on a Chromebook
ChromeOS has a global privacy control as well as app and website permissions.- Select the time in the lower-right corner.
- Select Settings.
- Go to Privacy and security > Privacy controls.
- Turn on Microphone access.
- Enable access for the required app or web application.
- Select the time.
- Open the audio controls or Audio settings.
- Under Input, select the microphone.
- Adjust its level and make sure it is not muted.
Select a microphone on GNOME Linux
On GNOME-based Linux desktops, including distributions that use the standard GNOME Settings interface:- Open the Activities overview.
- Type Sound.
- Open the Sound settings panel.
- Find the Input section.
- Select the built-in, USB, headset, or audio-interface microphone.
- Adjust the input volume.
- Speak and confirm that the input-level indicator responds.
- Make sure the microphone is not switched off in the same panel.
Troubleshoot a microphone that is enabled but silent
Work through these checks in order:- Test at the operating-system level. If the Windows, macOS, Chromebook, or GNOME input meter does not respond, the problem is with the hardware, connection, selected input, driver, or system mute—not the website.
- Select the microphone again. Webcam microphones, laptop microphones, Bluetooth headsets, and USB microphones can all appear as separate inputs.
- Reconnect the device. Unplug and reconnect USB or analog microphones. Disconnect and pair Bluetooth headsets again if necessary.
- Restart the app or browser. Permission changes are not always detected by an already-running program.
- Reload the website. Browser permission changes generally require a page refresh.
- Close competing audio programs. Recording software or communication utilities can interfere with microphone access.
- Check input volume. A permitted microphone with a zero or very low input level will still appear silent.
- Check app mute and meeting policy. Hosts and administrators can restrict unmuting in Teams and Zoom.
- Restart the device. This can release a microphone held by another process and reload its audio driver.
- Check management restrictions. Messages such as Managed by your organization indicate that work or school policy may override local settings.
The microphone is fully enabled when the operating system’s input meter responds, the correct device is selected in the browser or app, and a recording or test call plays your voice back clearly.
References
- Primary source: Technobezz
Published: 2026-07-14T16:42:23.018000+00:00
How to Enable Your Microphone on Any Device in 2026 | Technobezz
How to enable microphone access on Windows, Mac, iPhone, Android, browsers, Teams, Zoom, Discord, Chromebook, and Linux.www.technobezz.com - Official source: support.mozilla.org
- Official source: support.google.com

Use your camera and microphone in Chrome - Computer - Google Chrome Help
You can use your camera and microphone for sites and features, like video chatting, in Chrome. Important: If you're using Chrome at work or school, your network administrator can set camera and micro
support.google.com
