

C:\, C:\Program Files, another user’s profile, a shared work folder, or a protected folder usually points to permissions or Windows Security. A failure across an entire drive is more likely caused by no free space, a read-only drive, a removable-drive problem, or file-system errors. The steps below apply to supported Windows 10 and Windows 11 installations and are designed to fix the specific cause without broadly weakening security.
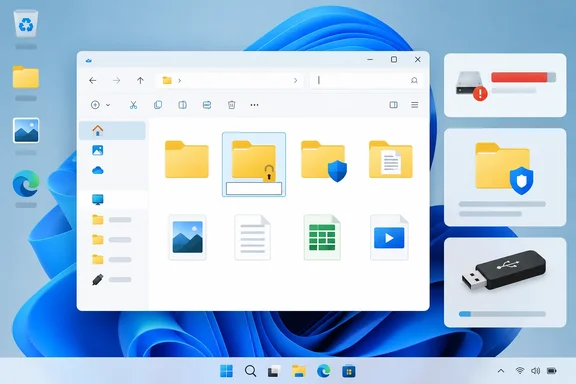 Identify the scope before changing anything
Start with a harmless test so you do not change permissions or security settings unnecessarily.
- Open File Explorer and select This PC.
- Open a location you normally own, such as Documents.
- Press Ctrl+Shift+N.
- In Windows 11, you can also select New > Folder from the command bar.
- In Windows 10, select the Home tab, then New folder.
- Name the test folder
FolderTest, then delete it.
Interpret the result:
- You can create the test folder in Documents, but not in one other location: focus on the target folder’s permissions, its parent folder, Controlled Folder Access, or the external drive.
- You cannot create a folder anywhere on a particular drive: check free space, drive read-only status, and file-system health.
- You cannot create folders in any local location, including Documents: restart Windows first, then check Windows Security and whether the drive containing your profile is full.
- The error occurs only when an application saves or creates a folder, but File Explorer works: the application may be blocked by Controlled Folder Access or may be running under a different account.
Do not try to create normal personal folders directly in protected Windows locations such as C:\, C:\Windows, C:\Program Files, or C:\Program Files (x86). Those locations are deliberately protected. Use a data folder such as Documents, a folder under your user profile, or a separate data drive instead.
Check available space on the affected drive
A drive with no usable free space may not be able to add the directory information required for a new folder. This is particularly common with USB flash drives, SD cards, and system drives that are nearly full.
- In File Explorer, select This PC.
- Find the affected drive under Devices and drives.
- Check its available space.
- If the drive is nearly full, delete or move unneeded files, then empty the Recycle Bin.
- Try creating the test folder again.
For a clearer breakdown of storage use:
Windows 11
- Select Start > Settings > System > Storage.
- Review the categories shown for the system drive.
- Select Cleanup recommendations to review temporary files, large files, unused applications, and cloud-synced files.
- If the affected location is on a non-system drive, select Advanced storage settings > Storage used on other drives.
Windows 10
- Select Start > Settings > System > Storage.
- Select the drive to review what is using space.
- Remove only files you recognize as unnecessary.
Warning: Do not delete Windows.old or other recovery-related files casually. Removing a previous Windows installation can eliminate the option to roll back to that earlier version.
After freeing space, return to the affected folder and press Ctrl+Shift+N. If the folder is created normally, no permissions repair is needed.
Check whether the parent folder allows you to create items
Windows creates a new folder inside its parent folder. Therefore, the parent needs to allow your account to write data and add subfolders. Seeing files in a folder does not mean you have permission to create anything there.
- In File Explorer, right-click the folder where creation fails.
- For example, if you cannot create
D:\Projects\NewFolder, right-click Projects, not the folder that does not yet exist.
- For example, if you cannot create
- Select Properties.
- Open the Security tab.
- Under Group or user names, select your account.
- In the permissions list, look for Modify or Write in the Allow column.
- Also look for an explicit Deny entry. An explicit denial can override an allowed permission.
If your account already has Modify or Write permission and there is no denial, do not change the permissions yet. Continue to the Controlled Folder Access and drive checks below.
Safely grant yourself access to a personal data folder
Only use this procedure on a folder you own and administer, such as a personal folder on a secondary internal drive or an external drive containing your own files.
Warning: Do not change permissions on C:\Windows, C:\Program Files, C:\Program Files (x86), another person’s user-profile folder, a company-managed folder, or a folder on a work server. Broad permission changes can expose data, interfere with software updates, or violate company policy.
- Right-click the affected parent folder and select Properties > Security.
- Select Edit.
- Select your account from the list.
- If it is not listed, select Add.
- Enter your Windows account name, then select Check Names.
- Select OK.
- Select your account.
- Under Allow, select Modify. This also enables the necessary write permissions for normal folder use.
- Select Apply, then OK.
- Close the Properties window.
- Try to create a test folder in that location.
If the Edit button is unavailable or Windows says you need permission from another account, stop before taking ownership unless this is unquestionably your own data. The folder may have been copied from another computer, restored from backup, or inherited restrictive permissions.
Take ownership only for data you own
Taking ownership is a recovery action for personal files that you cannot otherwise manage. It is not a routine fix.
Warning: Changing ownership can alter access control for files you share with others. Back up important data first, and do not use this on operating-system, application, work-managed, or shared-server folders.
- Right-click the affected folder and select Properties > Security > Advanced.
- Next to Owner, select Change.
- Enter your account name and select Check Names.
- Select OK.
- If you are repairing a personal folder and its contents, select Replace owner on subcontainers and objects.
- Select Apply and wait for Windows to complete the change.
- Return to the Security tab and grant your account Modify permission if it is still missing.
- Test folder creation again.
If this is a business PC and the folder is managed by an organization, contact the administrator instead. Domain policies or server-side permissions can reapply restrictive settings after you change them locally.
Check Controlled Folder Access without disabling protection
Controlled Folder Access is a ransomware-protection feature in Windows Security. It can block an unknown or untrusted application from creating or changing files in protected folders such as Desktop, Documents, Pictures, Music, and Videos. It does not normally prevent File Explorer itself from creating a folder, but it can prevent a specific editor, backup tool, script host, game launcher, or other application from doing so.
- Open Windows Security from the Start menu.
- Select Virus & threat protection.
- Under Ransomware protection, select Manage ransomware protection.
- Check whether Controlled folder access is turned on.
- If the problem occurs in a protected personal folder, review the recent Windows Security notification or Protection history to identify the blocked application.
If a known and trusted program is being blocked:
- In Manage ransomware protection, select Allow an app through Controlled folder access.
- Select Add an allowed app.
- Choose Recently blocked apps if the program appears there. Otherwise, choose Browse all apps.
- Select the program’s actual executable file, usually an
.exefile in its installed location. - Close and reopen the application, then repeat the folder-creation attempt.
Allow the specific application only after confirming it is legitimate and expected. Do not add broad Microsoft Defender exclusions merely to solve this issue. An antivirus exclusion prevents scanning and reduces protection; allowing a verified application through Controlled Folder Access is the narrower fix.
To roll back the change, return to Allow an app through Controlled folder access, select the application you added, and remove it from the allowed list.
Check external drives for read-only status and file-system limits
If the failure occurs on a USB drive, SD card, external SSD, or external hard drive, first disconnect it safely and reconnect it directly to the PC. Avoid unpowered USB hubs during testing.
- In File Explorer, right-click the affected drive and select Properties.
- On the General tab, note the File system value.
- Test whether you can create a folder at the drive root and inside an existing folder.
File-system type matters:
- NTFS supports Windows access control lists, ownership, and the Security tab.
- exFAT and FAT32 are common on removable media but do not provide NTFS-style per-folder Windows permissions.
- If an exFAT or FAT32 drive is read-only, changing NTFS permissions will not fix it because those permissions are not stored on that file system.
The Read-only box displayed on the General tab of a folder’s Properties window is not, by itself, a reliable diagnosis for an inability to create a subfolder. Focus instead on the drive’s actual write behavior and attributes.
Clear a verified read-only volume attribute
Use DiskPart only if Windows reports that the disk or volume is write-protected, or if you cannot create, rename, or delete anything anywhere on that external drive.
Warning: DiskPart acts on the selected disk or volume. Selecting the wrong item can affect the wrong storage device. Do not use commands that erase, clean, format, or delete partitions. Back up important files before changing disk attributes.
- Disconnect other removable drives if possible.
- Right-click Start and select Terminal (Admin) or Windows PowerShell (Admin).
- Enter:
diskpart - List the volumes:
list volume - Identify the correct volume by its drive letter, label, and size.
- Select that volume, replacing
Nwith its number:
select volume N - Display its attributes:
attributes volume - If it reports a read-only attribute, clear it:
attributes volume clear readonly - Enter:
exit - Close Terminal, reopen File Explorer, and test folder creation.
If the drive remains read-only after this change, check whether it has a physical write-protect switch, try another USB port, and test it on another computer. Some failing flash media permanently switches to read-only behavior to protect remaining data. Copy any accessible files off the drive promptly.
Scan the affected drive for file-system errors
Use a scan when the drive has enough free space and permissions look correct, but File Explorer returns errors, hangs, refuses all changes, or reports the drive as write-protected unexpectedly.
- Back up important files from the affected drive first.
- Open Terminal (Admin).
- For an NTFS drive such as
D:, run a non-destructive online scan:
chkdsk D: /scan - Review the result.
- If Windows reports errors that require repair, run:
chkdsk D: /f - If the drive is in use, Windows may ask to schedule the repair for the next restart. Enter
Y, then restart the PC.
chkdsk /f repairs logical file-system errors and can require exclusive access to the drive. For a system drive, a restart is normal. Do not interrupt a repair that has started.
Avoid using chkdsk /r as a first response to a simple folder-creation problem. It performs a more extensive bad-sector scan and can take a long time, especially on large drives. Use it when there are signs of physical drive trouble, such as repeated I/O errors, disappearing drives, file corruption, or unreadable sectors.
Verify the repair and handle remaining failures
After applying the relevant fix, verify more than one operation:
- Create a folder in the affected location.
- Rename it.
- Create a small text file inside it.
- Delete the text file and folder.
- If the location is on removable storage, use Safely Remove Hardware and Eject Media before disconnecting the drive.
Use the symptom to narrow the next step:
- “Access denied” in one folder only: review the parent folder’s Security permissions and ownership.
- Works in File Explorer but fails in one application: check Controlled Folder Access and allow only the verified blocked application.
- “The disk is write-protected” across the entire removable drive: check a physical lock switch, then inspect the correct volume’s read-only attribute with DiskPart.
- No Security tab on an exFAT or FAT32 drive: this is expected; NTFS permissions cannot be applied to that file system.
- Failure on a company share or OneDrive/SharePoint-managed library: local Windows permissions may not control access. Contact the share or site administrator.
- Drive errors return after
chkdsk /f, or the device disconnects repeatedly: back up data immediately and replace or professionally diagnose the drive.