

Network Discovery is for a trusted local network. It helps PCs, shared resources, and compatible printers appear under File Explorer > Network. It does not create a share, grant folder permissions, or guarantee that every device will appear immediately. A PC can sometimes be reachable by its network name even when it does not appear in the Network view.
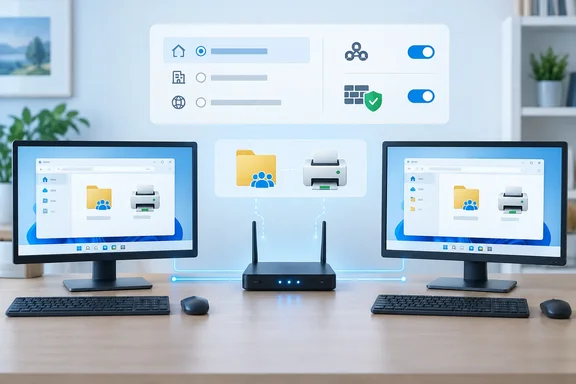 Before changing discovery settings
Check these basics first:
- Make sure both PCs are powered on, signed in, and connected to the same local network. A desktop on Ethernet and a laptop on the same home Wi-Fi normally qualify; a guest Wi-Fi network, mobile hotspot isolation, VPN, or separate router often does not.
- Do not use these settings on airport, hotel, coffee-shop, apartment-building, or other untrusted networks. A Private profile makes your PC discoverable to other devices on that network.
- If a PC is managed by an employer or school, settings may be enforced through policy. Do not attempt to bypass organizational firewall or security controls.
- If you use third-party security software with its own firewall, it can block discovery even when Microsoft Defender Firewall is configured correctly. Its network profile must also be set to trusted/private, or its firewall must allow local discovery and file sharing.
- Do not enable SMB 1.0/CIFS merely because an old troubleshooting post recommends it. SMB 1 is obsolete and is not required for normal Windows 10-to-Windows 11 file sharing.
If the issue is only that a shared folder does not appear in File Explorer, first note the name of the PC that hosts it. You can later test direct access with \\ComputerName even if browsing under Network still looks incomplete.
Set the active network to Private
The active connection must use the Private network profile before you enable discovery. Windows blocks device discovery more aggressively on a Public network by design.
Warning: Set a network to Private only when you trust the router and the other devices connected to it. Leave public Wi-Fi, guest networks, and unknown wired networks set to Public.
Windows 11
- Open Start > Settings > Network & internet.
- For Wi-Fi, select Wi-Fi, then select the connected network’s Properties page.
For a wired connection, select Ethernet. - Under Network profile type, select Private network.
- Close Settings.
Windows 10
- Open Start > Settings > Network & Internet.
- Select Wi-Fi or Ethernet, depending on the connection in use.
- Select the connected network or its Properties link.
- Under Network profile, select Private.
- Close Settings.
If the Private option is missing or immediately changes back, the network profile may be controlled by a work or school policy. In that case, contact the organization that manages the device.
Turn on Network Discovery and File and Printer Sharing
Enable these options on each relevant Windows PC. In particular, enable them on the computer that has the shared folder or printer, then enable discovery on the PC from which you want to browse.
Windows 11
- Open Start > Settings > Network & internet.
- Select Advanced network settings.
- Select Advanced sharing settings.
- Expand Private networks.
- Turn on Network discovery.
- Turn on File and printer sharing.
- Leave Public networks off unless a network administrator specifically requires otherwise.
Windows 10
- Open Start > Settings > Network & Internet > Status.
- Select Network and Sharing Center.
- In the left pane, select Change advanced sharing settings.
- Expand the Private profile.
- Select Turn on network discovery.
- Select Turn on file and printer sharing.
- Select Save changes if Windows displays the button.
If File Explorer displays a yellow or blue message stating that Network Discovery is turned off, you can also select the banner and choose Turn on network discovery and file sharing. Use the Settings or Control Panel steps above as well if the banner action does not stick after closing File Explorer.
Keep password-protected sharing on unless you have a specific reason not to
Under All Networks, Windows may show Password protected sharing. Keeping it enabled is normally the safer choice: users connecting to a share must supply an account and password that the host PC accepts.
Turning password-protected sharing off can be useful on a tightly controlled home network, but it gives broader access to shared resources and may be prohibited by organizational policy. It is not normally required simply to make computers appear in Network.
Start the services that publish and find devices
Windows relies on discovery services to advertise the PC and locate compatible devices. If these services are stopped or disabled, Network Discovery can be enabled in Settings but still fail in File Explorer.
Warning: Before changing a service’s startup type, record its current setting. On a business-managed PC, a service that returns to its prior setting may be governed by policy. Do not override a documented corporate baseline.
- Press Windows key + R.
- Type
services.msc, then select OK. - Locate Function Discovery Provider Host.
- Right-click it and select Properties.
- Set Startup type to Automatic.
- If Service status is not Running, select Start.
- Select Apply, then OK.
- Repeat the same process for each of these services:
- Function Discovery Resource Publication
- SSDP Discovery
- UPnP Device Host
- Find DNS Client and confirm that its status is Running. DNS Client is a dependency used in the discovery process; do not change a managed startup setting unless you know it was disabled locally.
- Close the Services console.
The two Function Discovery services are especially important for Windows PCs that need to publish themselves and their attached resources to other devices. Function Discovery Resource Publication advertises the PC and its shared resources, while Function Discovery Provider Host supports the discovery providers used to locate devices.
If the Start button is unavailable, or a service reports that it cannot start, restart the PC once and check again. A disabled dependency, endpoint security product, or organization policy can also prevent it from starting.
Allow Network Discovery through Microsoft Defender Firewall
Enabling discovery in sharing settings should activate the appropriate built-in firewall rules for a Private network. Check the firewall directly if the devices still cannot see one another.
- Press Windows key + R.
- Type
firewall.cpl, then select OK. - Select Allow an app or feature through Microsoft Defender Firewall in the left pane.
- Select Change settings. Approve the administrator prompt if it appears.
- Find Network Discovery in the list.
- Select its Private check box.
- Find File and Printer Sharing and select its Private check box if you need to open shared folders or use a printer shared from another PC.
- Select OK.
Do not enable the Public check boxes merely to make discovery work. The Private profile is the appropriate scope for a trusted home or small-office LAN.
Also confirm that the firewall itself is enabled:
- Open Windows Security from Start.
- Select Firewall & network protection.
- Select the active Private network.
- Confirm that Microsoft Defender Firewall is switched On.
- Confirm that Blocks all incoming connections, including those in the list of allowed apps is not selected. That option overrides the allowed-app list and can block discovery and sharing.
If another firewall product is active, configure its equivalent allow rules or temporarily use its documented troubleshooting mode only long enough to test. Re-enable protection immediately after the test. Do not leave any firewall disabled as a permanent fix.
Restart and verify Network Discovery
After changing services and firewall rules, restart both PCs. A restart ensures that services, firewall profile changes, and network registration are applied cleanly.
Then verify in this order:
- On each PC, open File Explorer with Windows key + E.
- Select Network in the left pane.
- Wait briefly for Windows to populate the device list.
- Check whether the other PC, a shared printer, or another network device appears.
- On the PC attempting to connect, click the File Explorer address bar and type:
\\ComputerName
ReplaceComputerNamewith the name of the PC that hosts the shared folder or printer, then press Enter. - If prompted, enter valid credentials for an account on the host PC.
- If the host opens, select the shared folder or printer to confirm that you have access.
A successful \\ComputerName connection proves that the host is reachable even if its icon is delayed or missing from the Network view. Device browsing is useful, but it is not the only supported way to open a share.
To find the computer name on the host PC, open Start > Settings > System > About and check Device name.
If the PC appears but a folder or printer does not
Network Discovery only makes the PC easier to find. The resource itself must still be shared.
For a folder:
- On the host PC, right-click the folder in File Explorer.
- Select Show more options on Windows 11 if necessary.
- Select Give access to and then Specific people.
- Select the user account to grant access to, or choose an appropriate permitted group.
- Confirm the sharing choice.
For a shared printer:
- On the host PC, open Start > Settings > Bluetooth & devices > Printers & scanners in Windows 11, or Start > Settings > Devices > Printers & scanners in Windows 10.
- Select the printer.
- Open Printer properties.
- Select the Sharing tab.
- Select Share this printer, then note the share name.
- On the other PC, add it manually if it does not appear automatically by choosing Add device, then Add manually, and selecting the option to add a shared printer by name.
The host PC must remain powered on, connected to the network, and signed in as required for its shared resources to be available.
Troubleshoot common Network Discovery failures
The Network view is empty or says discovery is turned off
- Confirm the active network profile is Private, not Public.
- Confirm Network discovery and File and printer sharing are enabled under Private networks.
- In Services, make sure the four discovery services are set to Automatic and are running.
- Restart the computer after correcting service settings.
- Recheck the Network Discovery firewall entry and ensure its Private box is selected.
The other PC does not appear, but \\ComputerName works
This is a browsing or device-publication issue rather than a basic connection failure. Confirm the Function Discovery services are running on the host PC, wait a few minutes after restart, and use the direct path to reach the resource. You can map a frequently used share as a network drive instead of depending on the Network list.
\\ComputerName does not open
- Confirm both PCs are on the same LAN, not a guest Wi-Fi or isolated network.
- Verify the computer name carefully. On the host, check Settings > System > About > Device name.
- Try the host PC’s current IPv4 address in File Explorer using
\\IPv4Address. This is a diagnostic check: if the IP address works but the name does not, the problem is likely name resolution rather than sharing permissions. - Check that the host PC is awake and that File and printer sharing is enabled in both Advanced sharing settings and the firewall.
- If credentials are requested, use an account recognized by the host PC rather than repeatedly entering the account from the connecting PC.
The settings revert, are unavailable, or services cannot be started
This commonly indicates management policy, security software, or a damaged Windows configuration. On a work or school PC, contact the administrator with the exact service name or setting that is blocked. On a personal PC, remove or reconfigure conflicting third-party firewall software according to its vendor documentation, then restart and retest.
Roll back the changes on an untrusted network
If you connected to a network that should not be trusted, reverse the exposure changes immediately:
- Change the active connection back to Public in Settings > Network & internet.
- Return to Advanced sharing settings and turn off Network discovery and File and printer sharing for the affected profile.
- In Allow an app or feature through Microsoft Defender Firewall, clear the Private boxes you enabled for Network Discovery and File and Printer Sharing if you no longer need LAN sharing.
- Return any service startup types to the values you recorded before troubleshooting, then restart the PC.