

The green bar is a sign that File Explorer has not completed its current navigation or search task. It is not a diagnosis by itself: a large local folder, a slow network share, an unavailable removable drive, a cloud-backed location, a damaged search index, or filesystem trouble can all leave Explorer looking busy. The goal is to identify which class of problem applies without jumping straight to registry edits, “cleanup” utilities, or a Windows reset.
Microsoft’s File Explorer, Windows Search, System File Checker, and CHKDSK documentation provides a useful escalation path: clear the Explorer history, restart the Explorer process, review indexed locations if the failure is search-specific, then scan Windows and the affected disk only when the simpler steps do not hold.
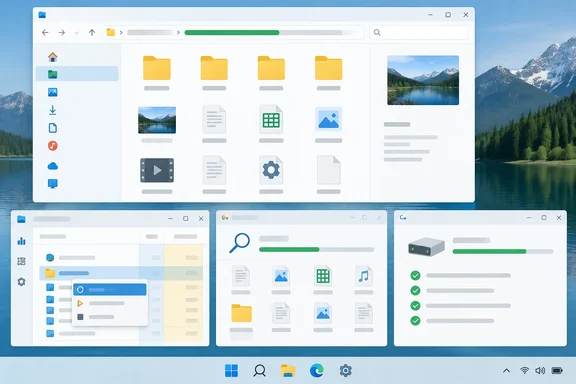 Windows 11 and Windows 10 File Explorer green bar: separate browsing from search first
Start by watching when the green bar stalls. If it appears only after typing in File Explorer’s search box, Windows Search and its index are the first suspects. If it appears when merely opening one particular folder, especially a network, external, or cloud-synced location, rebuilding the Windows Search index may do nothing because Explorer is waiting on that location rather than searching its catalogue.
Use two quick comparisons before repairing anything:
- Open a small local folder such as
C:\Windowsor a simple folder under Documents. - Open the folder that consistently causes the delay.
- If the delay occurs only while searching, repeat the same search in a small local folder and then in the troublesome location.
- Disconnect or safely remove any unused USB storage, and confirm that mapped network drives or shared folders are reachable before treating the issue as local Windows corruption.
A folder that opens promptly after a few seconds is different from File Explorer becoming unresponsive indefinitely. Likewise, slow results from a large archive folder are different from searches that never return results in ordinary indexed folders. The distinction determines whether to focus on Explorer’s recent-history data, Windows Search, or the underlying storage path.
Windows 10 users should also factor support status into the decision. Microsoft ended normal Windows 10 support on October 14, 2025. The troubleshooting steps below still apply to PCs running it, but a recurring shell or storage problem on an unmanaged Windows 10 machine is a reason to plan a move to a supported release, not merely to keep repairing the same installation.
Clear File Explorer history and restart Windows Explorer before deeper scans
File Explorer maintains a history for recently used files and folders shown through Home or Quick access. Clearing it does not delete documents, folders, or pinned locations. It removes the recent-history entries Explorer uses to populate that view, making it a low-risk first step when the problem appears at startup or while loading Home.
Clear the File Explorer history
The least ambiguous route on both Windows 10 and Windows 11 is to search for File Explorer Options from Start.
- Open File Explorer Options.
- Stay on the General tab.
- Under Privacy, select Clear next to Clear File Explorer history.
- Select Apply, then OK.
- Close all File Explorer windows and open a new one.
On Windows 11, the same options dialog can also be reached from File Explorer’s three-dot menu by choosing Options. Microsoft documents the Privacy controls as the place to control recently used files and frequent folders in Quick access or File Explorer Home.
If the green bar appears while Explorer is opening Home, this is a worthwhile test. If it occurs only in a specific folder or only during searches, clearing history is still harmless but is less likely to be the lasting answer.
Next, restart the Explorer process rather than restarting the whole PC immediately:
- Press Ctrl+Shift+Esc to open Task Manager.
- Find Windows Explorer in the Processes list.
- Right-click it and choose Restart.
The taskbar, desktop, and open Explorer windows may disappear briefly. That is expected: Windows Explorer is the process that provides both File Explorer and much of the desktop shell. Microsoft documents this Task Manager restart method for restoring the Explorer shell when it is misbehaving.
If Explorer does not appear in Task Manager, select Run new task from Task Manager’s File menu, type explorer.exe, and press Enter. Test the affected folder again before moving on.
Windows Search indexing is the right repair only for search-related hangs
Windows Search uses an index: a locally maintained catalogue of file names, paths, properties, and, for configured file types, contents. This is why a search in an indexed location can return quickly without Windows reading every file from scratch. Microsoft says the default Classic mode indexes the Desktop, Documents, Pictures, and Music folders; Enhanced mode indexes the whole PC and can use more system resources.
That design creates a practical boundary. If the green bar sticks while File Explorer searches for a file, check the search configuration. If it sticks while merely browsing an ordinary folder, do not assume the index is involved.
Check which locations Windows Search is indexing
On Windows 11:
- Open Settings.
- Select Privacy & security > Searching Windows.
- Select Advanced indexing options.
On Windows 10, Microsoft’s current troubleshooting guidance routes through Settings > Search > Searching Windows > Advanced Search Indexer Settings.
In the Indexing Options dialog, select Modify to review indexed locations. Under Classic indexing, add a folder only if you genuinely need File Explorer and Windows Search to return fast results from it. Switching to Enhanced indexing is useful for users whose files are spread across many local folders, but it is a trade-off: Windows will catalogue more of the PC and may take longer to complete its initial work.
An unavailable network share or removable drive should not be treated as an indexing problem. Windows Search is built around locations and data available to the PC; make the path accessible first.
Rebuild the Windows Search index only after confirming the scope
If searches in known indexed locations consistently hang, return incomplete results, or remain slow after ordinary restart, rebuild the index:
- Open the appropriate Advanced indexing options page.
- In Indexing Options, select Advanced.
- Under Troubleshooting, select Rebuild.
- Confirm the warning and leave the PC powered on while indexing resumes.
Microsoft describes rebuilding as a way to make the index reflect changes, but it is deliberately disruptive: Windows must create the catalogue again. Search results can be incomplete or slow until that work finishes, and Microsoft notes that initial indexing can take hours depending on the amount of content and the PC’s activity.
Do not rebuild repeatedly. Run it once, allow time for the indexer to process the intended locations, and then test a specific search that previously stalled. If the green bar remains tied to one folder that is not indexed, return to the folder’s storage path rather than rebuilding again.
DISM, SFC, and CHKDSK repair different layers of a Windows problem
The next steps carry more consequence because they check or modify Windows components and the file system. Use them when Explorer is broadly unreliable, other Windows components are also failing, or a particular local drive is showing persistent access errors—not merely because a single directory contains a large number of files.
First protect important data. If a local drive is behaving erratically, copy critical files to another known-good location before scheduling repairs. This is especially important when the affected files exist only on that drive.
Repair Windows component and system files with DISM and SFC
Microsoft’s recommended order is to run Deployment Image Servicing and Management, or DISM, before System File Checker. DISM repairs the Windows component source that SFC may need; SFC then verifies protected Windows system files and replaces damaged versions from the repaired source where possible.
Open Command Prompt as an administrator, then run:
DISM.exe /Online /Cleanup-Image /RestoreHealth
Wait for DISM to finish successfully. Then run:
sfc /scannow
Do not close the elevated Command Prompt while SFC is running. When it reaches 100%, Windows will report whether it found integrity violations, repaired files, or could not complete the operation.
Microsoft’s support guidance says to install current Windows updates and restart before starting these repairs. On Windows 11, do that first. On Windows 10, apply whatever supported update path applies to the device; the operating system itself has been out of normal support since October 14, 2025.
These commands are appropriate when the Explorer issue looks system-wide—for example, File Explorer, Start, or other Windows functions are failing together. They are not a targeted cure for a dead network share or an external drive that is not responding.
Check the affected local volume with CHKDSK
Use CHKDSK for a local drive that repeatedly causes the stall. Microsoft’s command reference makes two points worth preserving: CHKDSK cannot repair redirected network drives, and a scan without repair switches reports status but does not fix errors.
Open an elevated Command Prompt and begin with a scan of the affected drive. For the Windows system drive, that is commonly:
chkdsk C: /scan
If the scan reports errors that require correction, schedule a repair:
chkdsk C: /f
Windows may report that the volume is in use and ask to schedule the check for the next restart. Enter Y only when you can restart the PC and leave the process uninterrupted. A system-drive repair requires exclusive access, which is why Windows schedules it before the full desktop starts.
Avoid treating chkdsk /r as a routine File Explorer fix. Microsoft documents /r as a scan for physical disk errors that also attempts recovery from affected sectors; it can take substantially longer. Reserve it for a situation where CHKDSK findings or other storage symptoms justify the deeper check.
What this means for you
Take the smallest action that matches the symptom: restart and clear Explorer state for a general shell glitch, inspect Windows Search only for search failures, and use DISM, SFC, or CHKDSK when the evidence points to Windows or the local filesystem.
- Clear File Explorer history and restart Windows Explorer from Task Manager when the green bar is a new, general File Explorer problem and no particular drive or search is implicated.
- Check a problematic path against a small local folder before repairing Windows, because a network share, disconnected external disk, or cloud-backed folder can make Explorer wait without indicating system-file corruption.
- Review Searching Windows and indexed locations when File Explorer stalls after entering a search query, particularly when expected local results are absent or incomplete.
- Rebuild the Windows Search index once when the problem is confined to search, then allow time for indexing to finish instead of repeatedly restarting the rebuild.
- Run
DISM.exe /Online /Cleanup-Image /RestoreHealthfollowed bysfc /scannowwhen Explorer trouble is accompanied by broader Windows instability. - Use
chkdsk C: /scanfirst for a suspect local drive, back up valuable data before repair, and schedulechkdsk C: /fonly when a correction is warranted.
A stuck green bar is irritating precisely because it makes an ordinary folder operation look like a mystery. It becomes manageable once the symptom is treated as a scope question: reset Explorer for a transient shell problem, repair Search for a search problem, and investigate the local volume only when the path and the evidence point there.