

Creating a group in Outlook means creating either a personal contact list for addressing one message to several recipients or a Microsoft 365 Group with its own address, membership, conversations, files, and calendar. The steps below cover new Outlook for Windows 11 and Windows 10, classic Outlook for Microsoft 365 and Outlook 2024/2021, Outlook on the web, Outlook.com, Outlook for Mac, and Outlook mobile.
Pick the group type before following the procedures:
The contact group is stored in the selected Contacts folder. Changes to your personal contact group do not update similar groups stored by other users.
Outlook.com may also display Microsoft 365 Group creation for eligible personal accounts. Personal-account groups do not provide all the work-or-school collaboration resources associated with organizational Microsoft 365 Groups.
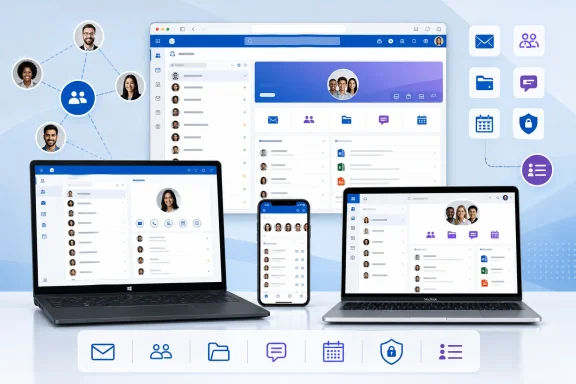 Choose the correct type of group
Pick the group type before following the procedures:- Contact list: A personal collection of email addresses. Use it when you repeatedly email the same people. Other users do not automatically receive or share your list.
- Contact group: The classic Outlook name for a personal contact list.
- Microsoft 365 Group: A collaborative group with an email address, owners, members, privacy controls, conversations, shared files, and a group calendar. Creation generally requires a qualifying work or school Microsoft 365 account.
- Distribution list: An organization-managed email address that distributes messages to multiple recipients. A Microsoft 365 or Exchange administrator normally creates it.
- Contacts folder: A folder that organizes individual contacts. It is not a mailing list and cannot be addressed as one recipient.
Create a contact list in new Outlook for Windows
New Outlook uses the term contact list.Create an empty list
- Open Outlook.
- Select People in the left app bar. If it is hidden, select More apps, and then select People.
- Select the arrow beside New contact.
- Select New contact list.
- Enter a recognizable list name, such as
Project Volunteers. - Add each member by entering a name or email address.
- Select Create.
Create a list from existing contacts
- Open People.
- Select the contacts you want to include. Each selected contact must have an email address.
- Select Add to list on the toolbar.
- Select New contact list.
- Enter the list name.
- Complete the creation prompt.
Create a contact list in Outlook.com
These instructions apply to personal Microsoft accounts using Outlook.com. They also generally match the current People experience in new Outlook.- Open Outlook.com and sign in.
- Select People from the app bar.
- If necessary, select the contacts folder where the list should be stored.
- Select the arrow beside New contact.
- Select New contact list.
- Enter a name for the list.
- Enter the names or email addresses of its members.
- Select Create.
Create a contact list in Outlook on the web
Organizations using an older Outlook on the web interface may have slightly different labels from new Outlook.- Sign in to your organization’s Outlook on the web mailbox.
- Select People at the bottom of the navigation pane.
- Under Your contacts, select the folder where the list should be saved.
- Select New.
- Select Contact list.
- Enter the list name and member details.
- Select Save.
Create a contact group in classic Outlook for Windows
Classic Outlook uses the name contact group. These steps apply to supported desktop releases including Outlook for Microsoft 365, Outlook 2024, and Outlook 2021.- Open classic Outlook.
- Select People on the Navigation bar.
- Select Home > New Contact Group.
- Enter a name in the Name box.
- Select Contact Group > Add Members.
- Choose one of the following:
- From Outlook Contacts
- From Address Book
- New E-mail Contact
- Select the people to include. Hold Ctrl while selecting multiple entries where supported.
- Select OK after adding members.
- Select Save & Close.
The contact group is stored in the selected Contacts folder. Changes to your personal contact group do not update similar groups stored by other users.
Create a contact list in Outlook for Mac
These steps apply to supported Outlook for Microsoft 365 for Mac and perpetual Outlook for Mac releases.- Open Outlook and select People on the side navigation bar.
- Select the Contacts folder under the account where the list should be stored.
- Point to New Contact.
- Select New Contact List.
- Enter a name for the list.
- Under Add members, enter an email address.
- Select Add.
- Repeat the process for the remaining members.
- Select Save.
Send a message to a contact list or contact group
After creating the list, verify it by addressing a new message.- Return to Mail.
- Select New mail or New Email.
- Enter the contact-list or contact-group name in the To, Cc, or Bcc field.
- Select the suggested list when it appears.
- In classic Outlook, select the plus sign beside the resolved group name if you need to expand and inspect its members.
- Complete and send the message.
Edit or delete a personal contact list
New Outlook and Outlook.com
- Select People.
- Select Your contact lists, or search for the list by name.
- Open the list.
- Select Edit.
- Add addresses or select the X beside a member to remove that person.
- Select Save.
Classic Outlook
- Select People.
- Double-click the contact group.
- To add someone, select Add Members and choose the source.
- To remove someone, select the member in the group window and choose Remove Member.
- Select Save & Close.
Create a Microsoft 365 Group in new Outlook
A Microsoft 365 Group is available only when the account and organization support it. Use this option for collaboration rather than merely saving a recipient list.- Open new Outlook with your work or school account.
- Select Groups in the left app bar. You may instead see Go to Groups in the mailbox folder list.
- Select New Group on the ribbon.
- Select New Group from the menu.
- Enter the group Name.
- Enter a Description explaining its purpose.
- Set Privacy:
- Public: People in the organization can view the content and join.
- Private: Only approved members can view the content, and joining requires owner approval.
- Select Create.
- Enter the names or email addresses of the initial members.
- Select Add, or select Not now to add members later.
Create a Microsoft 365 Group in classic Outlook
- Open classic Outlook with the eligible work or school account.
- Select Groups in the app bar, or select Home > New Group.
- Enter a Group name. Outlook proposes an email address and reports if the name is unavailable.
- Enter an optional Description.
- Select a Classification if your organization provides that setting.
- Choose Public or Private.
- If appropriate, enable Send all group conversations and events to members’ inboxes.
- Select Create.
- Enter the initial members.
- Select Add, or select Not now.
Create a Microsoft 365 Group in Outlook on the web
- Sign in with your work or school account.
- Select Groups in the app bar.
- Select New Group on the ribbon.
- Select New Group.
- Enter the group Name, Email address, and Description.
- Choose the required Privacy setting.
- Select Create.
- Add member names or email addresses.
- Select Add, or select Not now.
Outlook.com may also display Microsoft 365 Group creation for eligible personal accounts. Personal-account groups do not provide all the work-or-school collaboration resources associated with organizational Microsoft 365 Groups.
Create a Microsoft 365 Group in Outlook mobile
Microsoft documents mobile group creation for qualifying work or school accounts in Outlook for Android and Outlook for iOS. This procedure creates a Microsoft 365 Group, not a personal contact list.- Open the Outlook mobile app.
- Tap Home.
- Select the Microsoft 365 account that should own the group.
- Tap Home again.
- Tap Groups.
- Tap Add New Group.
- Enter the group name.
- Review the automatically generated email address and change it if necessary.
- Tap Next.
- Turn Follow in inbox on if members should receive copies of group messages and events in their individual inboxes.
- Select Public or Private.
- Tap Next.
- Enter member email addresses, or skip member selection.
- Tap Create.
Create an organization distribution list as an administrator
A distribution list is appropriate when an organization needs one managed address that forwards email to multiple recipients. You need suitable Microsoft 365 administrative permissions.- Sign in to the Microsoft 365 admin center.
- Select Show all if the full navigation is hidden.
- Expand Teams and groups.
- Select Active teams and groups.
- Open the Distribution list tab.
- Select Add a distribution list.
- On Set up the basics, enter a name and description, then select Next.
- On Assign owners, select Assign owners, choose the owners, and select Add.
- Select Next.
- On Add members, select Add members, choose the recipients, and select Add.
- Select Next.
- Enter the distribution-list email address.
- Decide whether to enable Allow people outside of my organization to send email to this Distribution group.
- Select Next.
- Review the configuration and select Create group.
Fix missing group or contact-list options
If the expected button is unavailable, match the symptom to the appropriate check:- No People button: Select More apps, or expand the navigation pane.
- No New Contact Group in Windows: Confirm that you are using classic Outlook. New Outlook calls the feature New contact list.
- No Groups or New Group: Confirm that Outlook is signed in to the intended work or school Microsoft 365 account.
- Personal account selected: Switch to the organization account before opening Groups.
- New Group missing for a work account: The subscription may not qualify, Microsoft 365 Groups may not be enabled, or administrators may have restricted group creation. Contact the organization’s Microsoft 365 administrator.
- Mobile has no Add New Group: Group creation is unavailable for that account or has been disabled by IT.
- Contact is rejected from a list: Add or correct the contact’s email address. Contact lists can contain only entries with an email address.
- Mac list does not synchronize: Verify that it was created under a Microsoft 365 or Outlook.com Contacts folder. Lists under On My Computer remain local.
- List name does not resolve in a message: Open People, confirm that the list exists in the current mailbox, and type the full name again. Lists in another Outlook profile or account are not automatically available.
References
- Primary source: Technobezz
Published: 2026-07-13T17:00:50.952000+00:00
How to Create a Group in Outlook | Technobezz
How to create a group in Outlook for email lists, Microsoft 365 Groups, Outlook.com, Mac, mobile, and work accounts.www.technobezz.com - Official source: support.microsoft.com
Create, view, and edit contacts and contact lists in Outlook | Microsoft Support
Learn how to manage your contacts or contact lists in Outlook on the web.support.microsoft.com
