

Windows 11 can fail to use a wired headphone jack when another output is selected, an app is routed elsewhere, the audio driver is damaged, or the jack/headset itself is not making a proper connection. This guide covers 3.5 mm wired headphones and headsets on Windows 11 laptops and desktops, including combo headphone/microphone jacks. Start with output selection and physical checks before changing drivers or Windows recovery settings.
A plugged-in headset does not always become Windows’ active playback device—especially if you also use HDMI, a monitor, USB audio, Bluetooth, or a docking station.
If the device is listed but unavailable:
If your PC has separate audio-out and microphone ports but your headset has one combined plug, use a headset splitter designed for that connector arrangement. If your PC has one combo jack but your headset has two separate plugs, use the appropriate combiner adapter.
A connector mismatch can allow partial operation—such as sound without microphone input—or prevent reliable detection.
For example, in a meeting app, select the wired headset as both the speaker and microphone device if you are using a headset with a microphone. Use the app’s built-in speaker test where available.
Warning: Save your work before continuing. Audio will stop temporarily, and you may need an internet connection or an OEM driver package afterward if Windows does not reinstall the preferred driver automatically.
If multiple known-good wired headphones are not detected after these steps, especially if the jack feels loose or works only when the plug is held at an angle, the likely cause is hardware. Arrange service through the PC manufacturer, a qualified repair provider, or your organization’s IT department.
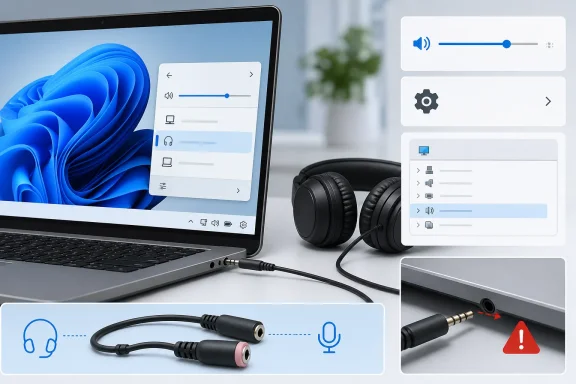 Confirm Windows is sending sound to the headphone output
A plugged-in headset does not always become Windows’ active playback device—especially if you also use HDMI, a monitor, USB audio, Bluetooth, or a docking station.- Plug the headphones fully into the audio jack.
- Select the Speakers icon in the right side of the taskbar.
- Select the arrow to the right of the volume slider. Its tooltip is Select a sound output.
- Choose the headphones, headset, or speaker device that represents the wired jack.
- Raise the volume slider and make sure it is not muted.
- Play a known sound, such as a browser video or the Windows test sound.
Set the wired device as the default output
Use the full Sound settings page if Quick Settings does not retain the correct device.- Open Start > Settings > System > Sound.
- Under Output, select the device you want to use.
- Confirm the volume is raised and the device is not muted.
- Under Advanced, select More sound settings.
- Open the Playback tab.
- Right-click the headphones or the applicable audio device.
- Select Set as Default Device.
- Select OK.
If the device is listed but unavailable:
- In More sound settings > Playback, right-click the device and select Properties.
- On the General tab, find Device usage.
- Set it to Use this device (enable).
- Select OK, then test audio.
Check the headset, plug, and physical jack
Do this before reinstalling drivers. A loose plug, damaged cable, lint in the jack, or mismatched connector can make Windows behave as though no headset is connected.- Push the plug in firmly. Many laptop jacks require a final, distinct click.
- Check that you are using the correct port. Desktop PCs may have separate green audio-out and pink microphone ports.
- Turn up any inline headset volume control.
- Turn off any physical or inline mute switch.
- Test the headphones on another device, such as a phone, tablet, or another computer.
- Test a known-working pair of wired headphones on the Windows PC.
- Turn off the computer.
- Disconnect the headphones and external accessories.
- Inspect the plug and port for visible lint, debris, bending, cracking, or looseness.
- If loose debris is visible, use brief bursts of compressed air from a safe distance.
- Reconnect the headphones, start Windows, and test again.
Check connector compatibility
A headset with both headphones and a microphone normally uses a four-pole 3.5 mm connector, often called TRRS. Older desktops may instead have two separate ports: one for headphones and one for microphone input.If your PC has separate audio-out and microphone ports but your headset has one combined plug, use a headset splitter designed for that connector arrangement. If your PC has one combo jack but your headset has two separate plugs, use the appropriate combiner adapter.
A connector mismatch can allow partial operation—such as sound without microphone input—or prevent reliable detection.
Restart Windows and run the audio troubleshooter
Restarting clears temporary device-detection and audio-service problems.- Save open work.
- Select Start > Power > Restart.
- After Windows restarts, reconnect the headphones and test them.
- Open Start > Settings > System > Sound.
- Look for a Get Help option related to audio troubleshooting and run it if shown.
- Follow the prompts and apply any recommended fix.
- If you need the manual path, open Start > Settings > System > Troubleshoot > Other troubleshooters.
- Find Audio and select Run.
- Complete the troubleshooter, then test the headphones again.
Fix app-specific volume and output routing
If Windows sounds work through the headphones but a browser, game, Teams meeting, or media app is silent, the physical jack is working. The problem is likely the app’s volume or output assignment.- Open Start > Settings > System > Sound > Volume mixer.
- Under Apps, locate the affected program.
- Raise its volume slider.
- Confirm the app is not muted.
- Set the app’s Output device to the headphones or the same device selected under Windows output.
- Close and reopen the app, then test sound.
For example, in a meeting app, select the wired headset as both the speaker and microphone device if you are using a headset with a microphone. Use the app’s built-in speaker test where available.
Turn off audio enhancements and test another format
Audio enhancements can cause silent, distorted, or unreliable analog-jack output on some systems.- Open Start > Settings > System > Sound.
- Under Output, select the device currently used for the wired jack.
- Find Audio enhancements.
- Turn enhancements Off.
- Test the headphones.
- Return to Start > Settings > System > Sound.
- Select the wired output device.
- Open Advanced.
- Under Default format, select a different available format.
- Test the audio after each change.
Update Windows and repair the audio driver
Driver repair is appropriate when the headphones are known-good, the plug and jack are sound, and Windows does not detect or use the output correctly.- Open Start > Settings > Windows Update.
- Select Check for updates.
- Install available updates.
- Open Advanced options > Optional updates.
- Review Driver updates for an audio-related update from your PC maker or audio hardware provider.
- Install only updates applicable to your device.
- Restart the PC.
- Open Start, type Device Manager, and select it.
- Expand Sound, video and game controllers.
- Right-click the listed audio device.
- Select Update driver.
- Select Search automatically for drivers.
- Complete the process and restart if prompted.
Reinstall or roll back the audio driver
Reinstalling removes a damaged driver installation and lets Windows install it again after restart.Warning: Save your work before continuing. Audio will stop temporarily, and you may need an internet connection or an OEM driver package afterward if Windows does not reinstall the preferred driver automatically.
- Open Device Manager.
- Expand Sound, video and game controllers.
- Right-click the audio device and select Uninstall device.
- If Windows offers an option to remove the driver for the device, use it only if you have already downloaded the correct OEM replacement driver or can recover it through Windows Update.
- Select Uninstall.
- Restart the PC.
- Test the headphone jack after Windows loads.
- Open Device Manager.
- Expand Sound, video and game controllers.
- Right-click the audio device and select Properties.
- Open the Driver tab.
- Select Roll Back Driver if it is available.
- Choose the applicable reason and confirm.
- Restart Windows and test the headphones.
Restore a missing audio device
If no headphones, speakers, or audio output device appears in Sound settings, Windows may not be detecting or loading the audio hardware.- Open Device Manager.
- Expand Sound, video and game controllers.
- If the audio device appears, right-click it and select Enable device if that option is available.
- If it does not appear, select View > Show hidden devices.
- Select Action > Scan for hardware changes.
- Restart the PC.
- Recheck Start > Settings > System > Sound.
Restart the Windows audio services
Use this only after output selection and driver checks. Restarting audio services can recover sound when the device is present but remains silent.- Open Start, type Services, and select the Services app.
- Right-click Windows Audio and select Restart.
- Right-click Windows Audio Endpoint Builder and select Restart.
- Right-click Remote Procedure Call (RPC) and select Restart if the option is available.
- Test the headphone jack again.
Use recovery only after the focused fixes fail
If the headphone jack worked before a recent driver, app, or system change, System Restore can reverse that change without removing personal files.- Open Start, type Create a restore point, and select it.
- Select System Restore.
- Choose a restore point dated before the headphone problem began.
- Review affected programs and drivers.
- Complete the restore and test the jack after Windows restarts.
- Open Start > Settings > System > Recovery.
- Under Fix problems using Windows Update, select Reinstall now.
- Keep the PC connected to power and the internet.
- Follow the prompts and restart if Windows does not restart automatically.
If multiple known-good wired headphones are not detected after these steps, especially if the jack feels loose or works only when the plug is held at an angle, the likely cause is hardware. Arrange service through the PC manufacturer, a qualified repair provider, or your organization’s IT department.
References
- Primary source: Technobezz
Published: 2026-07-19T16:36:07.436000+00:00
Headphone Jack Not Working in Windows 11? How to Fix It | Technobezz
Fix headphone jack not working in Windows 11 with output, volume, driver, app, and hardware checks.www.technobezz.com
