Schedule Microsoft Defender Antivirus Scans with Task Scheduler in Windows 10/11
Difficulty: Intermediate | Time Required: 15 minutesMicrosoft Defender Antivirus already provides real-time protection in Windows 10 and Windows 11, but scheduled scans add an extra layer of routine checking. If your PC is usually busy during the day, you can schedule scans for evenings, lunch breaks, or another time when performance impact is less noticeable.
This tutorial walks you through scheduling Microsoft Defender Antivirus scans using Task Scheduler, the built-in Windows tool for automating background jobs.
Prerequisites
Before you begin, make sure:Quick walkthrough
- You are using Windows 10 or Windows 11.
- You are signed in with an account that has administrator permissions.
- Microsoft Defender Antivirus is active.
- If you use a third-party antivirus, Microsoft Defender may be in passive or limited mode, so some options may not behave the same way.
Note: In Task Scheduler, the folder is still named Windows Defender on many systems, even though the product is now called Microsoft Defender Antivirus.
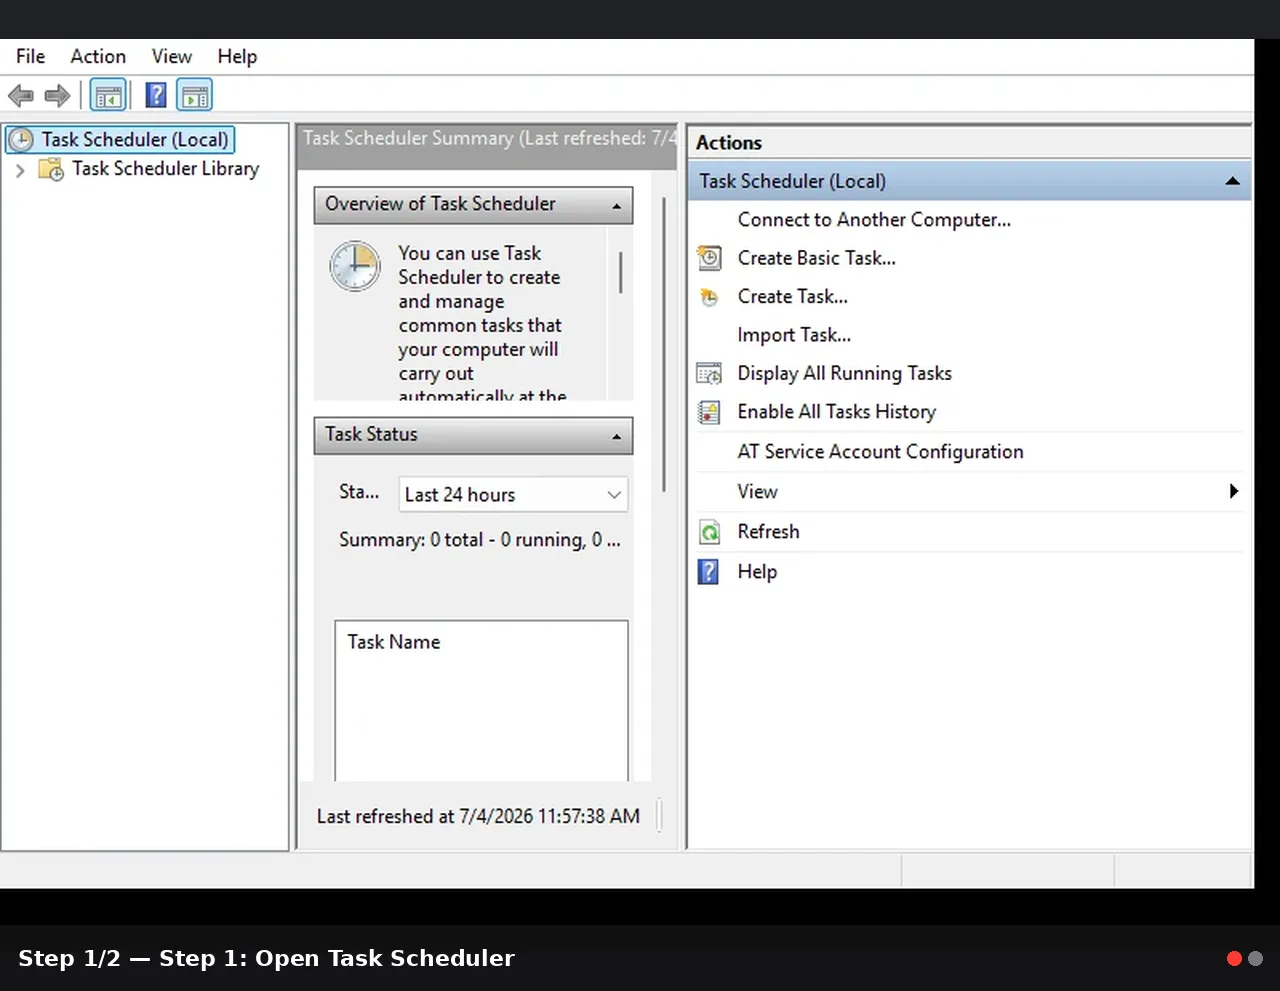
Step 1: Open Task Scheduler
- Click Start.
- Type Task Scheduler.
- Select Task Scheduler from the search results.
- If prompted by User Account Control, select Yes.
Step 2: Find the Microsoft Defender Scheduled Scan Task
- In the left pane, expand:
Task Scheduler Library - Expand:
Microsoft - Expand:
Windows - Scroll down and select:
Windows Defender - In the middle pane, look for:
Windows Defender Scheduled Scan - Double-click Windows Defender Scheduled Scan.
Tip: If you do not see the Windows Defender folder, confirm that Microsoft Defender Antivirus is available on your system and that you are viewing the full Task Scheduler Library.
Step 3: Add a New Scan Trigger
The trigger controls when the scan runs.- In the Windows Defender Scheduled Scan Properties window, select the Triggers tab.
- Click New.
- For Begin the task, choose:
On a schedule - Choose how often you want the scan to run:
- Daily: Good for heavily used PCs.
- Weekly: Good for most home users.
- Monthly: Better for secondary or rarely used systems, though weekly is usually preferred.
- Set the Start date and time.
Every Sunday at 2:00 AMor:
Every Wednesday at 12:30 PM- Make sure Enabled is checked.
- Click OK.
Recommendation: For most users, a weekly scheduled scan outside normal working hours is a good balance between protection and convenience.
Step 4: Adjust Conditions
Conditions control whether the task should wait for idle time, power status, or other system states.- Select the Conditions tab.
- Consider enabling:
Start the task only if the computer is idle for - If you are using a desktop PC, you may also enable:
Wake the computer to run this task - On laptops, review the power options carefully. You may want to leave enabled:
Start the task only if the computer is on AC power
Warning: Full system scans can take a while and may use more CPU, disk, and battery. If you are scheduling scans on a laptop, pick a time when the device is plugged in.
Step 5: Review Task Settings
- Select the Settings tab.
- Recommended options include:
- Allow task to be run on demand
- Run task as soon as possible after a scheduled start is missed
- Stop the task if it runs longer than a reasonable limit, such as several hours
- Avoid changing the Actions tab unless you know exactly what you are doing.
- Click OK to save your changes.
Step 6: Run the Task Manually for Testing
To make sure the task works:- In Task Scheduler, select the Windows Defender folder again.
- Click Windows Defender Scheduled Scan once.
- In the right pane, select Run.
To check its status:
- Look at the Status, Last Run Time, and Last Run Result columns.
- A successful task often reports a result such as:
0x0 - You can also open Windows Security and check the Microsoft Defender scan information.
Step 7: Confirm Defender Status in Windows Security
It is a good idea to verify that Microsoft Defender is working normally.
- Open Start.
- Type Windows Security.
- Open Windows Security.
- Select Virus & threat protection.
- Check for any warnings or required actions.
- Under scan options, you can also manually run a Quick scan, Full scan, or other scan type when needed.
Note: A quick scan is usually enough for routine scheduled scanning because real-time protection continues monitoring files as they are opened, closed, downloaded, or accessed.
Tips and Troubleshooting
The task did not run
Check the following:- Was the PC turned off at the scheduled time?
- Was the laptop running on battery?
- Was the task disabled?
- Did the task require idle time that never occurred?
- Is another antivirus product controlling protection?
The scan affects performance
If your PC slows down during scans:- Schedule scans for a less active time.
- Use a weekly schedule instead of daily.
- Avoid scheduling a scan during backups, gaming, video editing, or large downloads.
- Prefer quick scans for routine protection.
The scan stops on a laptop
If the scan stops while unplugged, connect the laptop to AC power and choose a schedule when it is likely to remain plugged in.You want a full scan
You can still run a full scan manually from Windows Security > Virus & threat protection > Scan options. For most routine schedules, quick scans are generally the better choice because they complete faster and work alongside real-time protection.Conclusion
Scheduling Microsoft Defender Antivirus scans with Task Scheduler is a simple way to keep security checks running on your terms. Instead of waiting for scans to happen at inconvenient times, you can choose a predictable schedule that fits how you use your PC.Once configured, the scheduled scan runs quietly in the background, helping maintain regular malware checks without needing much attention from you.
Key Takeaways:
- Task Scheduler lets you choose when Microsoft Defender Antivirus scans run.
- Weekly quick scans are a practical choice for most Windows 10/11 users.
- Laptops should usually scan while connected to AC power.
- The built-in scheduled scan task should usually be adjusted, not rebuilt.
- Windows Security is the best place to confirm Defender status and run manual scans.
This tutorial was generated to help WindowsForum.com users get the most out of their Windows experience.
Verification references, separate from the article body: Microsoft Support documents scheduling Microsoft Defender Antivirus scans through Task Scheduler, including the Windows Defender task folder and trigger setup. Microsoft Learn documents Windows Security scan options, scheduled scan behavior, and the recommendation that quick scans are generally suitable for routine scheduled scans. (support.microsoft.com)
References
- Official source: support.microsoft.com
Schedule a scan in Microsoft Defender Antivirus - Microsoft Support
Learn how to schedule a Windows Defender Antivirus scan at a time and frequency that you choose.support.microsoft.com - Official source: learn.microsoft.com
Microsoft Defender Antivirus in the Windows Security app - Microsoft Defender for Endpoint | Microsoft Learn
With Microsoft Defender Antivirus now included in the Windows Security app, you can review, compare, and perform common tasks.learn.microsoft.com
Last edited: