Back Up and Restore Task Scheduler Tasks Before Reinstalling Windows 10/11
Difficulty: Intermediate | Time Required: 15 minutesReinstalling Windows 10 or Windows 11 can give you a clean, faster, more stable system—but it can also wipe out custom automation you may have forgotten about. If you use Task Scheduler to run backup scripts, cleanup jobs, app launchers, PowerShell scripts, maintenance tools, or reminder tasks, you should export those tasks before reinstalling Windows.
Task Scheduler stores tasks as XML definitions. Exporting them gives you portable
.xml files that can be imported again after Windows is reinstalled. This tutorial shows both the graphical method for individual tasks and a PowerShell method for backing up multiple tasks at once.Prerequisites
Before you begin, make sure you have:Quick walkthrough
- Administrator access on the Windows PC.
- Windows 10 or Windows 11 installed.
- A safe backup location, such as:
- External USB drive
- Network share
- OneDrive folder
- Secondary internal drive that will not be wiped
- Any scripts, programs, or batch files used by your scheduled tasks.
Important: Exporting a scheduled task backs up the task definition, not the actual program or script it runs. If a task runsC:\Scripts\Backup.ps1, you must also back up that script.
Part 1: Review Your Existing Scheduled Tasks
Before exporting anything, take a quick look at what you actually need.- Press Windows + R.
- Type:
taskschd.msc - Press Enter.
- In the left pane, expand Task Scheduler Library.
- Review your custom folders and tasks.
Task Scheduler Library\Microsoft\WindowsIn most reinstall scenarios, you usually do not need to back up Microsoft’s built-in Windows tasks because Windows recreates them automatically.
Tip: Focus on tasks you created yourself or tasks installed by third-party software that you know you still need.
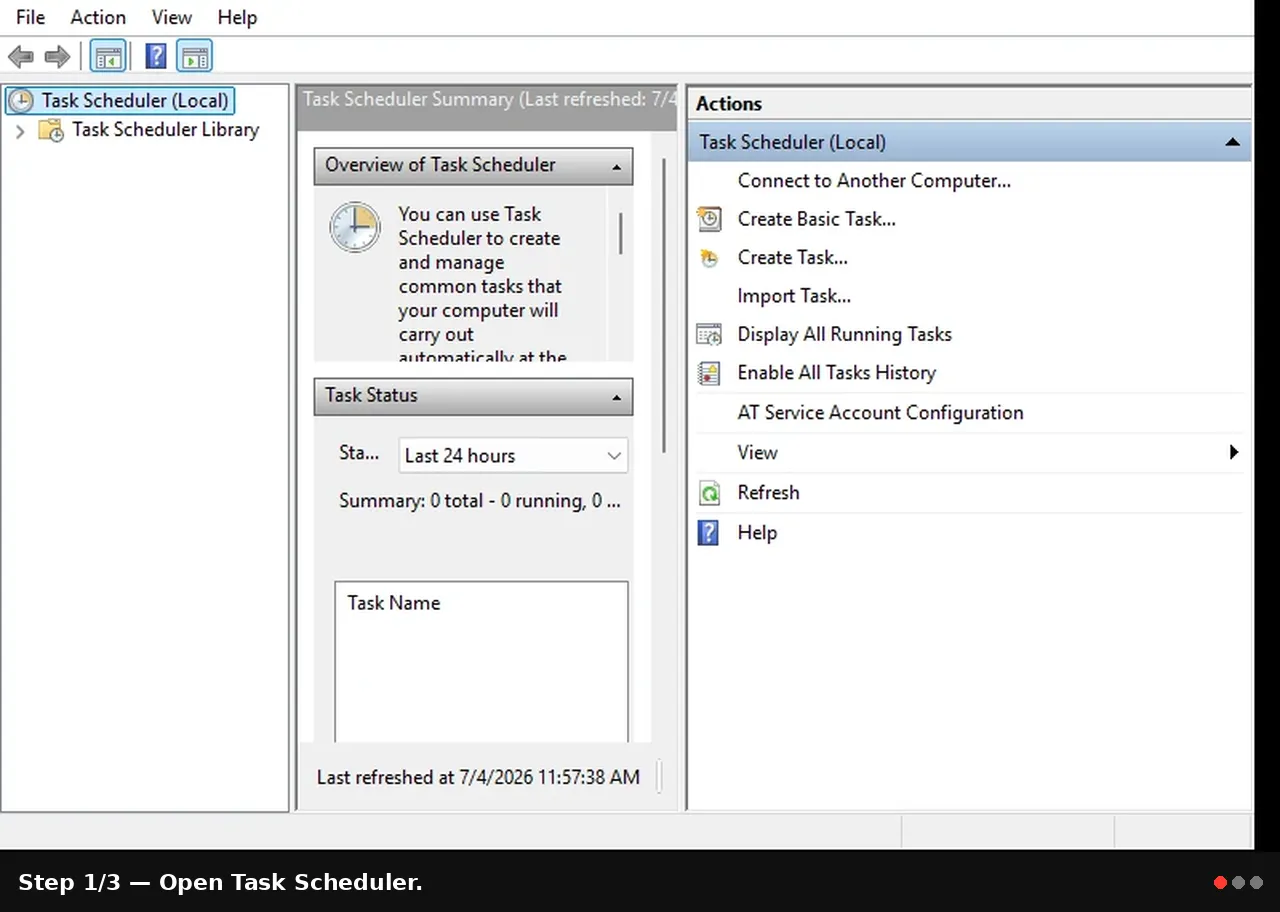
Part 2: Export a Single Task Using Task Scheduler
Use this method if you only have a few tasks to save.- Open Task Scheduler.
- In the left pane, browse to the folder containing your task.
- Click the task once to select it.
- In the right-side Actions pane, click Export.
- Choose your backup location.
- Save the file with a clear name, for example:
WeeklyBackup.xml - Repeat this process for each custom task you want to keep.
Note: The exported XML file contains the task’s triggers, actions, conditions, and settings. It may also reference usernames, paths, scripts, and programs that must exist again after the reinstall.
Part 3: Back Up Multiple Tasks with PowerShell
If you have several tasks, PowerShell is faster and more reliable than exporting each one manually.- Right-click Start.
- Select Windows Terminal (Admin) or PowerShell (Admin).
- If prompted by User Account Control, click Yes.
- Copy and paste the following script:
Code:$BackupRoot = "$env:USERPROFILE\Desktop\ScheduledTaskBackup" New-Item -ItemType Directory -Path $BackupRoot -Force | Out-Null $tasks = Get-ScheduledTask | Where-Object { $_.TaskPath -notlike "\Microsoft\*" } $manifest = foreach ($task in $tasks) { $relativePath = $task.TaskPath.Trim("\") $safeName = ($task.TaskName -replace '[\\/:*?"<>|]', "_") if ([string]::IsNullOrWhiteSpace($relativePath)) { $folder = $BackupRoot $relativeFile = "$safeName.xml" } else { $folder = Join-Path $BackupRoot $relativePath $relativeFile = Join-Path $relativePath "$safeName.xml" } New-Item -ItemType Directory -Path $folder -Force | Out-Null $xmlPath = Join-Path $BackupRoot $relativeFile Export-ScheduledTask -TaskName $task.TaskName -TaskPath $task.TaskPath | Out-File -FilePath $xmlPath -Encoding UTF8 [PSCustomObject]@{ TaskName = $task.TaskName TaskPath = $task.TaskPath RelativeFile = $relativeFile } } $manifest | Export-Csv -Path (Join-Path $BackupRoot "TaskManifest.csv") -NoTypeInformation -Encoding UTF8 Write-Host "Scheduled task backup complete: $BackupRoot" - Press Enter.
- When the script finishes, open your Desktop.
- Look for a folder named:
ScheduledTaskBackup - Copy that entire folder to your external drive, cloud storage, or other safe location.
TaskManifest.csv file that helps restore the tasks later.Warning: Do not rely on your Desktop as the final backup location if you are reinstalling Windows. Copy the backup folder somewhere that will survive the reinstall.
Part 4: Back Up Files Used by Your Tasks
Scheduled tasks often launch files outside Task Scheduler. Before reinstalling Windows, check each task’s Actions tab.- Open Task Scheduler.
- Select a custom task.
- Click the Actions tab in the lower pane.
- Note the path listed under Program/script.
- Also check Add arguments and Start in.
- Back up any referenced:
- PowerShell scripts
- Batch files
- EXE tools
- Configuration files
- Log folders
- Mapped drive dependencies
powershell.exe -File C:\Scripts\NightlyBackup.ps1you should back up:
C:\Scripts\NightlyBackup.ps1After reinstalling Windows, restore the script to the same path or update the task to use the new path.
Part 5: Restore Tasks Using Task Scheduler
After reinstalling Windows 10 or Windows 11, you can restore tasks one at a time.- Copy your exported
.xmlfiles back to the PC. - Open Task Scheduler.
- Click Task Scheduler Library.
- If needed, create the same folder structure you used before.
- In the right-side Actions pane, click Import Task.
- Select the exported
.xmlfile. - Review the task settings.
- Confirm the General, Triggers, Actions, Conditions, and Settings tabs.
- Click OK.
- If prompted, enter the password for the account that will run the task.
Important: Tasks configured to run whether the user is logged on or not usually require you to re-enter the account password after import.
Part 6: Restore Multiple Tasks with PowerShell
If you used the PowerShell backup method above, you can restore the tasks with another script.- Copy the
ScheduledTaskBackupfolder back to your Desktop. - Open Windows Terminal (Admin) or PowerShell (Admin).
- Run this command:
Code:$BackupRoot = "$env:USERPROFILE\Desktop\ScheduledTaskBackup" $manifestPath = Join-Path $BackupRoot "TaskManifest.csv" $manifest = Import-Csv $manifestPath foreach ($item in $manifest) { $xmlPath = Join-Path $BackupRoot $item.RelativeFile if (Test-Path $xmlPath) { $xml = Get-Content $xmlPath -Raw Register-ScheduledTask ` -TaskName $item.TaskName ` -TaskPath $item.TaskPath ` -Xml $xml ` -Force Write-Host "Restored: $($item.TaskPath)$($item.TaskName)" } else { Write-Warning "Missing XML file: $xmlPath" } } - Open Task Scheduler and confirm the restored tasks appear.
- Test important tasks manually by right-clicking them and selecting Run.
Note: If a restored task references a user account that no longer exists, the import may fail. In that case, import the task manually and choose the correct Windows account.
Tips and Troubleshooting
Task imports but does not run
Check the task’s Actions tab. Make sure the program, script, or file path still exists after reinstalling Windows.Task asks for a password
This is normal for tasks configured to run under a specific user account, especially when using Run whether user is logged on or not.Task fails with a permissions error
Run Task Scheduler as an administrator and confirm the selected user account has permission to access the script, folder, network share, or executable.Task uses a mapped network drive
Mapped drives may not exist when a scheduled task runs in the background. Use a UNC path instead, such as:\\ServerName\ShareNameBuilt-in Windows tasks are missing from your backup
That is expected if you used the PowerShell script above. It intentionally skips tasks under the Microsoft folder because Windows normally recreates those during installation.Conclusion
Backing up Task Scheduler tasks before reinstalling Windows 10 or Windows 11 is a small step that can save a lot of time later. By exporting your custom tasks to XML, preserving the scripts and files they depend on, and restoring them after setup, you can quickly rebuild your automation without recreating everything manually.Key Takeaways:
- Export custom scheduled tasks before reinstalling Windows.
- Back up the scripts, executables, and folders your tasks rely on.
- Use Task Scheduler for individual exports or PowerShell for bulk backup.
- Re-enter credentials after restoring tasks that run under specific accounts.
- Test restored tasks immediately after reinstalling Windows.
This tutorial was generated to help WindowsForum.com users get the most out of their Windows experience.
Last edited: